Skip to content


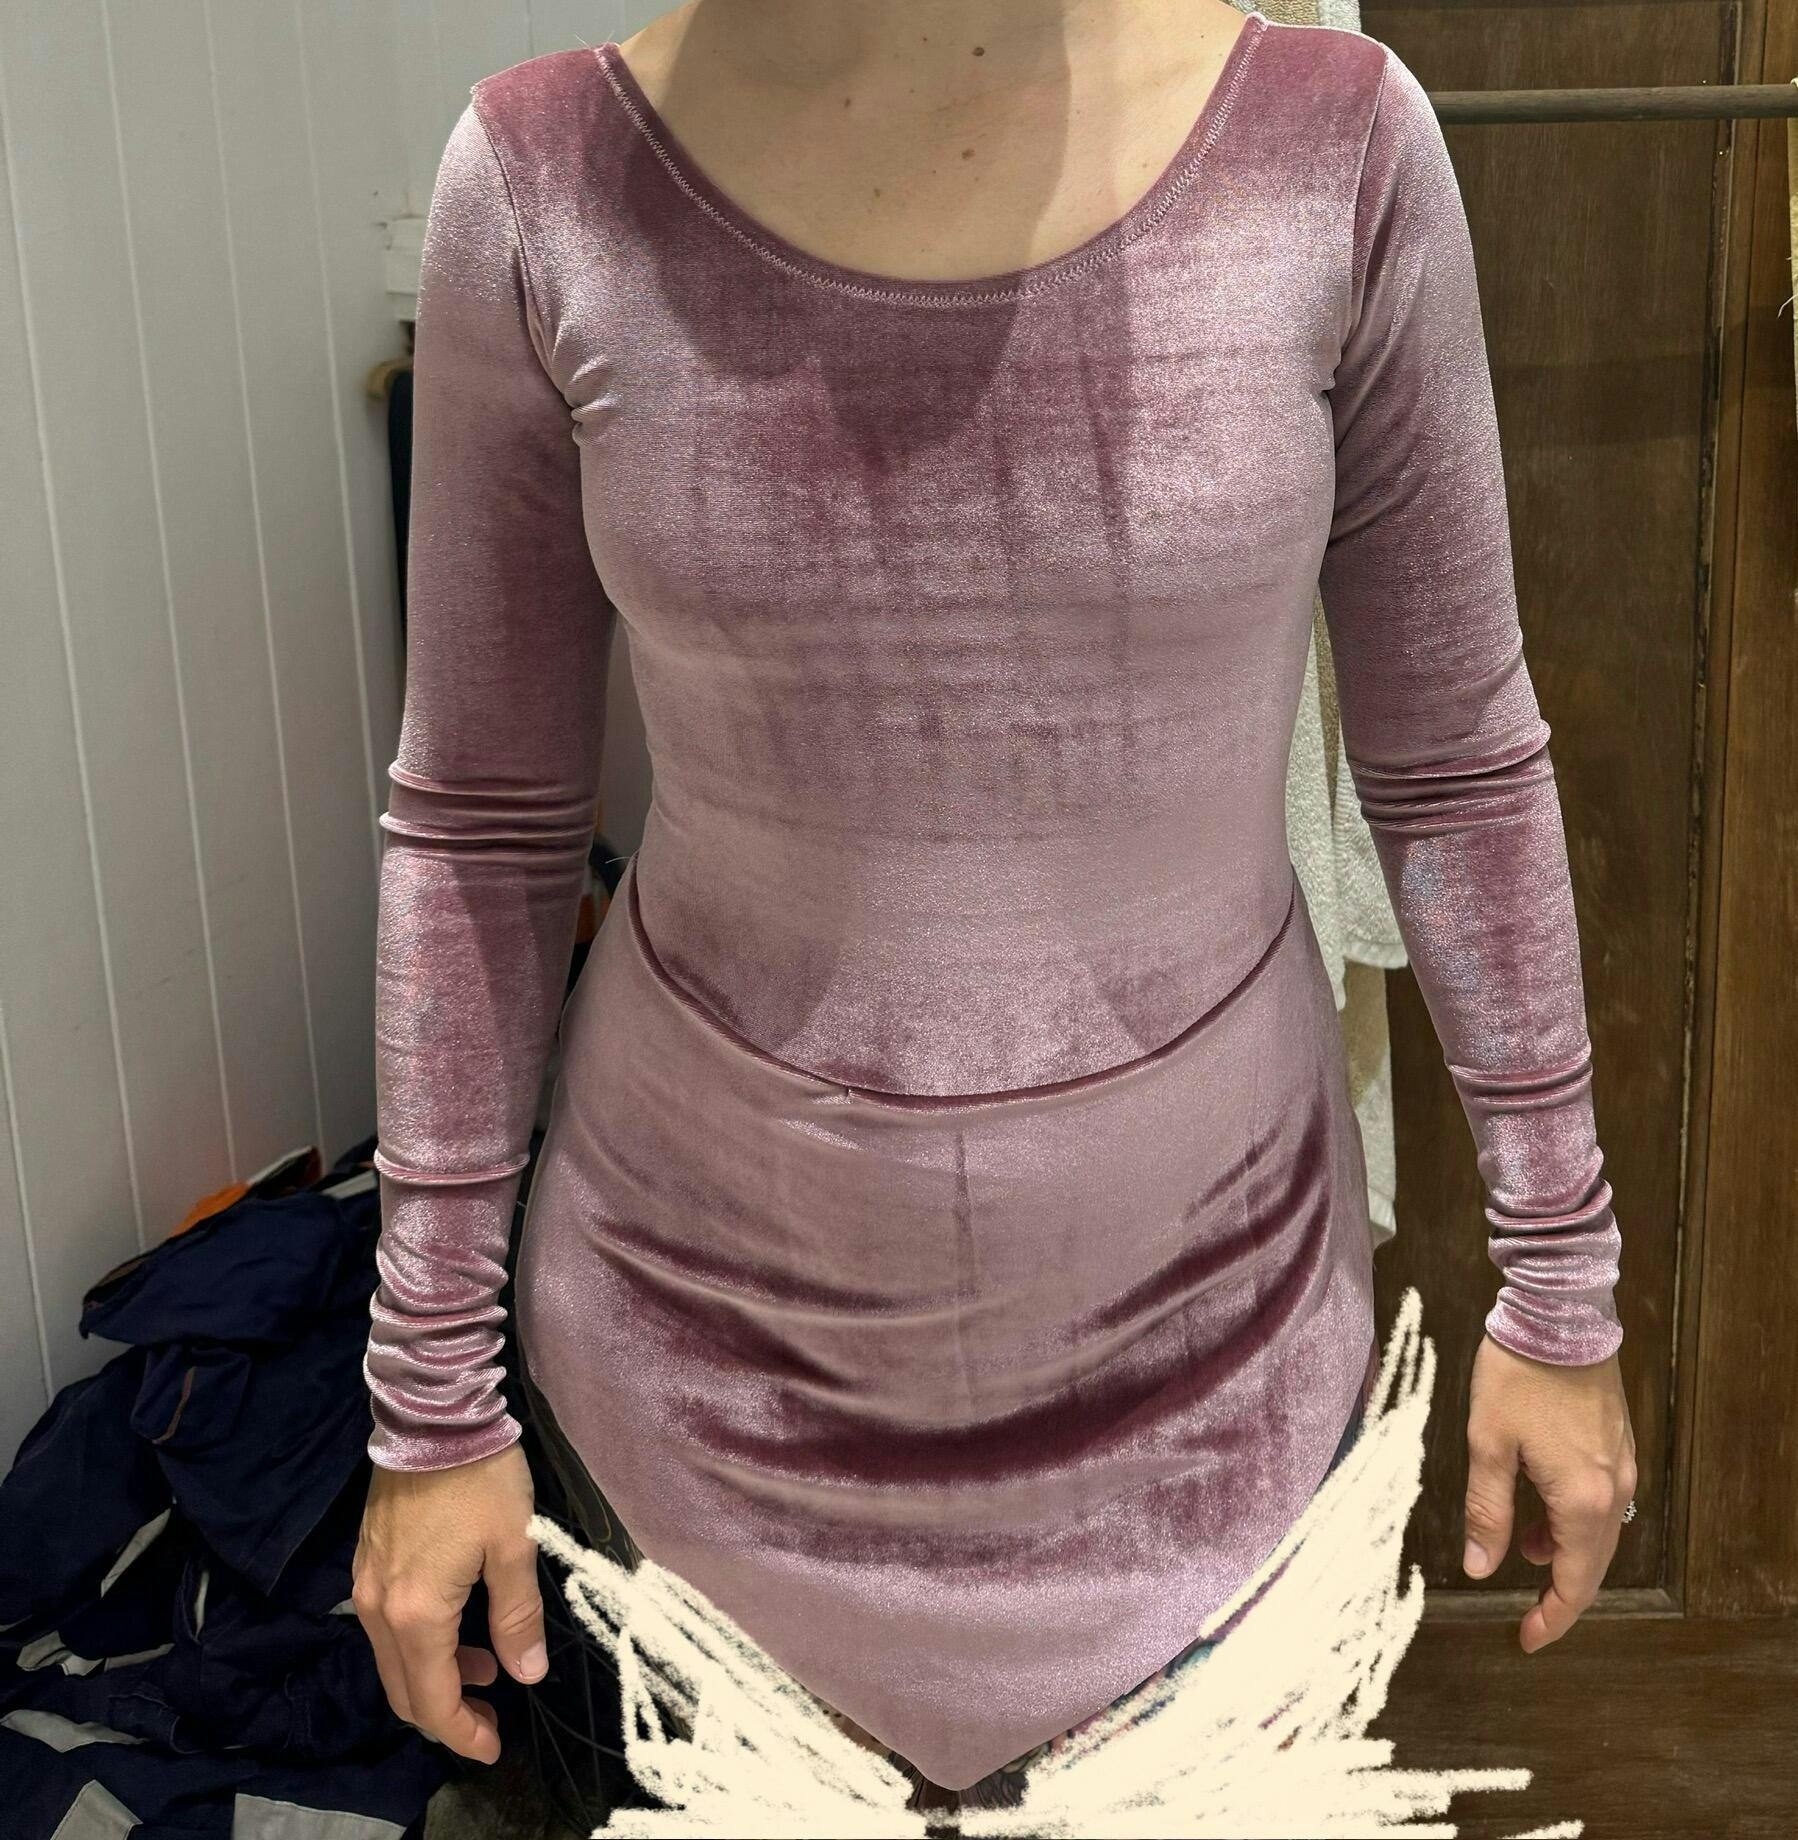
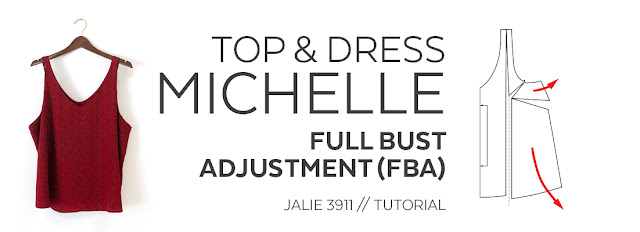
MICHELLE // Full Bust Adjustment (FBA) (on a Dartless Tank)
The MICHELLE tank/dress pattern is a minimalist design without dart, drafted for B cup. If you are larger than a B cup and want a perfect fit, a full bust adjust and a dart will help the garment fit better. This post will show your our favorite Full Bust Adjustment (FBA) technique.
 |
| You can find our Michelle pattern in PDF or paper format on our website |
TRACE YOUR BASE SIZE
Measure your full bust and find the size on the pattern. Go down by the number of sizes :- C Cup: Go one size down
- D Cup: Go two sizes down
- DD Cup: Go three sizes down
For example, if your full bust is 40'' (102 cm ) - which corresponds to a size Y - and you have a D cup, trace size W (two sizes down).

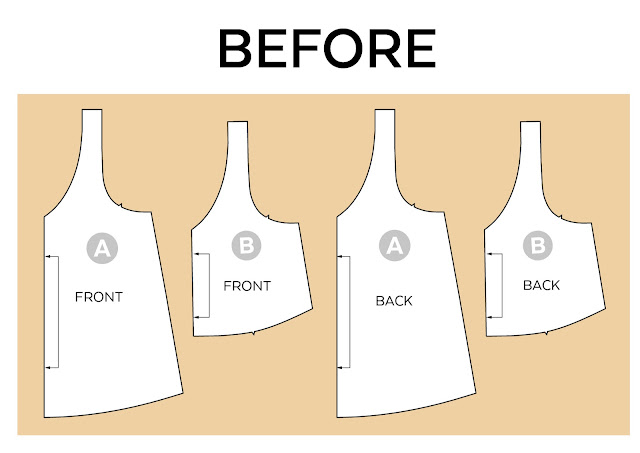
PREP THE PATTERN
Trace an extra copy of the main piece and facing (if you are making view B). Put those pieces aside, they will be the back and back facing. You do not need to alter them. The original design has an identical front and back. The FBA will change the proportions and there will be more fabric in the front than in the back.
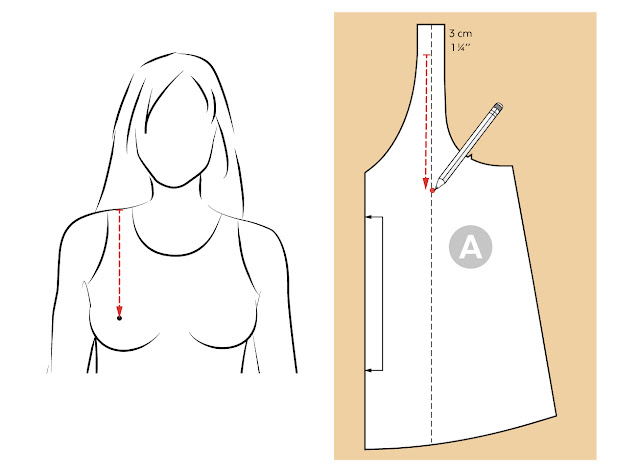
On your new front (A) piece, trace a line parallel to the center front, from the center of the strap to the hem (LINE 1).
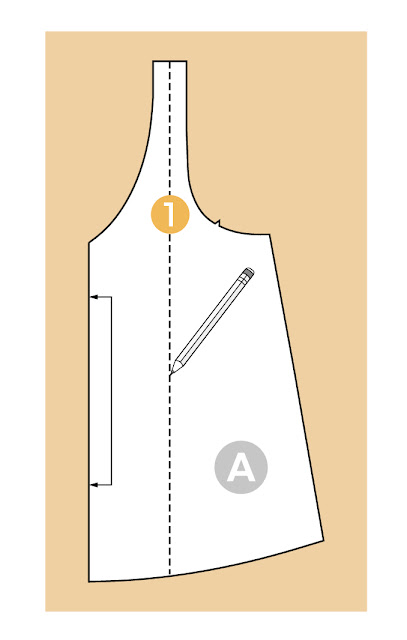
Measure from shoulder to apex (wearing the same bra you would wear with your MICHELLE). On LINE 1, transfer that measurement, STARTING 3 cm (1 1/4'') from the edge of the paper. For those who wonder why there is such a big seam allowance there... It is "insurance" fabric for those would would need to lengthen the strap for a better fit, we will tell you more on that in a future post.
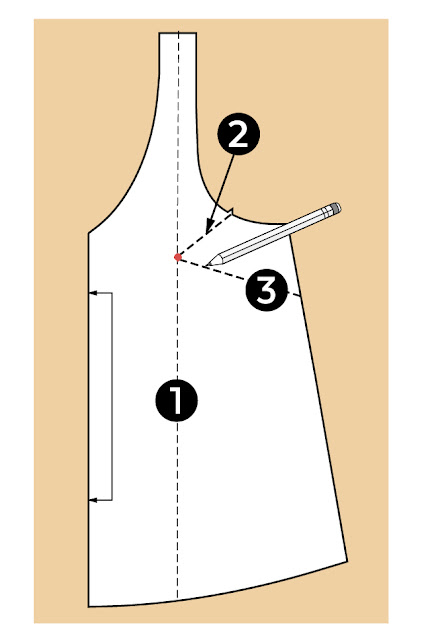
Draw a line (LINE 2) from the apex point to the armhole notch. Then draw another line (LINE 3) from apex to side seam (where you want your dart to be).
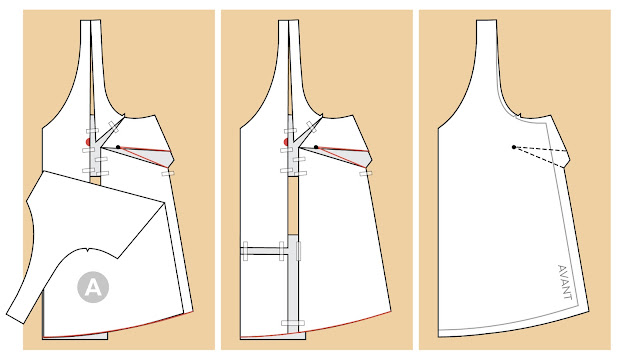
SPREAD AND CREATE THE DART
Cut the paper as shown, leaving some paper at the strap, at the notch and where lines 2 and 3 meet to create hinges. They will help you handle the paper more easily to create a Y-shaped FBA.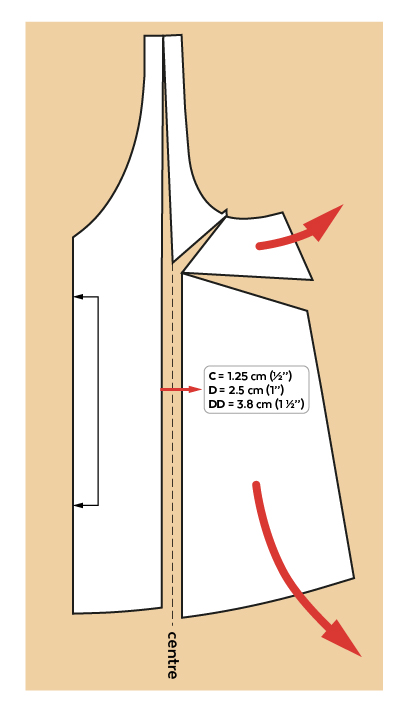
Spread the pattern apart at LINE 1, by the amount shown in the image above. The triangle of your "Y" should be approximately in the centre of the space you created.
Here is how much you need by cup size.
Here is how much you need by cup size.
- C cup: Open line 1 by 1.3 cm (1/2'')
- D cup: Open line 1 by 2.5 cm (1'')
- DD cup: Open line 1 by 3.8 cm (1 1/2'')
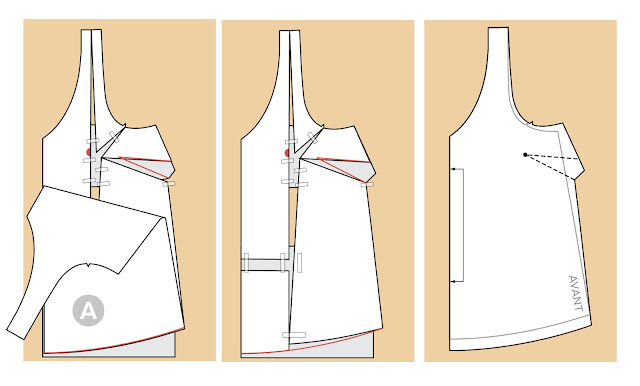
Now the hem. Position the corner section the way you prefer, whether you need more room over the abdomen, down to the hem, or not.

You new front now has extra room across the bust and a dart for shaping. Place some paper under the piece where there are openings and tape in place. The next step is to draw the dart.
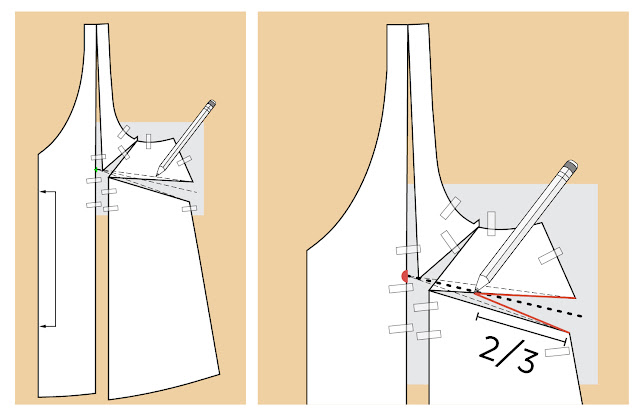
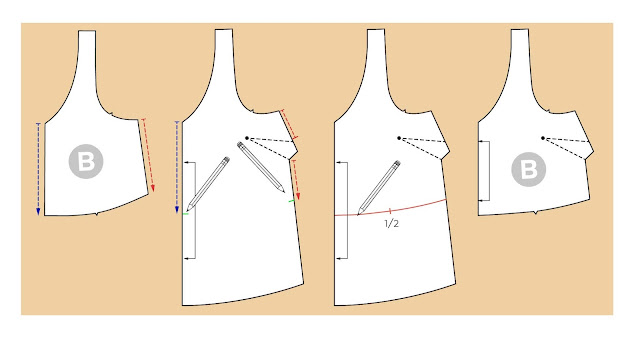
- Trace lines from the apex to the corners of the opening you created earlier.
- Add a third line in the center to indicate where the center of your dart will be.
- Mark at 2/3 of the center line. That will be the tip of your dart.
REDRAW THE SIDE SEAM
With a ruler, prolong the side seam line above the dart as shown below. Then, draw a line from the "center line / new side seam intersection" to the bottom corner of your dart. This will ensure that the side seam is nice and straight when your dart is folded.
 The last step for your front alteration is to adjust the length. An FBA adjustment adds fabric in the width but also in the length to make sure there is enough fabric to cover the bust and keep the hem nice and straight.
Use the back piece (remember, the front and back used to be the same) and transfer the hem curve onto your new front:
If you are making view A (fully lined, reversible tank), you are ready to sew!
TRANSFER THE ADJUSTMENT ONTO THE FACING (VIEW B AND C)
Use the back piece (remember, the front and back used to be the same) and transfer the hem curve onto your new front:
 |
| FBA with more ease at the bottom |
 |
| FBA with same width at the hem |
TRANSFER THE ADJUSTMENT ONTO THE FACING (VIEW B AND C)
Trace a copy of your modified front. Measure the side seam length of your facing and transfer it onto your front copy (above + below the dart). Transfer the center front length onto the facing and trace the curve.

Happy sewing!
Don't forget to share pictures of your Michelle tank or dress on social media #jaliemichelle #jalielife
← How to Make a Lined / Reversible CHARLIE jacket Different Fabrics, Different Tops & Dresses - MICHELLE & ADÈLE →