

Jalie 101 : Understanding the Pattern Pieces
The most important section of the pattern is of course the pattern pieces themselves. As any sewist knows, they are much more than just a pile of lines. Let's look at them closer to better understand some little things that will help sew a perfect garment.
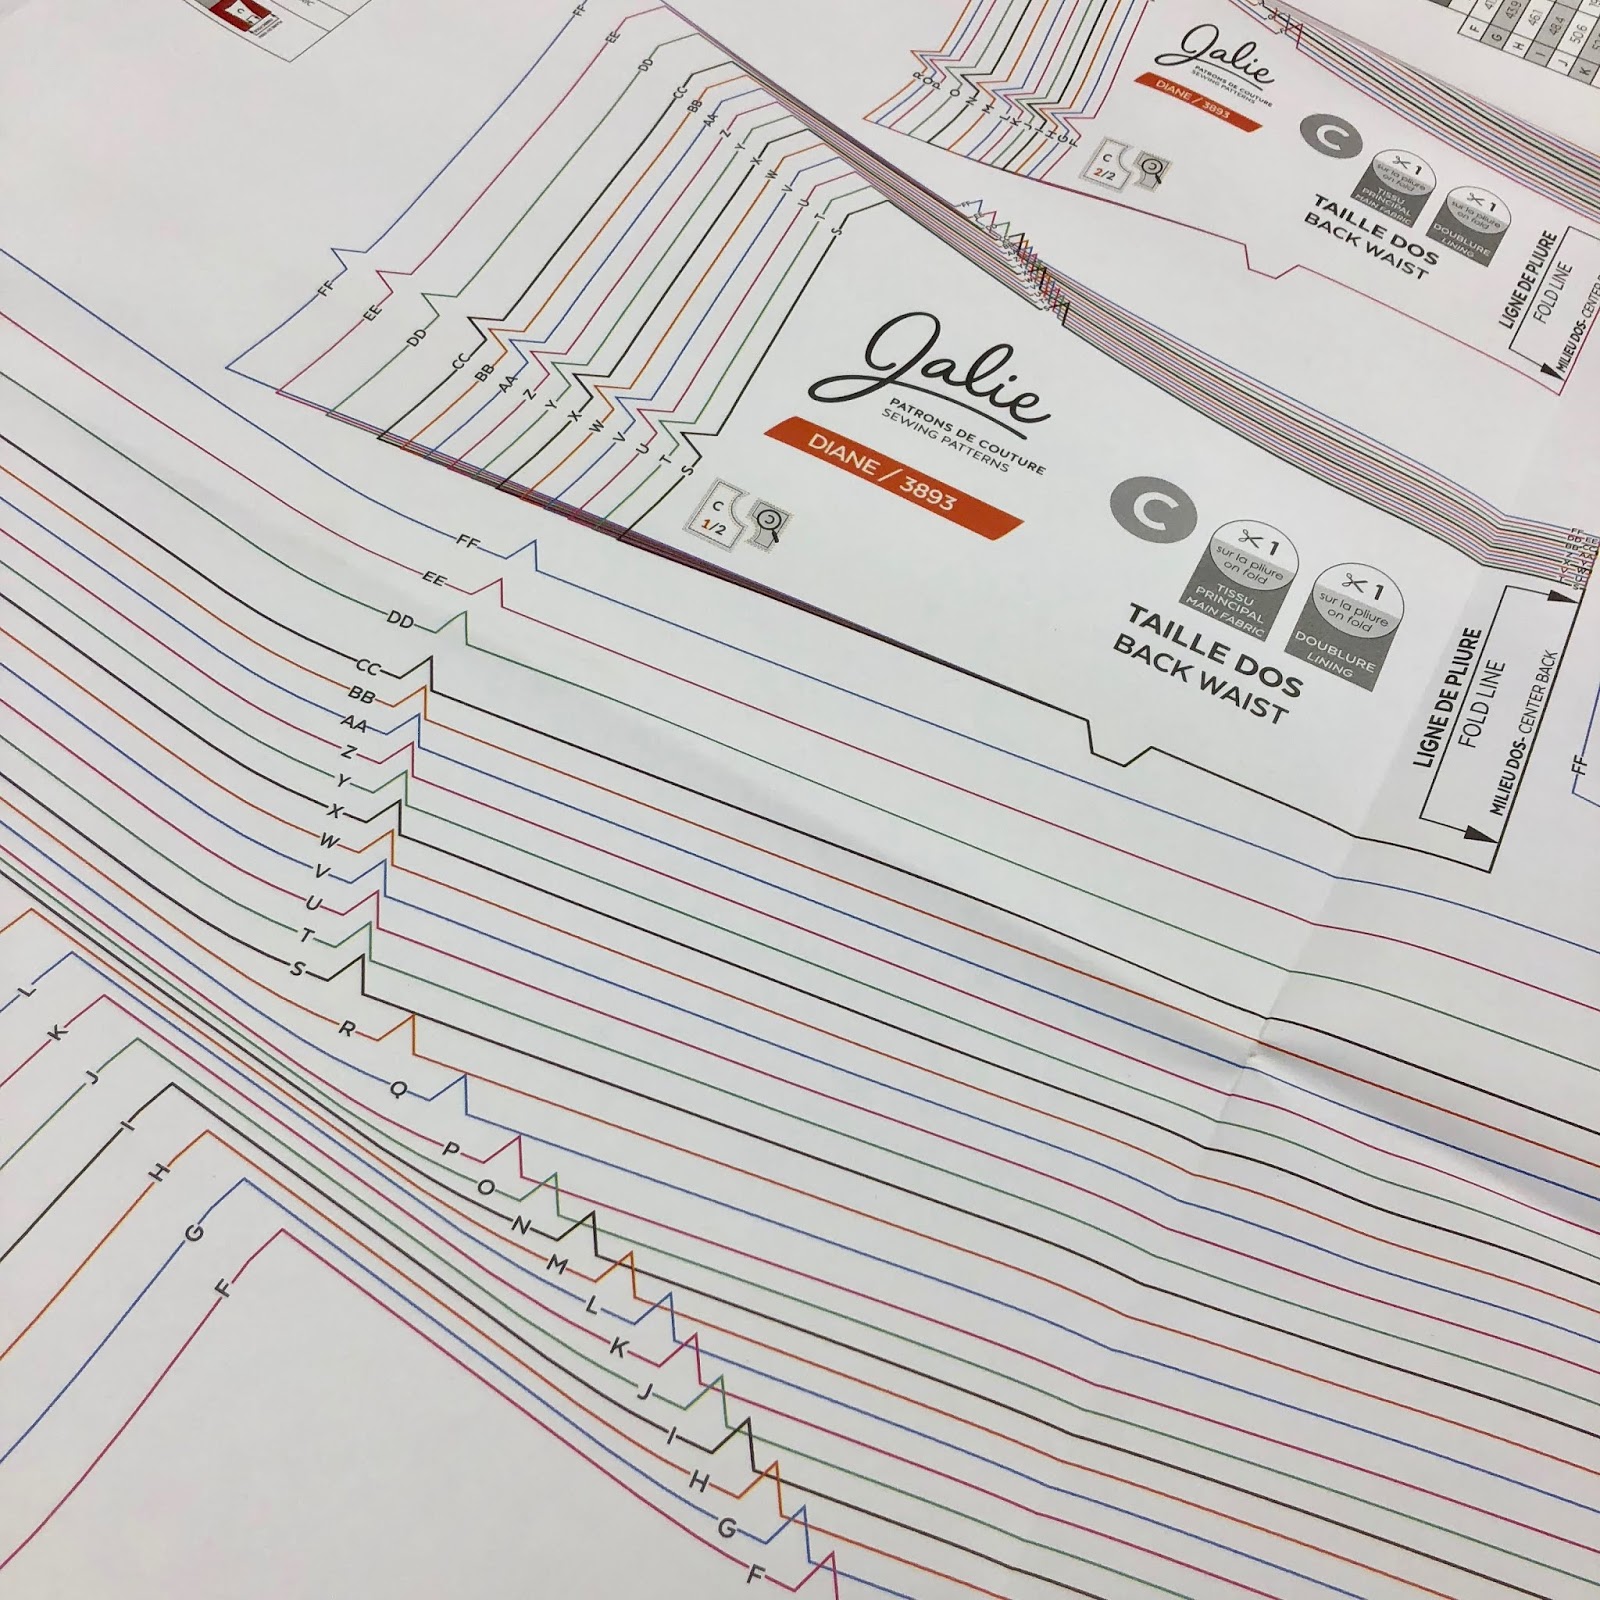
Patterns 2907 and up have colour-coded lines. Once you know which size you want to use (the Jalie size, which is a letter between F and GG), locate it on the piece and follow the line all around. The tiny letters you see on the pieces are added manually. It might happen that two letters were inverted by accident on a pattern. Don't worry about it. If you are on the right line, have seen the same letter all around, keep going on your line (and send us a quick email so we correct it for the next reprint).
Whenever the same line is used for many sizes and space is too limited to list all the letters, you will see something like "F - L" or "S - GG". This means "All sizes from F to L" or "All sizes from S to GG".
When using a layered PDF pattern, you don't have to worry about a thing. You can print one size at the time by toggling the other sizes of in the layers menu. This means you print, cut and are ready to cut your fabric in no time.


Pattern Sizes
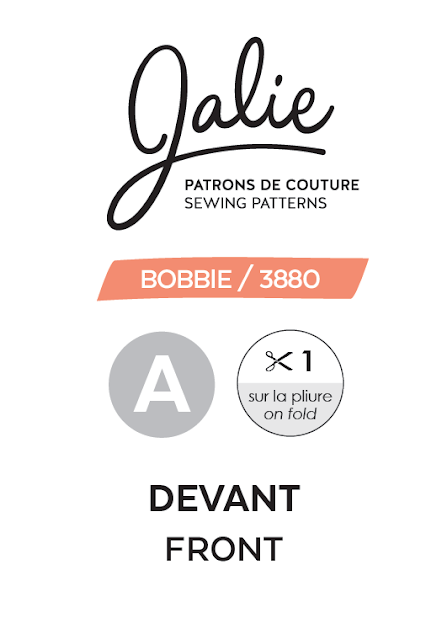
In Jalie patterns, you will find LETTERS on the pattern edges, not numbers. We have been using letters for nearly two decades now. It simplifies things (8... would it means kid size 8 or women size 8?) and as explained in the post about the back of the pattern, it requires you take a few measurements and increase the chance of getting better results. |
| Size labels on the Bobbie's center front |
Patterns 2907 and up have colour-coded lines. Once you know which size you want to use (the Jalie size, which is a letter between F and GG), locate it on the piece and follow the line all around. The tiny letters you see on the pieces are added manually. It might happen that two letters were inverted by accident on a pattern. Don't worry about it. If you are on the right line, have seen the same letter all around, keep going on your line (and send us a quick email so we correct it for the next reprint).
Whenever the same line is used for many sizes and space is too limited to list all the letters, you will see something like "F - L" or "S - GG". This means "All sizes from F to L" or "All sizes from S to GG".
When using a layered PDF pattern, you don't have to worry about a thing. You can print one size at the time by toggling the other sizes of in the layers menu. This means you print, cut and are ready to cut your fabric in no time.
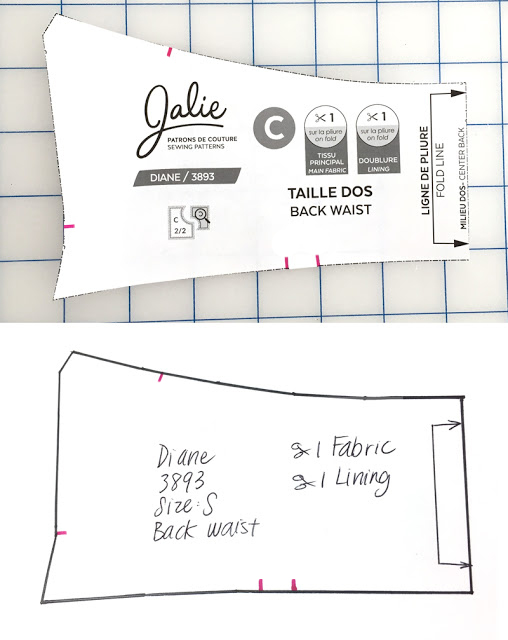
Piece Label
On the label, you will find:- The pattern number and name
- The view (if the pattern includes more than one view / option)
- The name of the piece and letter code (that we refer to in the sewing instructions)
- The cutting information (how many you need, in which fabric, on the fold or not)

If you are tracing your pattern, copy as much of that info as possible so you don't have to go back and forth, looking at the original piece for reference.
Pattern Markings

- The straight grain / grainline or fold line arrow to help you position the piece onto the fabric (that we will talk about in in more detail in the upcoming post about the cutting layout)
- Shorten / lengthen line (when the size nesting allows us to include one line for all sizes)
- Size stack info (that we explain in more detail in this post) // On some pieces (smaller pieces or pieces with a complex shape)
- Notches
- Notches
- Notches
- Did we say "notches'?
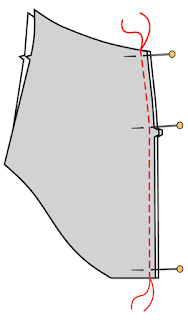
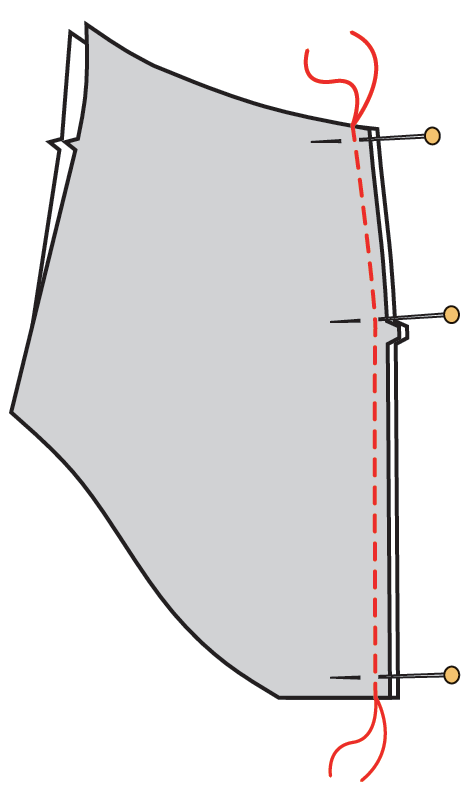
The notches
Notches are your best friends. They are guides that allow you to align pieces when sewing them together. If notches are off, it means something is wrong somewhere (wrong piece, inverted piece, you are not attaching the right things together).Jalie notches come in two shapes:
TRIANGLES // SINGLE NOTCHES // These are used on front pieces and side seams:
TRAPEZOID // DOUBLE NOTCHES // These are used on back pieces (center back seam, between center back and back side panel, etc.)
 You will also see the notches in the illustrations and we always say "pin [...], matching notches" when you are assembling two pieces with notches:
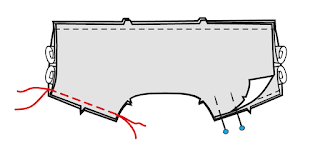 |
| See how notches are important to align all layers with the burrito technique where we assemble the back yoke, front and back of the Rose shirt! |
If you cut your fabric with scissors, take the time to cut around them so that the triangle is visible on your fabric piece. If you are using a rotary cutter, take the time to mark the notch location on the paper and transfer it onto the fabric piece with a marker or by clipping the fabric a tiny bit (a clip shorter than the seam allowance!).
|
Notches will disappear if you use a serger. For that reason, if you don't have a lot of experience or want to be on the safe side when assembly is not 100% obvious (take the Cora Leggings for example), don't hesitate to baste with a long zigzag stitch first. This is really good advice for slippery fabrics to make sure edges and notches are perfectly aligned. You can see this technique in action in many of our Video Tutorials.
Shorten / Lengthen Lines
These lines show you where you can slash your pattern to add or remove length. These lines are suggestions. You may shorten or lengthen in different places, depending on the effect you want.
If you are shortening pants because your inseam is shorter than the inseam the pants pattern is designed for, you will want to remove at the knee or equally above and below the knee. However, if you want to shorten pants because you want capri, then you shorten only below the knee (or simply at the hem if the leg is straight from the knee down.
If you are shortening pants because your inseam is shorter than the inseam the pants pattern is designed for, you will want to remove at the knee or equally above and below the knee. However, if you want to shorten pants because you want capri, then you shorten only below the knee (or simply at the hem if the leg is straight from the knee down.
What matters most is that if you are shortening front and back, you need to look at the notches to alter the pattern in the same areas and keep the notch position intact.

If you lengthen / shorten in an area where there is a binding, elastic or zipper don't forget to take note of the change you made to edit your binding piece, elastic or zipper length!
← Jalie 101: The Cutting Layout Jalie 101: The Cutting Layout →