

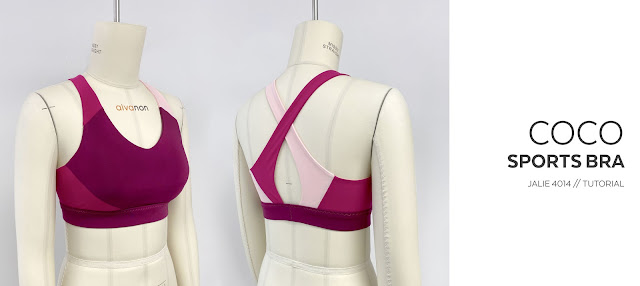
COCO Sports Bra (X-Back Style) // Step-by-step Tutorial
The COCO sports bra pattern stole the show when we launched our collection. We wrote this tutorial to walk you through the construction steps of this quite unique pattern. You will be able to see what makes the COCO so great: its pieces/seaming, clean finish inside and out, and the option for removable cups.

The COCO bra is a real scrap buster! If you have remnants from sewing other activewear like leggings, now is the time to use them. The main (outer) fabric is athletic knit. For the straps, we are using the same fabric but went with swimwear lining fabric and power net for the lining pieces. Look for a fabric that has approximately 50% stretch (length and width) and good recovery. If your fabric has too much stretch, the bra will grow and won't be supportive.


The pattern is available on our website, in both paper and digital/PDF formats (the PDF includes print-at-home, copy shop, and projector versions). You can also purchase it from your favorite reseller.
PATTERN PIECES
This tutorial shows how to make the X-back style (view A). The wide straps do not dig into the shoulder and stay in place when you move because they cross in the back. The racerback style that is also included in the pattern also has a clean finish inside and out. It provides more support / feels tighter since there is no opening in the back.The COCO bra is a real scrap buster! If you have remnants from sewing other activewear like leggings, now is the time to use them. The main (outer) fabric is athletic knit. For the straps, we are using the same fabric but went with swimwear lining fabric and power net for the lining pieces. Look for a fabric that has approximately 50% stretch (length and width) and good recovery. If your fabric has too much stretch, the bra will grow and won't be supportive.

- A - CENTER FRONT // Cut 1 on the fold, MAIN FABRIC
- B - SIDE // Cut 2, MAIN FABRIC (we used two different fabrics and made sure one would be the mirror of the other (cut with the paper facing down for the second piece))
- C - STRAP - VIEW A // Cut 2, MAIN FABRIC + Cut 2, LINING (INNER FABRIC) (we used the same fabric, in a different colour for each pair. This will result in straps that have the same fabric inside and outside, different colours left and right)
- E - BAND // Cut 1 on the fold, MAIN FABRIC
- F - LINING CENTER FRONT // Cut 1 on the fold, LINING (Power Net)
- G - LINING SIDE // Cut 4 if you want to create a pocket for removable cups, Cut 2 if you don't. We are using swimwear lining but could have used Power Net for more support.
- H - LINING BACK // Cut 2, LINING
OUTER FABRIC ASSEMBLY
Pin side pieces to center front piece, right sides together, and stitch 6 mm (1/4'') from edge (the seam allowance for the garment):Pin straps (the fabric you want on the outside) to the center front piece, right sides together, and stitch. If you are using the same fabric inside and out, pay attention to the shape of the straps to avoid mixing them up:
LINING ASSEMBLY
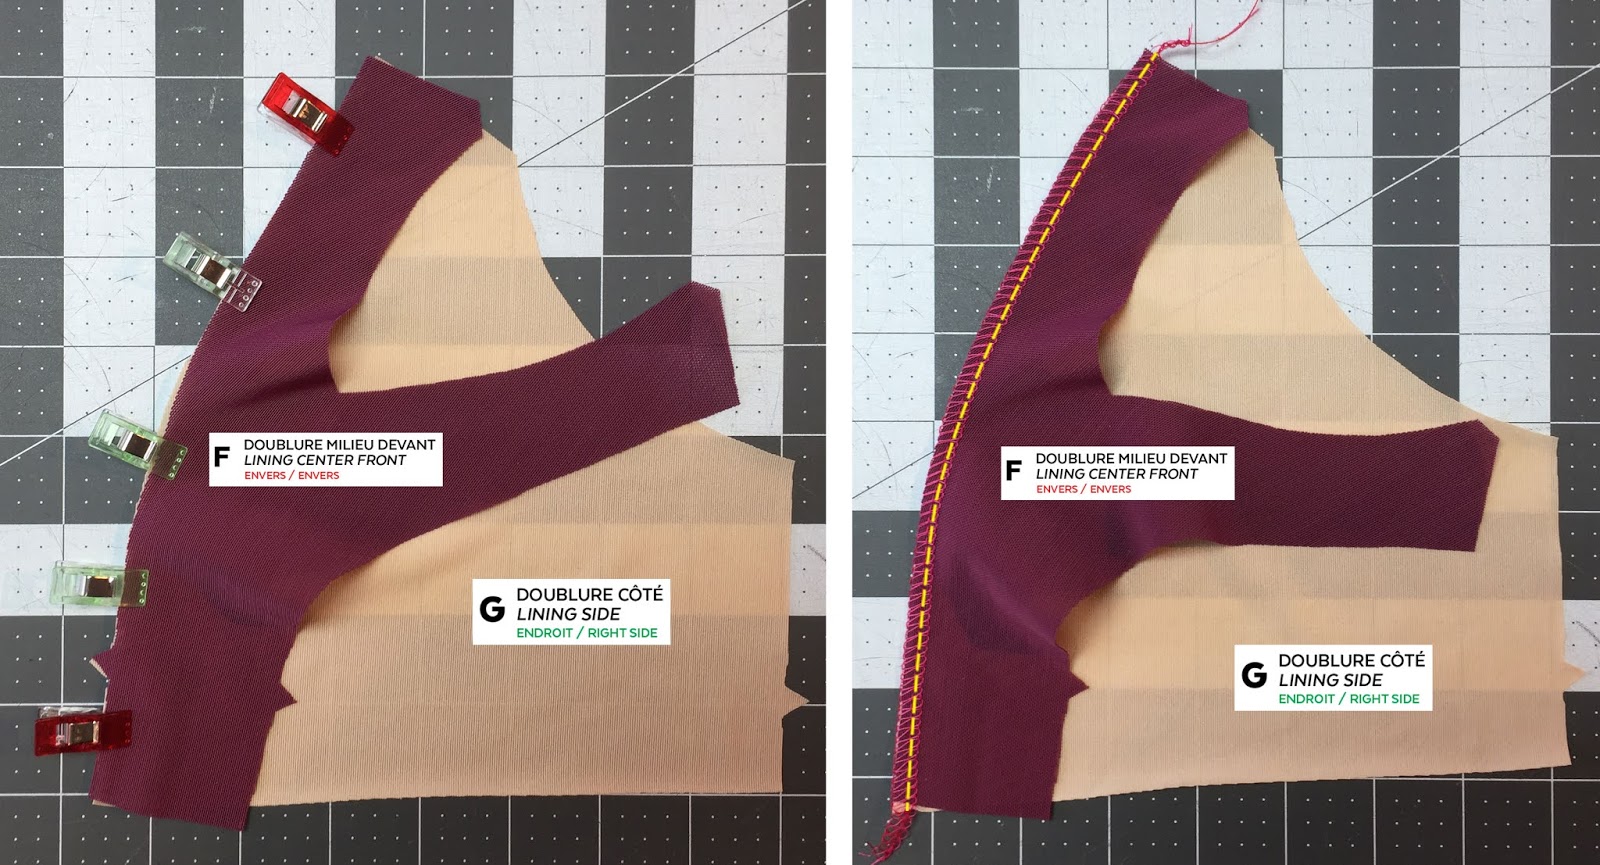
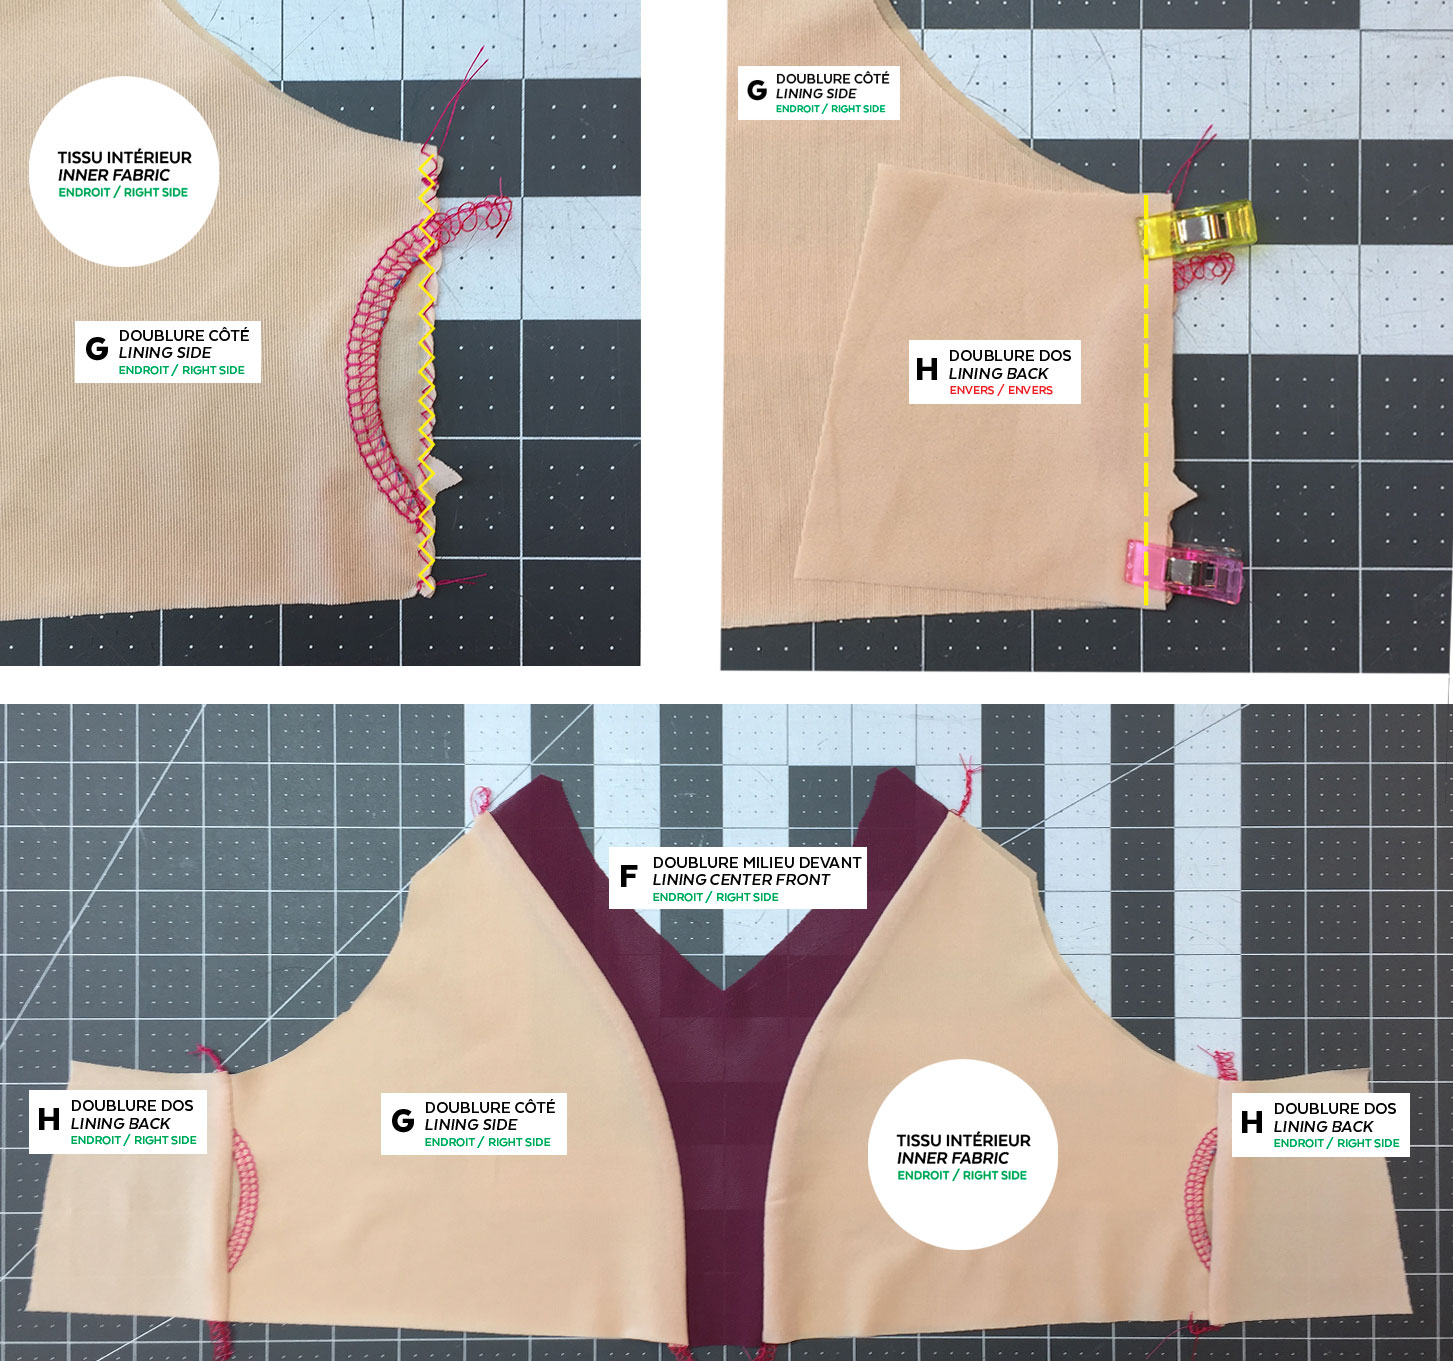
Pin lining center front to lining side, right sides together and matching notches, and stitch:
If you are making the version with only one layer of lining, you are ready to assemble the other side of the lining.
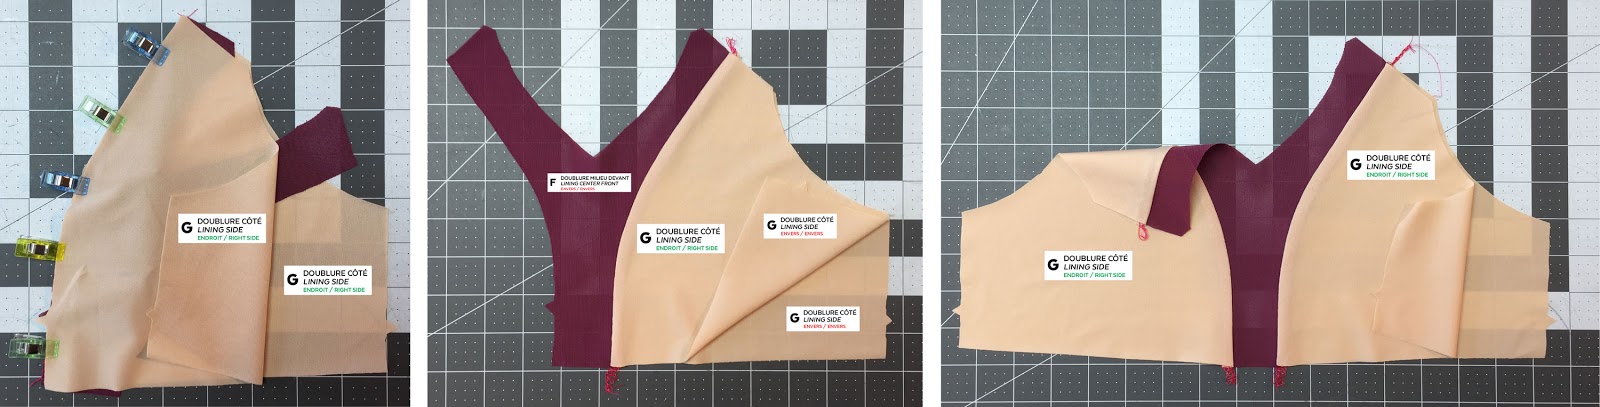
We are making the version with a pocket so we are adding another layer of lining side. Pin it over the center front lining (to sandwich it), lining sides right sides together, and stitch.
Repeat these steps for the other side and then bring the lining side layers wrong sides together:
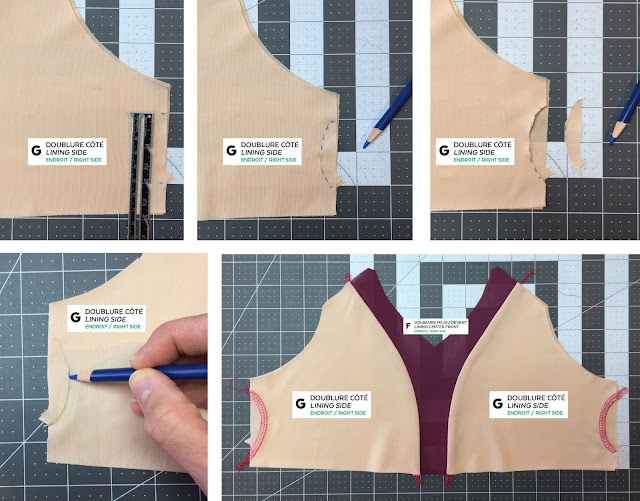
POCKET FOR REMOVABLE CUP
This step is optional, it creates an opening for those who want to insert foam cups for extra support and modesty.
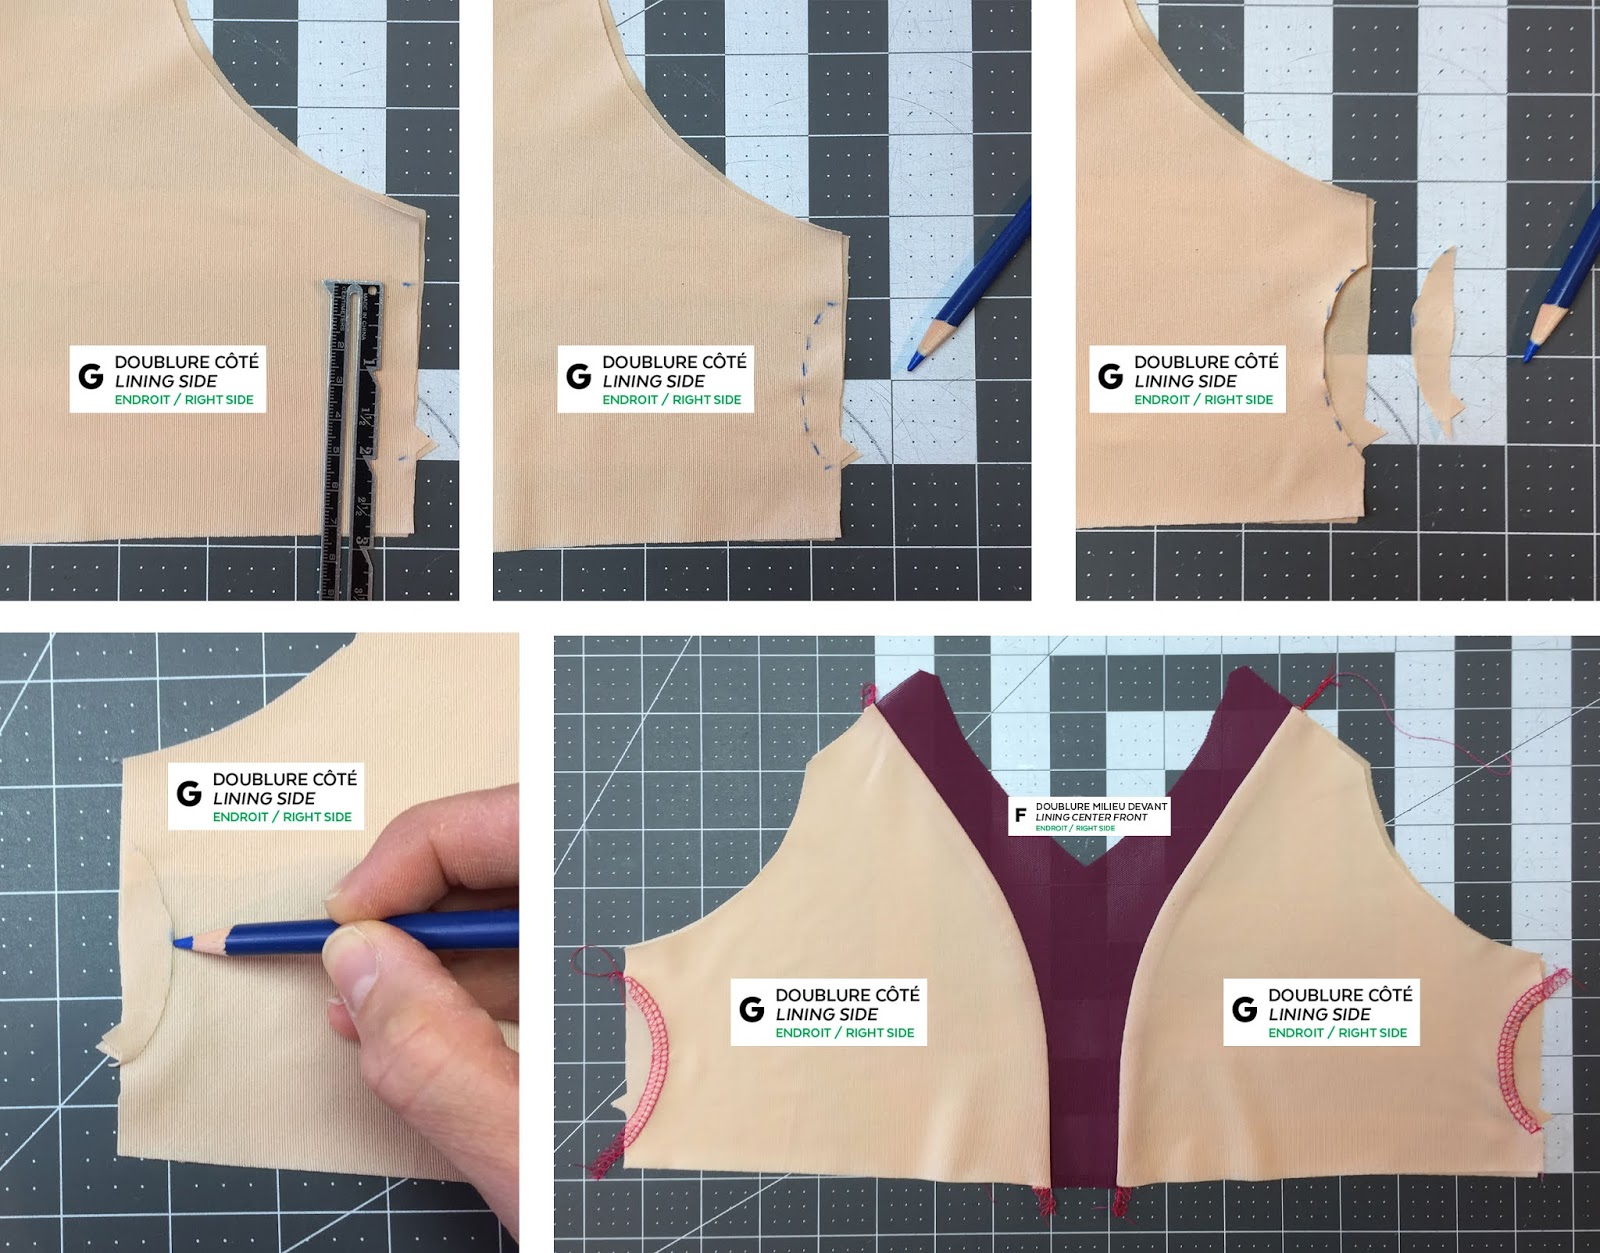
Place your lining with the center front right side up. Measure approximately 5 cm (2'') from the notch up and draw a curve on the top lining layer. Cut the fabric and use the cut-out to mark the opening on the other side. Finish the edge with a zigzag or your serger:
Baste sides with a zigzag. Then, pin the lining back over the opening, right sides together, and stitch:
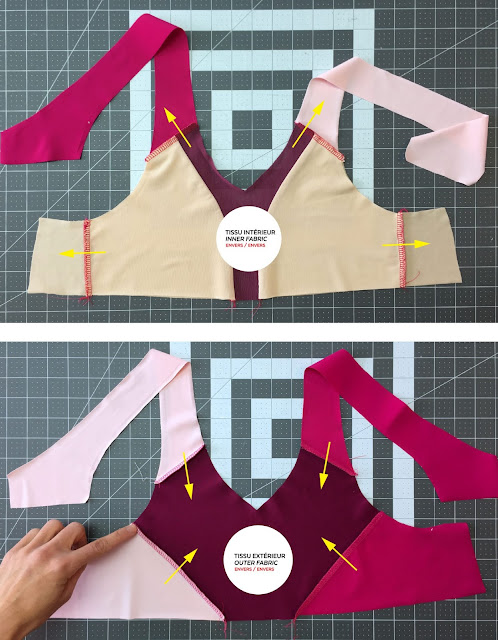
STRAPS, ARMHOLES, AND NECKLINE
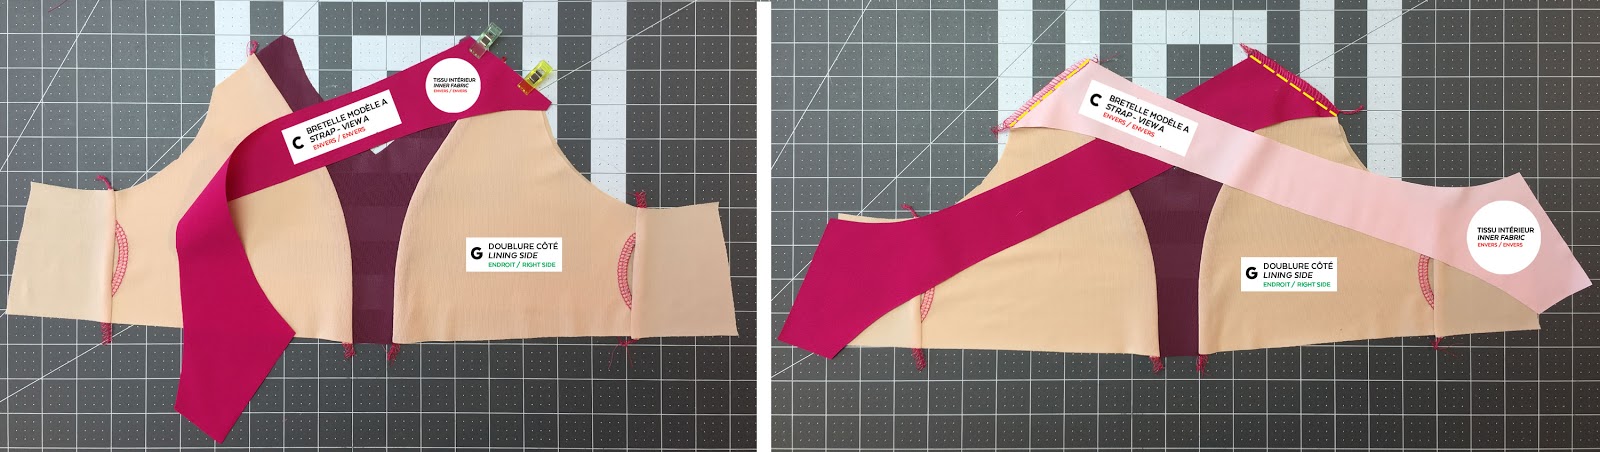
Pin right side of straps (inner fabric) to the lining (notice how the openings are facing up) and stitch:
LINING: Bring seam allowances outwards.
OUTER FABRIC: Bring seam allowances inwards.
OUTER FABRIC: Bring seam allowances inwards.
Press at low temperature if your fabric allows it. à basse température si le tissu le permet afin de maintenir les ressources de couture en position:

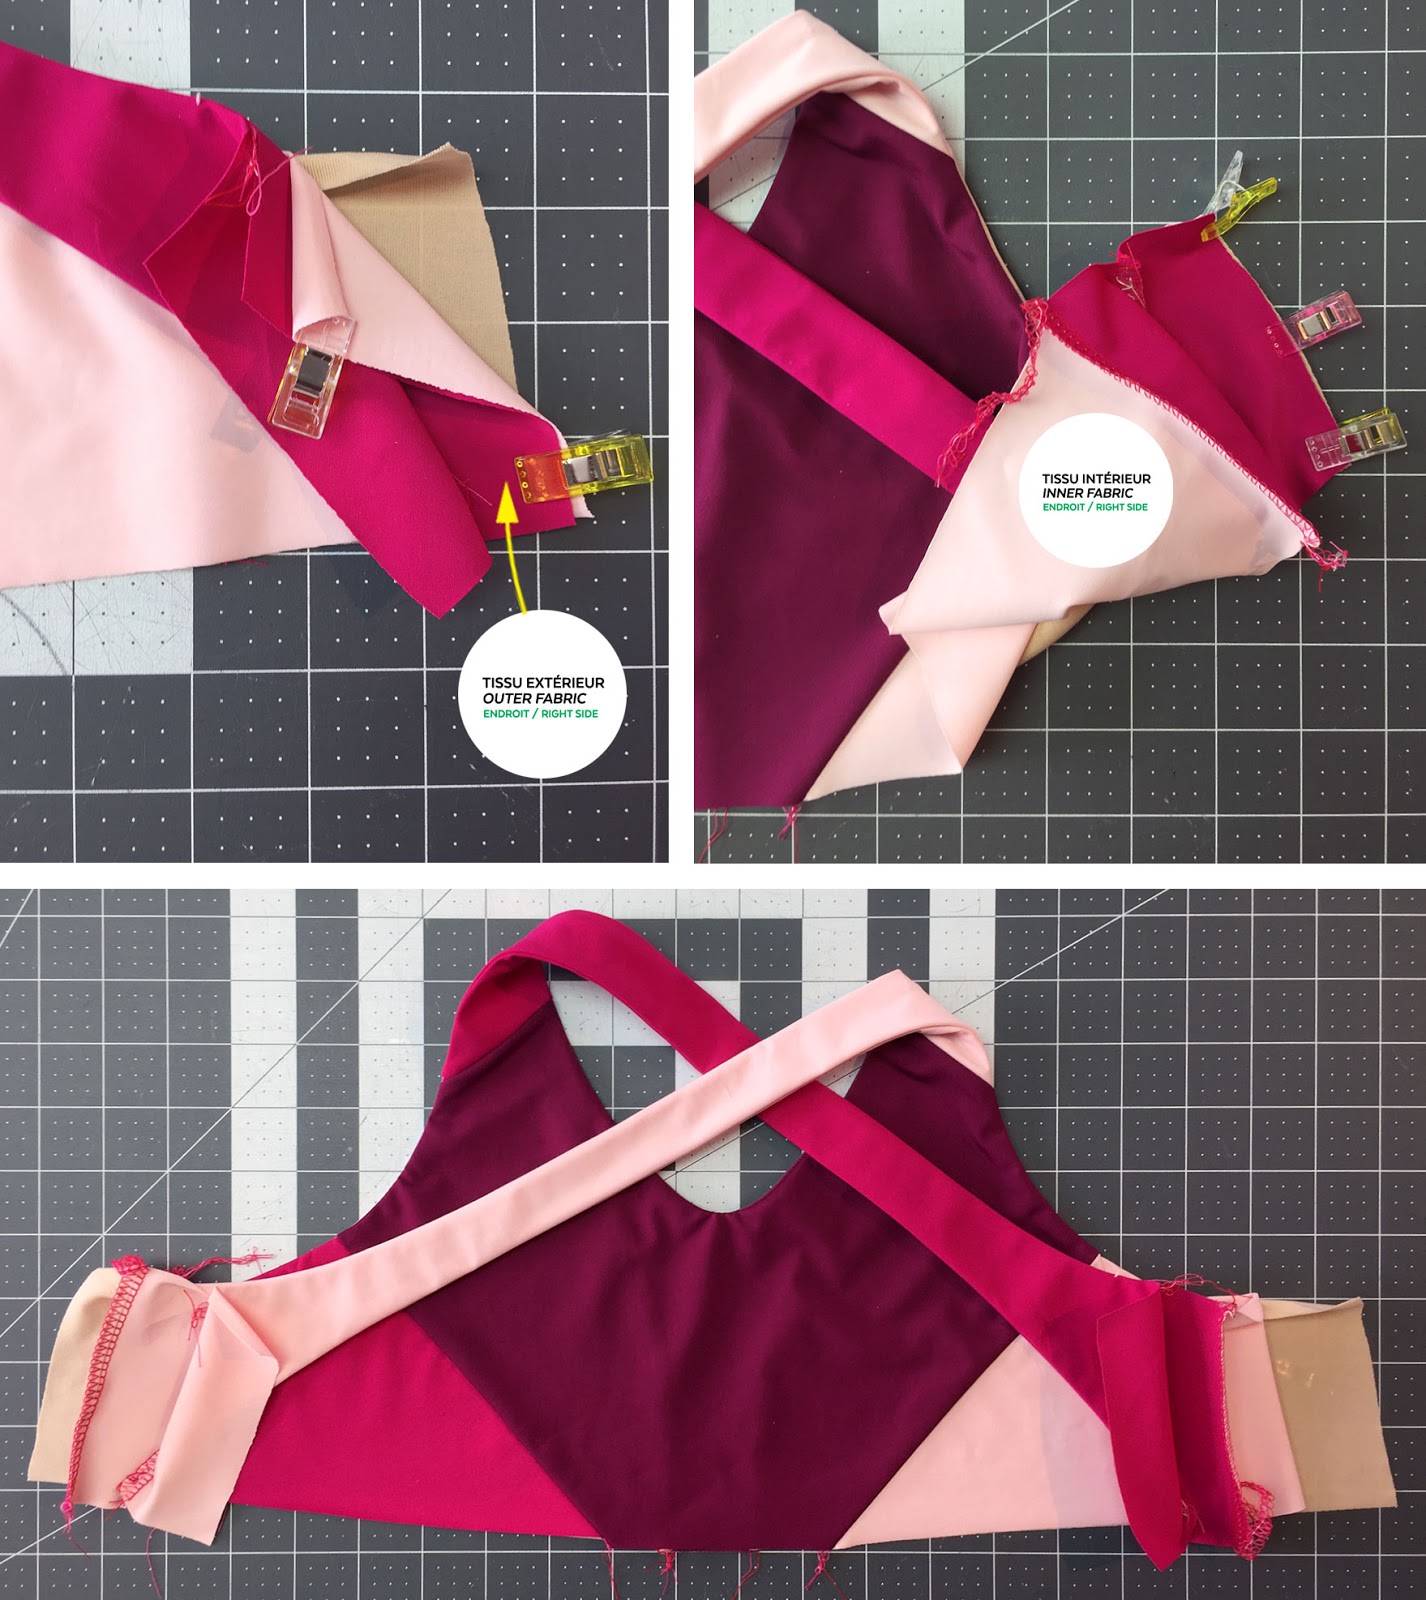
Pin outer fabric to lining, right sides together (the "right side of the lining is the side where you see the openings and right side of the center front piece). Because you pressed the seam allowances earlier, they will be easy to align and bulk will be minimized.
Stitch along neckline and armholes, stopping 4 cm (1 1/2'') before the ends, as shown in the photo on the right:

Apply clear elastic to the seam allowance, without stretching and sewing with a zigzag. The clear elastic should be the same length as the fabric so the ends will remain unsewn for now, as shown below:

FINISHING
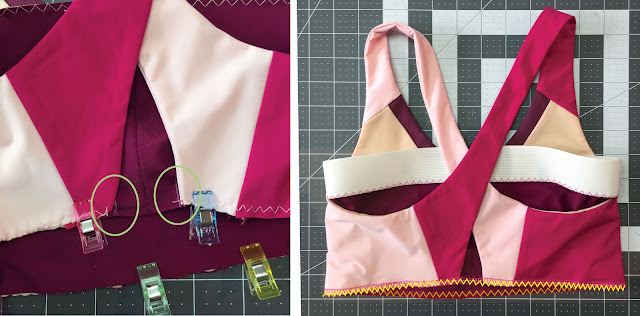
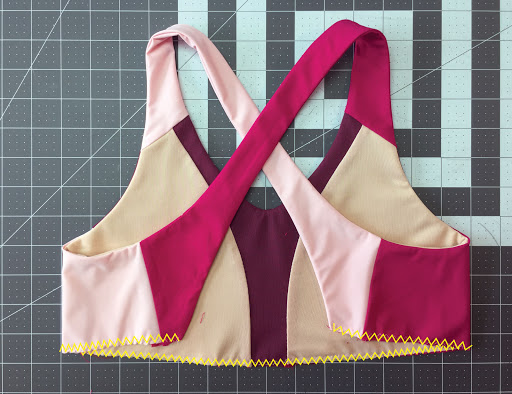
Turn right side out and cross the straps:

Pin sides of the outer fabric together and stitch. Repeat for the other side.
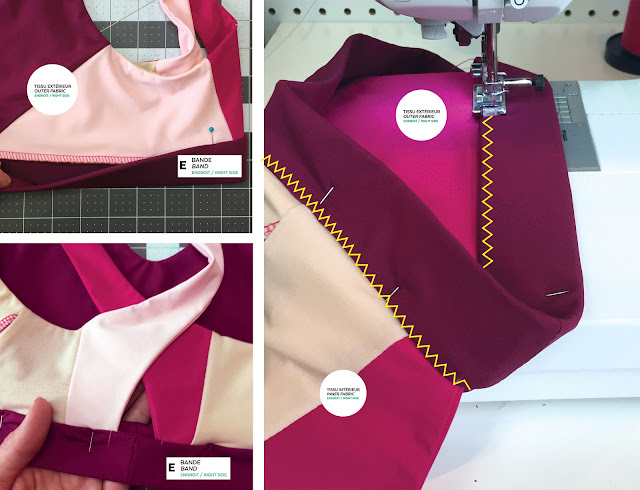
Then, pin facing with the inner fabric of the strap, right sides together, and stitch:
Bring sides/armholes right sides together and sew the clear elastic onto the seam allowance (the portion of elastic that was not sewn previously):
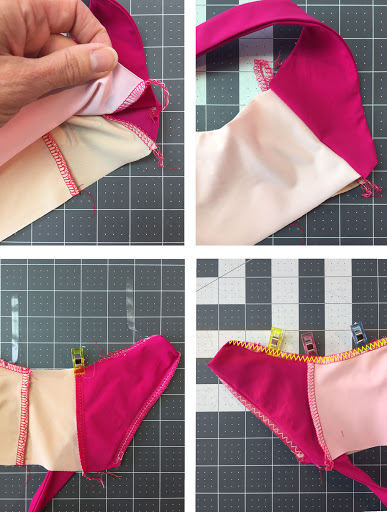
Bring lining and outer fabric wrong sides together, pin and baste bottom edge, matching centers:
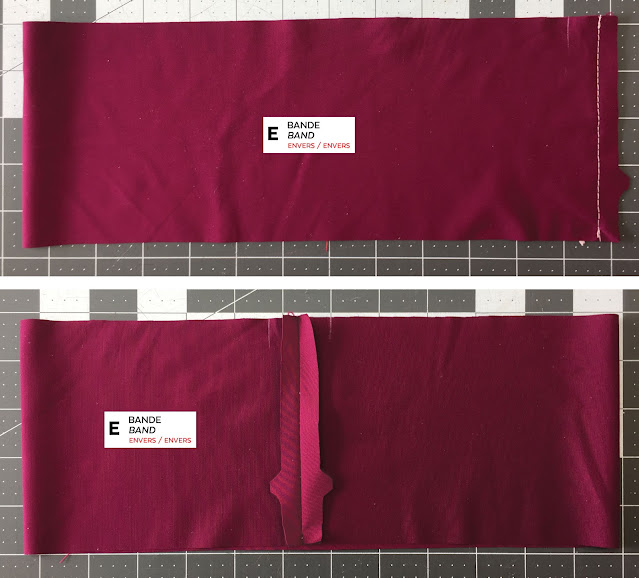
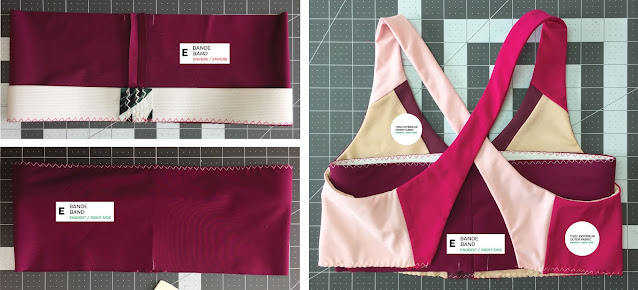
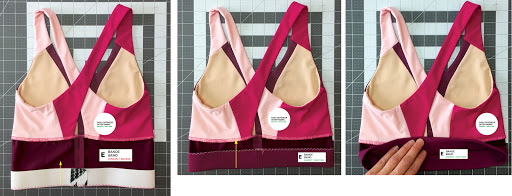
BAND
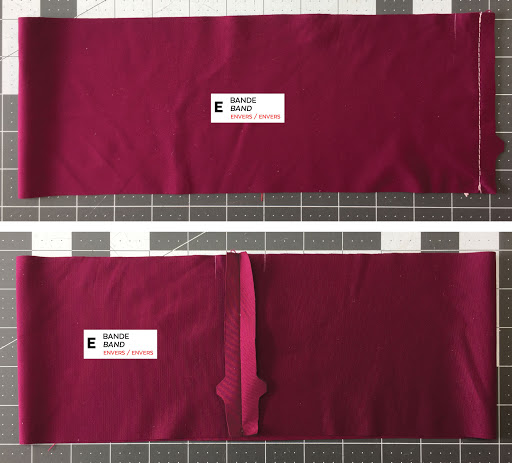
Fold band right sides together and sew across the end, 1 cm (3/8'') from the edge. Press the seam allowance open:
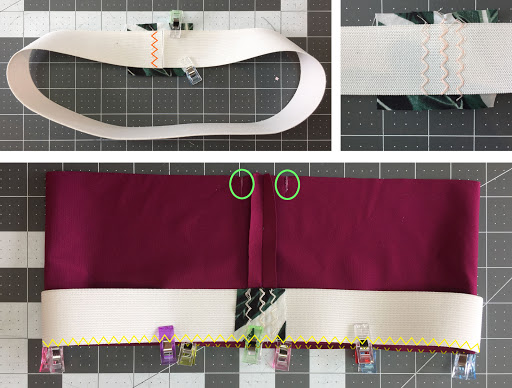
Butt ends of the elastic, place over a scrap of fabric and stitch with zigzag stitches to keep in place.
Pin right side of elastic to the wrong side of the band (hiding the double notches) and baste with a zigzag along the bottom edge. Make sure the strap placement mark is visible on both sides:
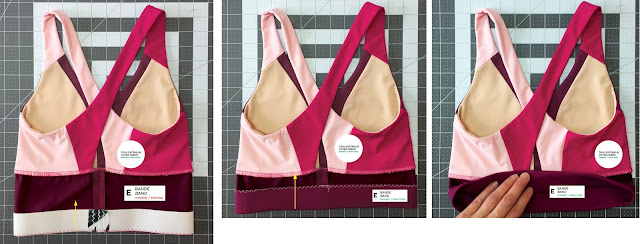
Turn band right side out. Insert the band into the bra, with the elastic towards the top. RIGHT SIDE of the band should be against the lining:
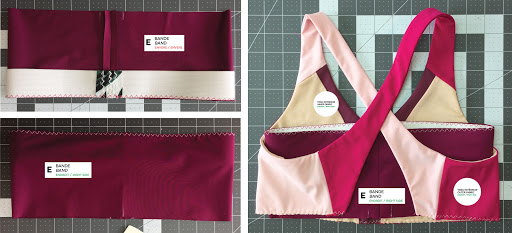
Pin, matching the strap edges with the marks and baste with a zigzag. It is a good idea to move the elastic up to keep it away from the seam and avoid catching it by accident:

Pull band and elastic out of the bra and fold the elastic towards the wrong side of the band. The fabric should be taut, but not stretched out. Fold again to hide the basting stitch with the edge of the folded band:
Pin generously, making sure everything is nice and straight. Topstitch with a zigzag or cover stitch with the outer fabric facing up:

Voilà! You are done! All you need to do now is insert foam cups through the openings and you can wear your COCO bra for your next workout!
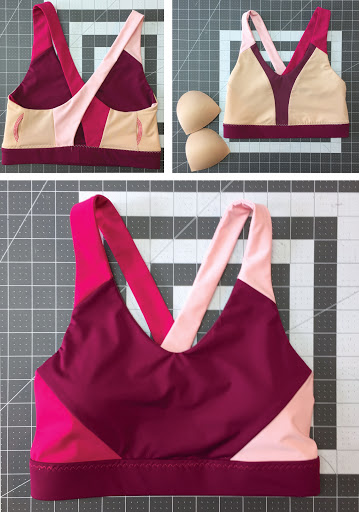
Happy sewing!
← Racerback COCO Sports Bra // Step-by-step Tutorial NIKITA // Workout Top Sewing Tutorial →