A Patch Pocket for your Nico (free template)
Adding a pocket is not complicated, but there are some tricks to doing it right. In this post, you will learn how to make a symmetrical pocket with sharp corners that will be nice and straight..
Keep reading and don't forget to post pictures of you Nico tees in our Facebook group or on Instagram with hashtags #jalielife #jalienico !
You will need:
- Your Nico t-shirt pieces, cut and ready to sew
- Cardboard (cereal boxes have the perfect thickness)
- Glue stick
- Scissors (fabric and paper/cardboard)
- Something to mark your fabric (tailors chalk, disappearing ink pen), iron, pins... the usual :)
The Nico pattern is available on the Jalie website, but you can also purchase it from a retailer near you. In this tutorial, we will only cover the pocket application, not the t-shirt construction.
Like all other Jalie patterns, sewing instructions are available directly on the pattern page before you purchase the pattern. You can download and read them over while you are waiting for the delivery of your paper pattern or before downloading your PDF pattern.
Like all other Jalie patterns, sewing instructions are available directly on the pattern page before you purchase the pattern. You can download and read them over while you are waiting for the delivery of your paper pattern or before downloading your PDF pattern.
Instructions:
1- Download the free POCKET PATTERN AND TEMPLATE. The document prints on US Letter or A4 paper. Make sure you print it at 100% (actual size). DO NOT select "fit to page" or "resize". Measure the TEST rectangle to make sure the document printed correctly. Choose the size you want to use (the template includes 5 pocket sizes, ranging from toddlers to adults).
 |
| 2- After cutting roughly around the paper template, glue it to the cardboard and cut along the line. |
 |
| 3- Cut one pocket in the fabric of your choice (woven or knit), using the POCKET piece. Mark the top hem (dotted line) on the wrong side of your fabric. |
 |
| 4- Place the TEMPLATE piece on the wrong side, along the line. |
 |
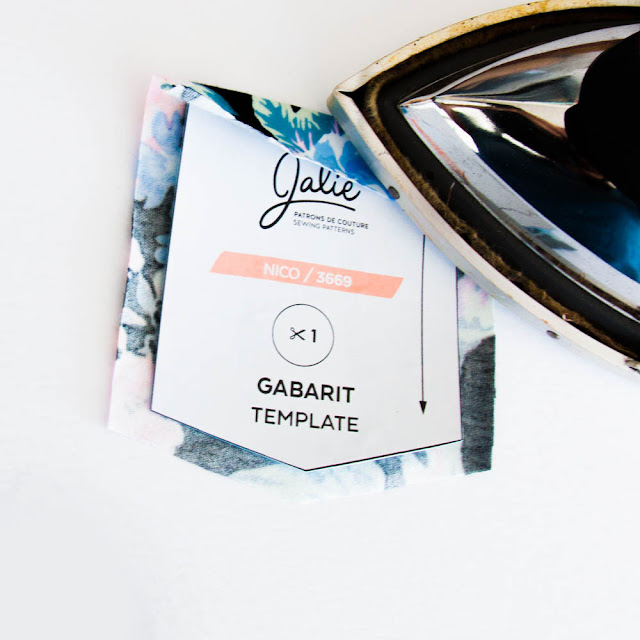
| 5- Press the fabric over the template (sides first, then top and bottom), along the edges of the cardboard. |
 |
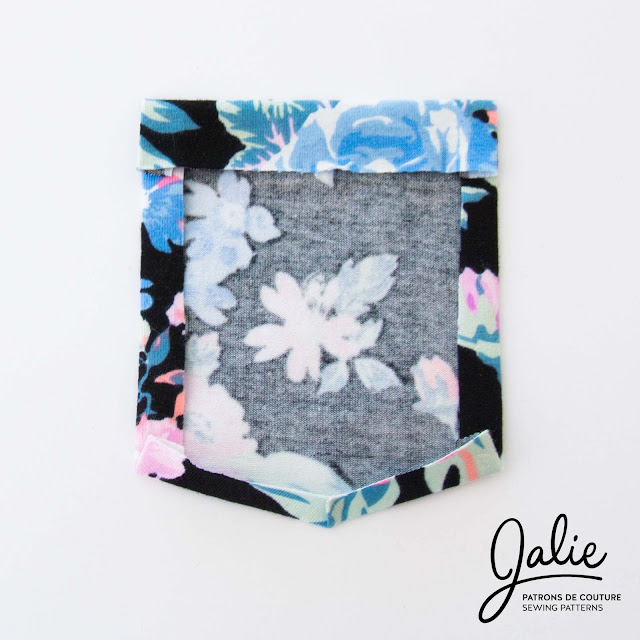
| 6- Remove the template and press again so the pleats are as flat as possible. |
 |
| 7- Unfold left and right edges and topstitch the top, 2 cm (3/4'') from the fold.. |
 |
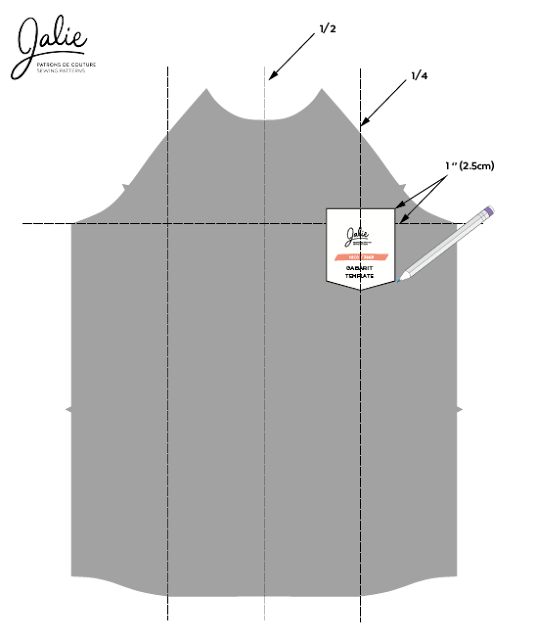
| 8- Use the TEMPLATE to mark the pocket position on the t-shirt front. |
Width: Fold in half twice to mark quarters (with pins or chalk) with vertical lines.
Height: Trace a horizontal line from one side seam/armhole corner to the other. Place the TEMPLATE 2,5 cm (1''') above that line.
Trace around the template (or mark the corners) on the right side of the front.
*Please note: This placement is only a suggestion with easy-to-mark guides. Feel free to experiment and move it a bit if you think it would look better in a different position. Pinning on a finished shirt is also possible, but it makes it a bit more challenging to sew it straight.
 |
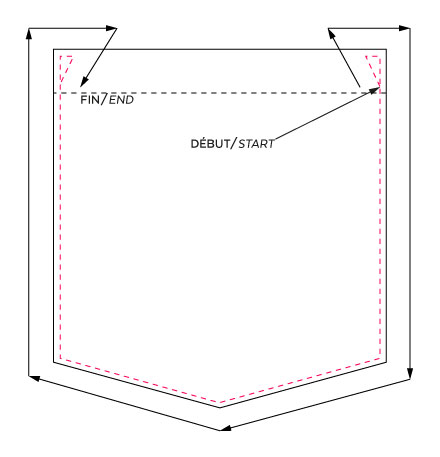
| 9- Pin the pocket in place and topstitch, following the guide above. Press again and... you're done! |
Did you like this tutorial?
Pin the photo below to your Pinterest board:
← Color-Blocked CLARA Leggings How to sew a knit binding →


