ROSE Shirt // Shirt Collar Tutorial
There are different ways to attach a collar to a shirt. After working on a few shirt, using sewing patterns from various designers, most people pick their favorite method and stick with it. On the ROSE pattern, we use a technique that is slightly different from the traditional methods you usually see in sewing books. We received a lot of positive comments about it so we are sharing it with you in a photo tutorial.

You can download the ROSE shirt instructions directly on the pattern page on our website, where you will also see inspiring customer photos. Fun fact: this pattern was named ROSE after Jeanne's mother's favorite flower.

This sewing pattern includes 28 sizes and is available in paper (mailed to you) and PDF formats (print at home, copy shop and projector file)

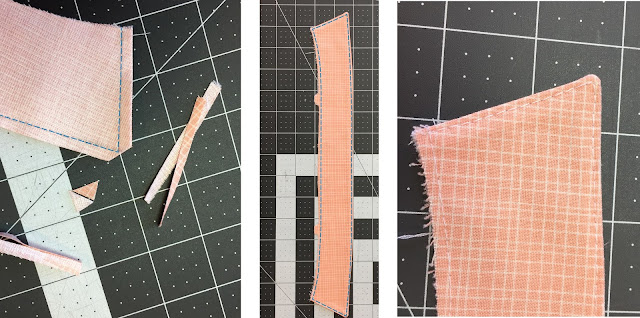
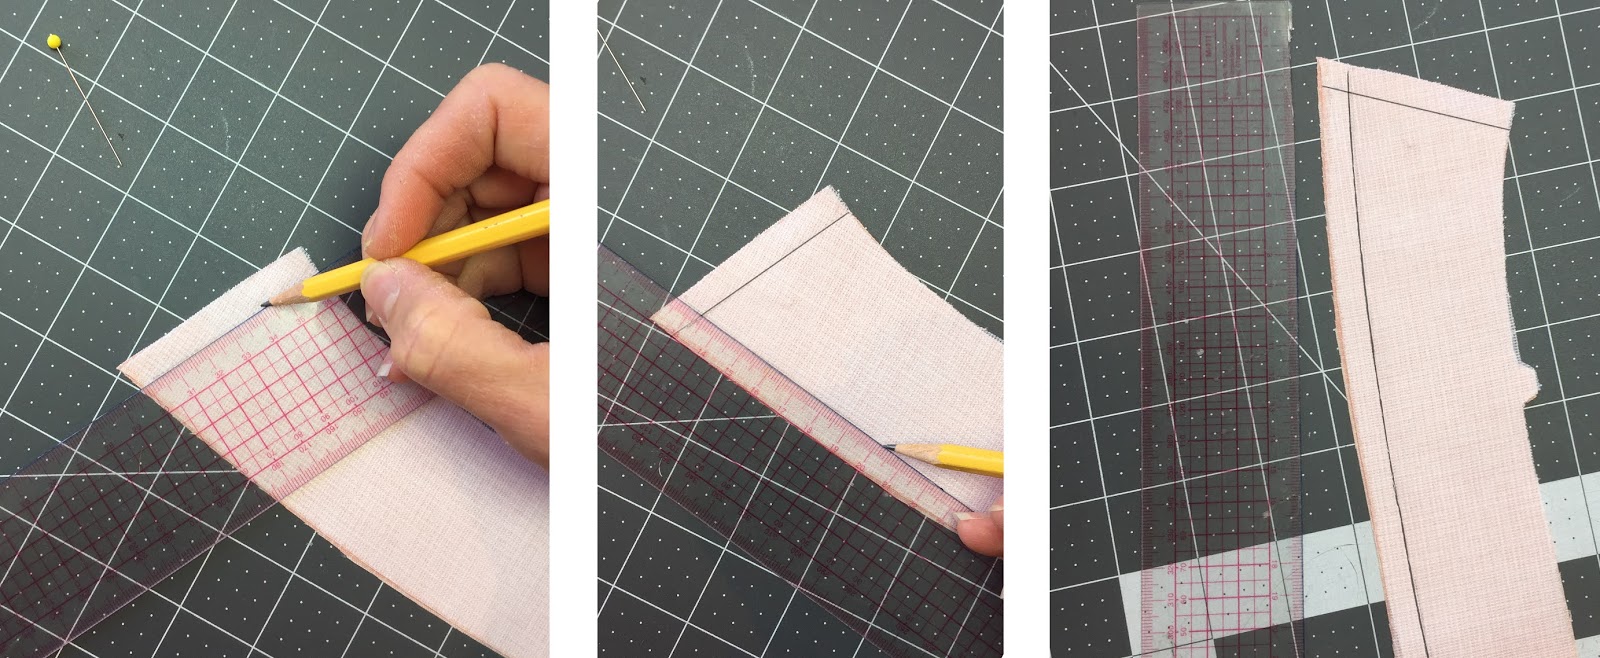
Trace a line, 1 cm (3/8'') from edge, on the interfaced side of the collar with chalk or a pencil:

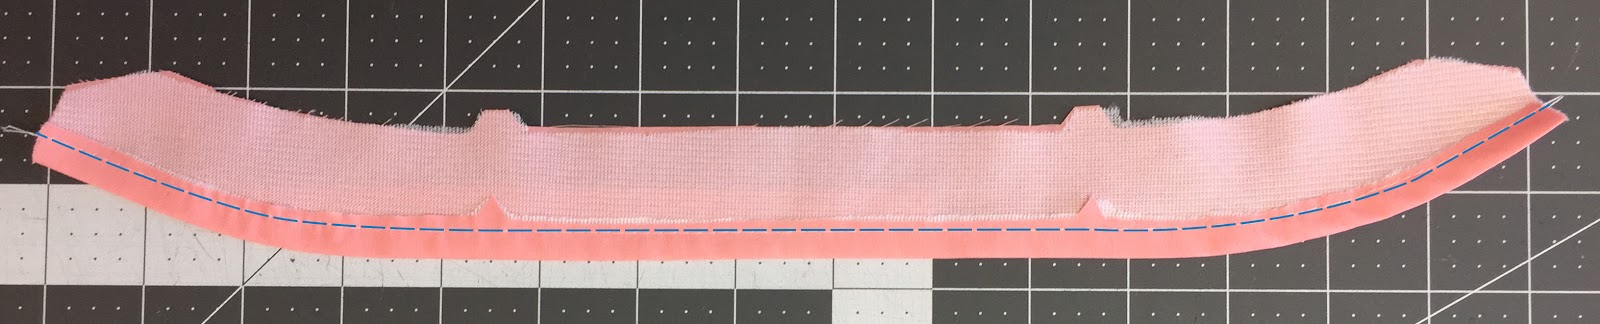
Pin collar pieces right sides together and stitch on the line. Trim seam allowances, turn right side out, press and topstitch close to the edge. Stitch all around to baste the open side shut at the same time, matching the double notches to keep everything straight.
To make sharp corners, make sure you pivot, needle down:
Fold bottom edge (with triangle notches) of the interfaced collar stand piece to the wrong side by 1 cm (3/8''). You can fold and press with a guide or ruler or sew a guide seam 1 cm (3/8'') from edge to fold precisely and quickly.:

Baste (sew with a long straight stitch that you can remove at the end) to hold the folded edge into position from one end to the other:

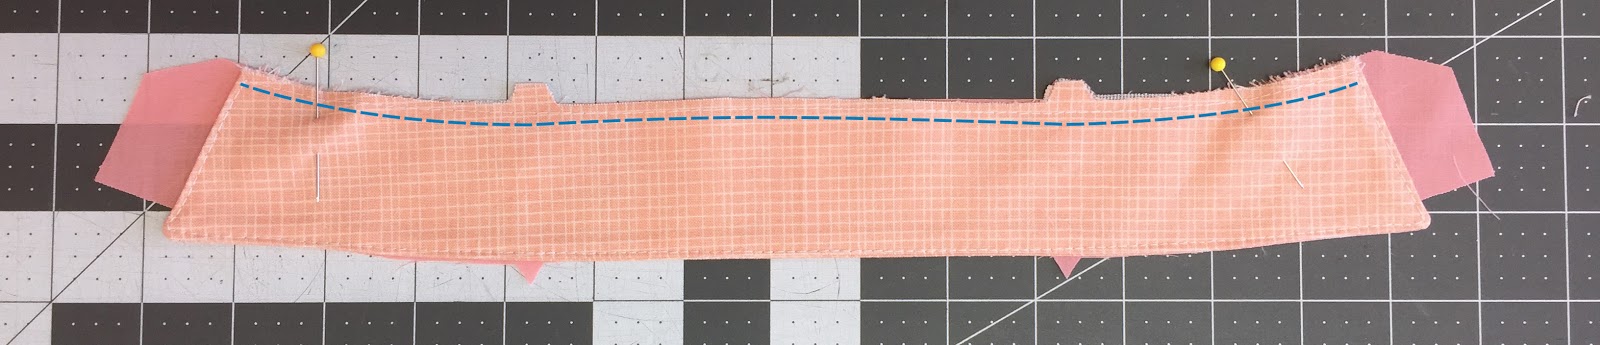
Pin NON INTERFACED side of the collar to NON INTERFACED collar stand piece, matching double notches and baste, 6 mm (1/4'') from edge:
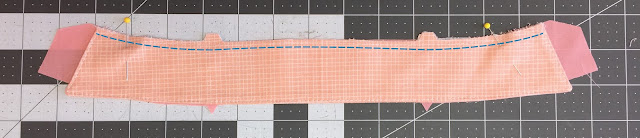
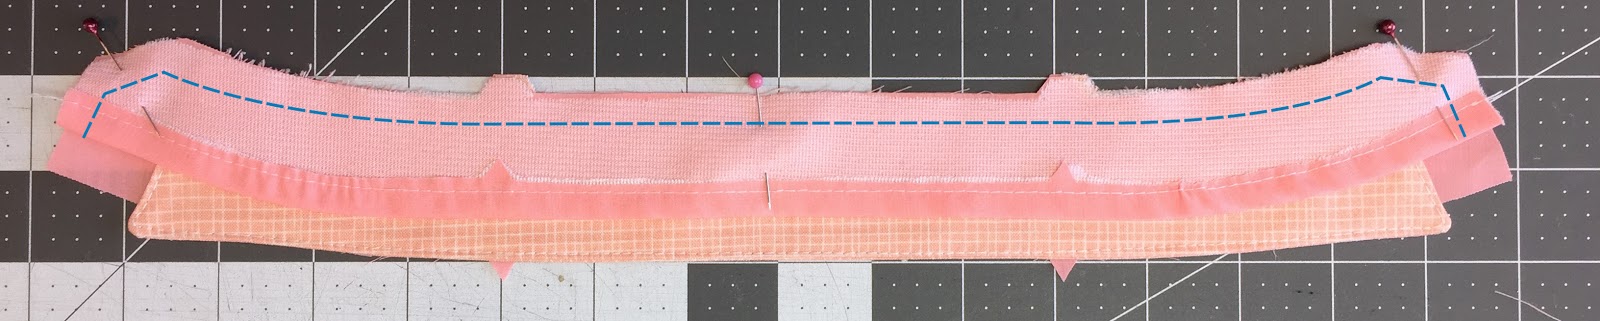
Pin right side of interfaced collar stand to the collar (the collar is sandwiched between the collar stand pieces), matching double notches. Stitch as shown, 1 cm (3/8'') from edge, from one folded edge to the other:

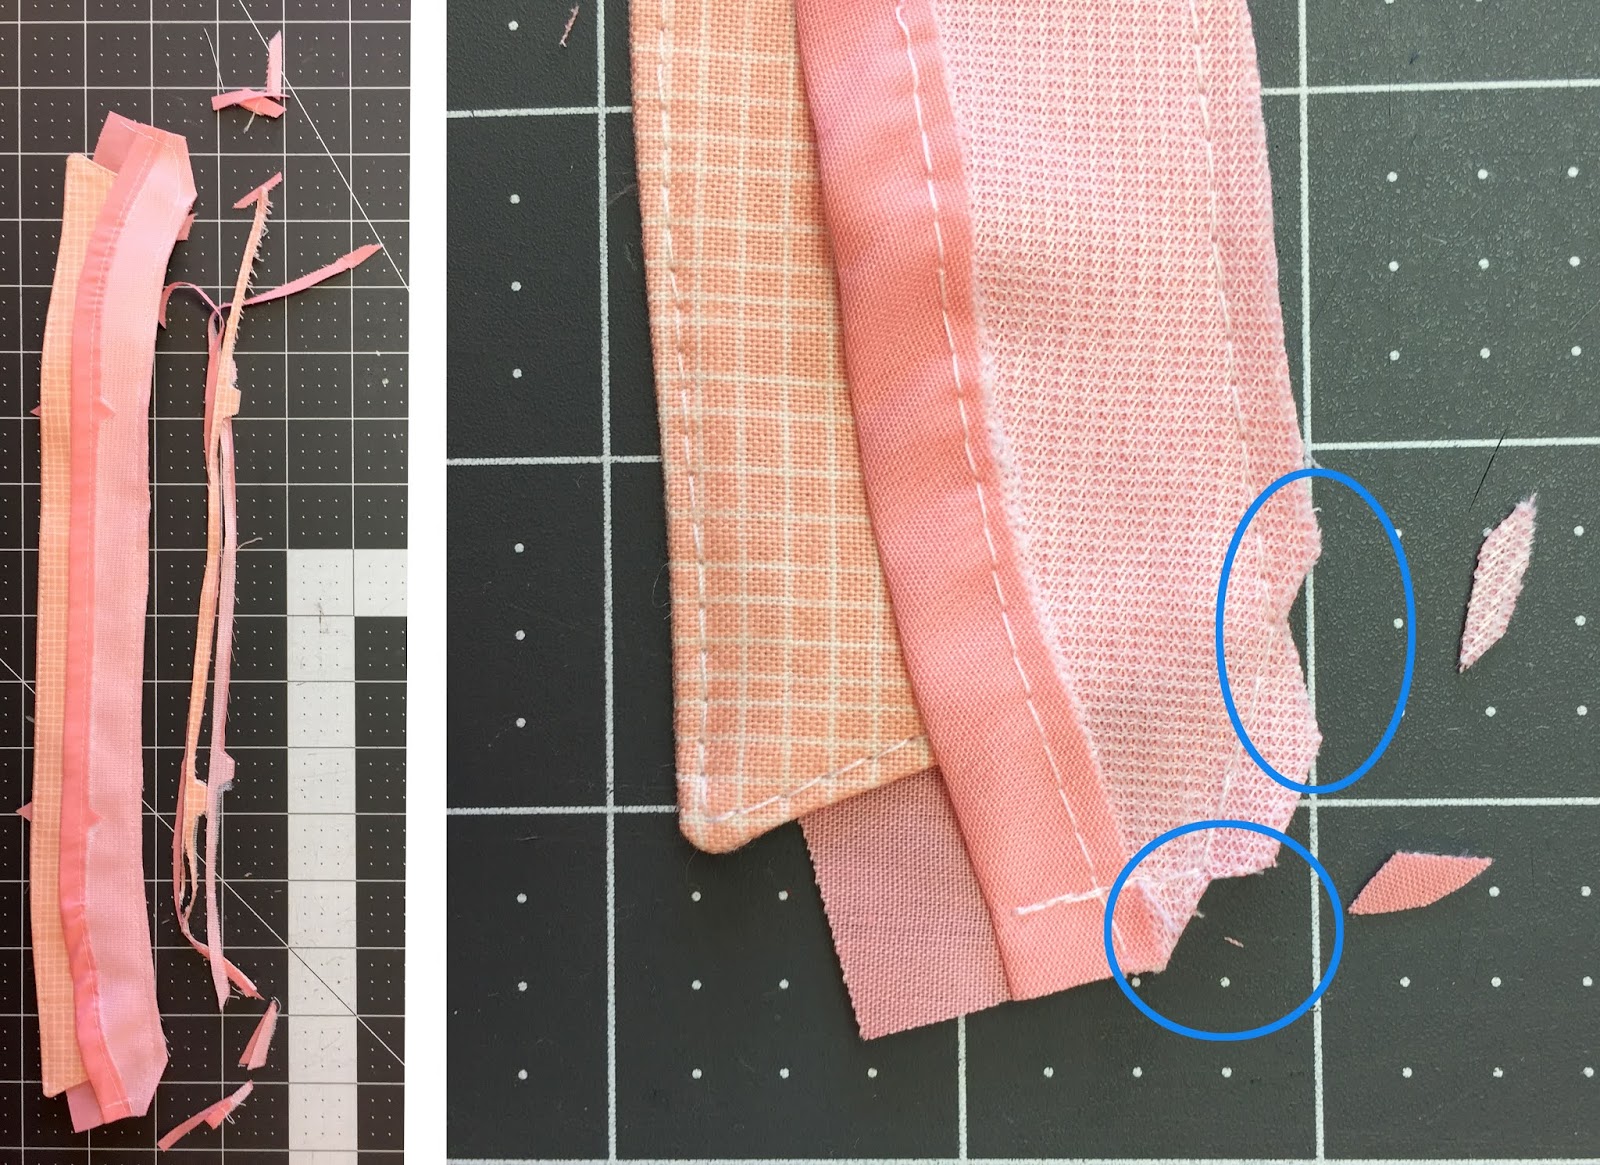
Trim seam allowances and clip corners as shown:

Turn right side out, press and mark center (you can locate it by folding the collar stand in half, bringing its ends together):

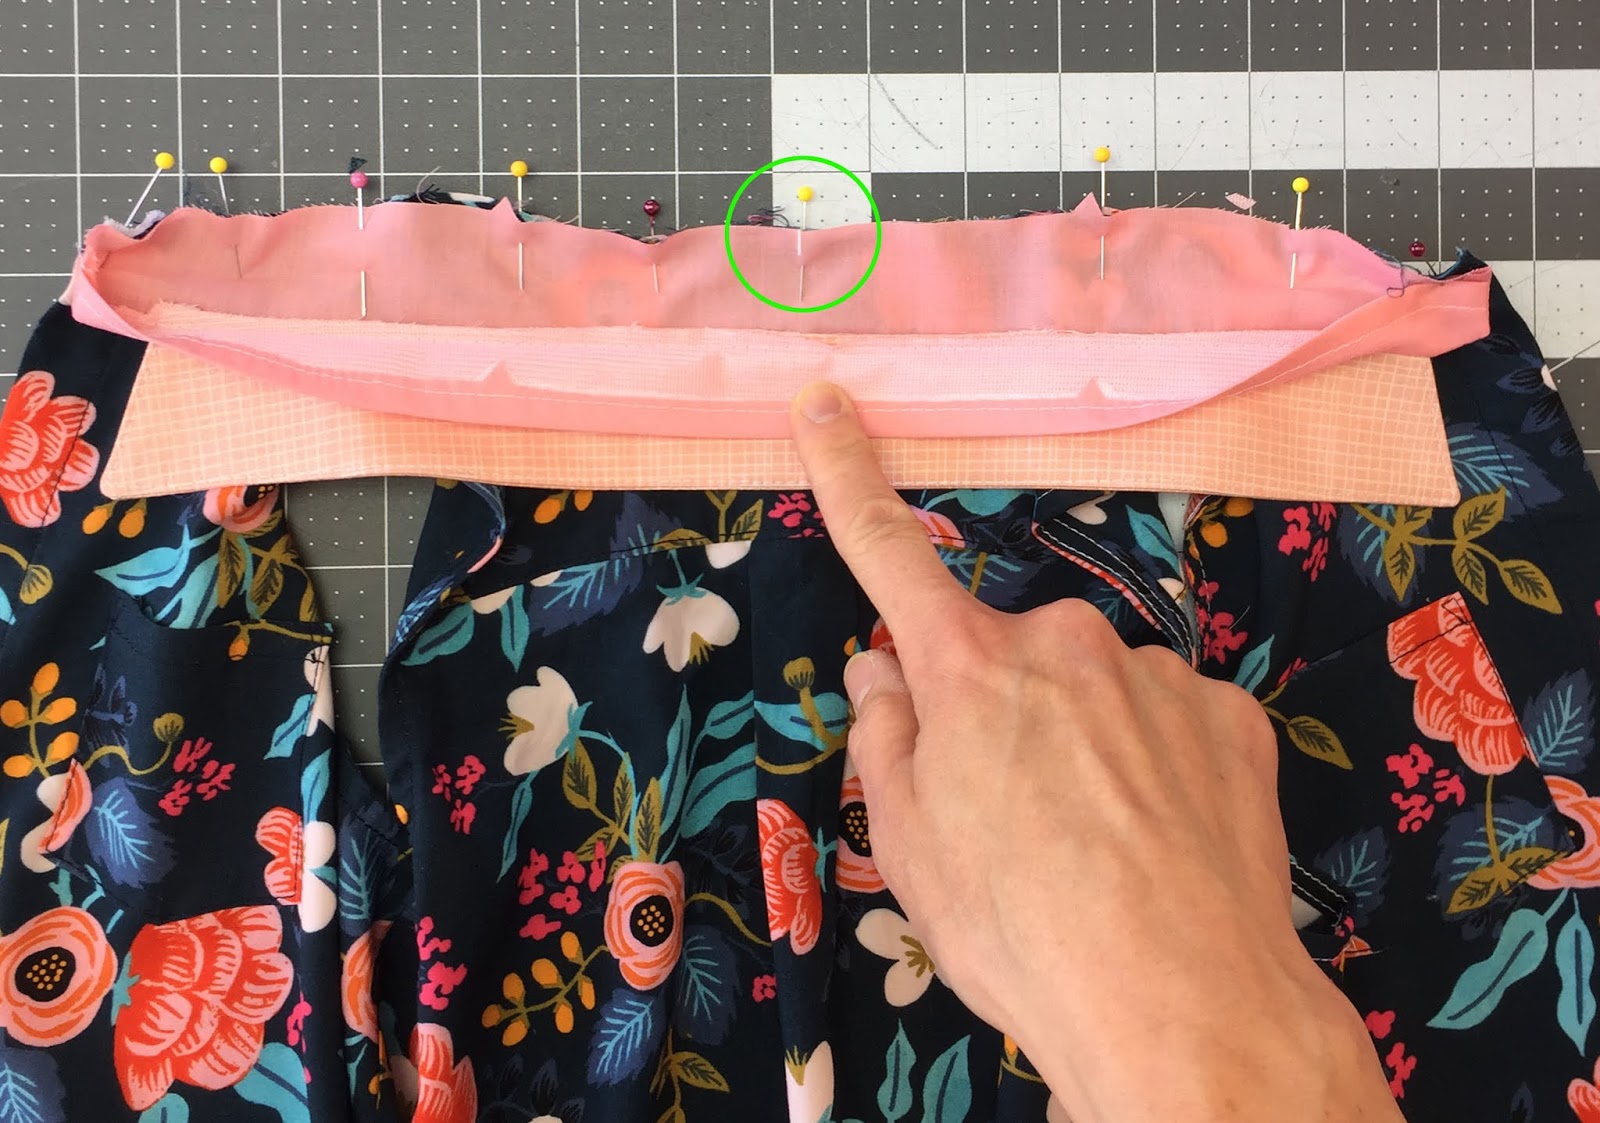
Pin right side of NON INTERFACED collar stand to RIGHT SIDE of the neckline, matching centers and double notches, centers, and ends:

Stitch 1 cm (3/8'') from one end to the other. Notice how the seam allowances at the ends are folded to their wrong side and stitched down:

Clip the neckline as shown in step 26 of the instructions (available on the Jalie website) before moving on to the next step (the clipped section is hidden under the collar stand in the next photo).
Bring folded collar stand edge to the wrong side of the neckline, covering the neckline seam and pin:
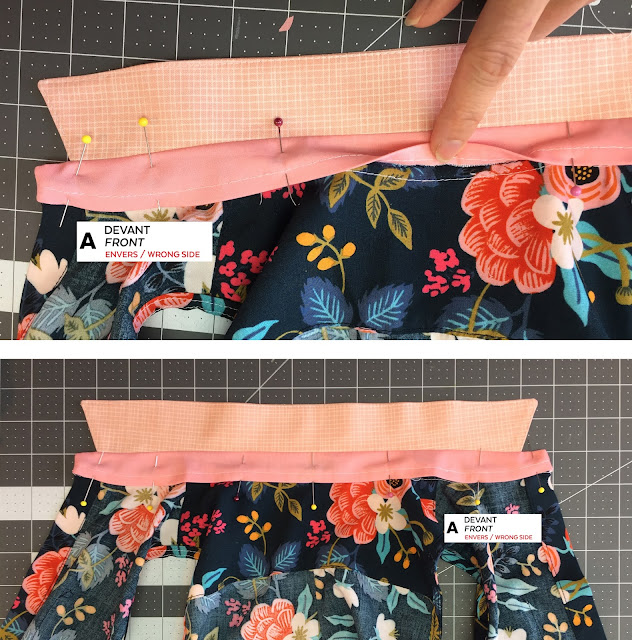
Flip the garment so the right edge is on top. For the photo, we repinned on the outside before topstitching:

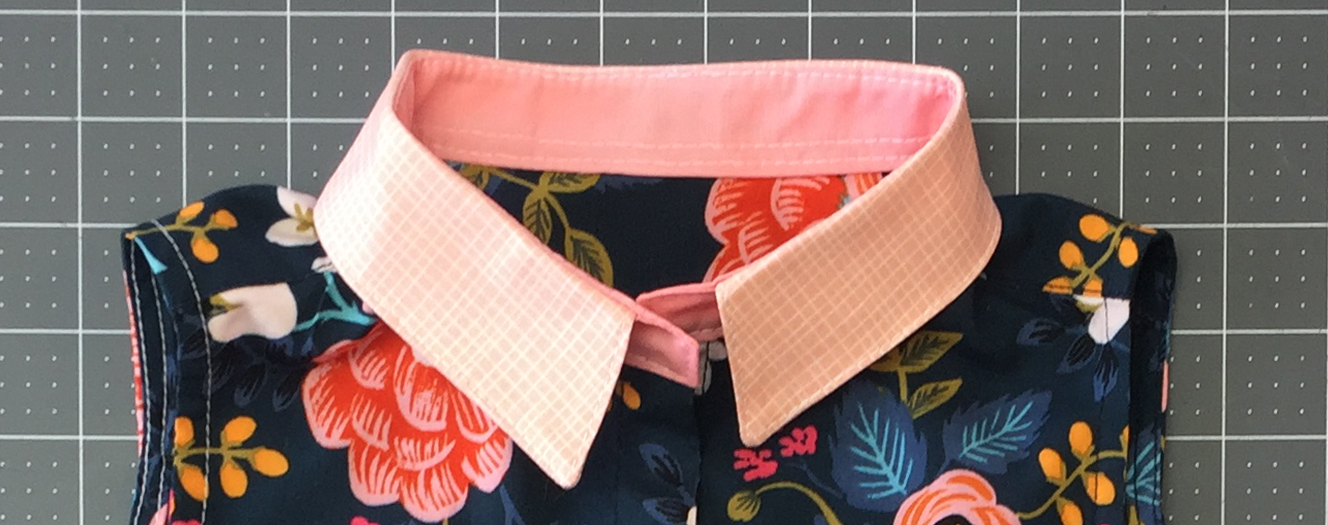
Topstitch along the edges of the collar stand, close to the edge (stitch on the collar stand side where there is no basting seam visible). For this tutorial, we are using white thread so you can see better but we recommend you pick a thread that matches your collar stand of course:

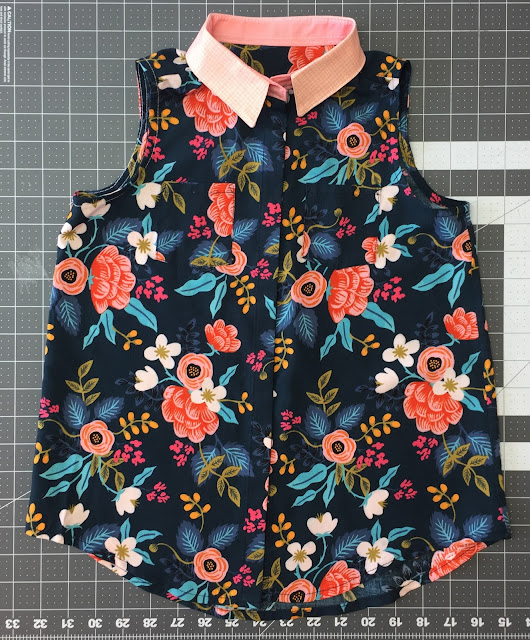
You're done! Your shirt has a collar :) Remove the basting stitch (extra stitch visible inside the collar stand) if you want. We left it on the photo below so you can see where all seams are located / visible when you finish sewing:
As we mentioned at the beginning of the post, you can use this technique on all projects where you have to attach a collar with collar stand. Practice makes perfect (or at least much better :). We hope you enjoyed it and that it will help you make shirt that you love in the future.
Don't forget to share your photos in our Facebook group, on Instagram and on our website!
Happy sewing!
You can download the ROSE shirt instructions directly on the pattern page on our website, where you will also see inspiring customer photos. Fun fact: this pattern was named ROSE after Jeanne's mother's favorite flower.
This sewing pattern includes 28 sizes and is available in paper (mailed to you) and PDF formats (print at home, copy shop and projector file)
PREPPING THE PIECES // INTERFACING
For a nice and crisp collar, you need to interface one collar and one collar stand piece. Apply fusible interfacing to the wrong side of the two pieces. Make sure notches are cut neatly to differentiate between single (triangle) and double (trapeze) notches:
Trace a line, 1 cm (3/8'') from edge, on the interfaced side of the collar with chalk or a pencil:
Pin collar pieces right sides together and stitch on the line. Trim seam allowances, turn right side out, press and topstitch close to the edge. Stitch all around to baste the open side shut at the same time, matching the double notches to keep everything straight.
To make sharp corners, make sure you pivot, needle down:

Fold bottom edge (with triangle notches) of the interfaced collar stand piece to the wrong side by 1 cm (3/8''). You can fold and press with a guide or ruler or sew a guide seam 1 cm (3/8'') from edge to fold precisely and quickly.:

Baste (sew with a long straight stitch that you can remove at the end) to hold the folded edge into position from one end to the other:
Pin NON INTERFACED side of the collar to NON INTERFACED collar stand piece, matching double notches and baste, 6 mm (1/4'') from edge:
Pin right side of interfaced collar stand to the collar (the collar is sandwiched between the collar stand pieces), matching double notches. Stitch as shown, 1 cm (3/8'') from edge, from one folded edge to the other:
Trim seam allowances and clip corners as shown:
Turn right side out, press and mark center (you can locate it by folding the collar stand in half, bringing its ends together):

Pin right side of NON INTERFACED collar stand to RIGHT SIDE of the neckline, matching centers and double notches, centers, and ends:
Stitch 1 cm (3/8'') from one end to the other. Notice how the seam allowances at the ends are folded to their wrong side and stitched down:

Clip the neckline as shown in step 26 of the instructions (available on the Jalie website) before moving on to the next step (the clipped section is hidden under the collar stand in the next photo).
Bring folded collar stand edge to the wrong side of the neckline, covering the neckline seam and pin:

Flip the garment so the right edge is on top. For the photo, we repinned on the outside before topstitching:

Topstitch along the edges of the collar stand, close to the edge (stitch on the collar stand side where there is no basting seam visible). For this tutorial, we are using white thread so you can see better but we recommend you pick a thread that matches your collar stand of course:

You're done! Your shirt has a collar :) Remove the basting stitch (extra stitch visible inside the collar stand) if you want. We left it on the photo below so you can see where all seams are located / visible when you finish sewing:

As we mentioned at the beginning of the post, you can use this technique on all projects where you have to attach a collar with collar stand. Practice makes perfect (or at least much better :). We hope you enjoyed it and that it will help you make shirt that you love in the future.
Don't forget to share your photos in our Facebook group, on Instagram and on our website!
Happy sewing!
← JULIA Underwear Tutorial // How to finish with Foldover Elastic BOBBIE V-NECK TOP // Color block and construction →