

PIKA - Dress Hack and assembly tips
The Pika top has been around for two years and people have made it as a sports bra, flowy tank, blouson tank, all versions included in the pattern. One of the most popular hacks we have seen was a dress hack. It is very easy to do and it makes a great dress for girls and women. Here is how you lengthen the pika tank into a dress:


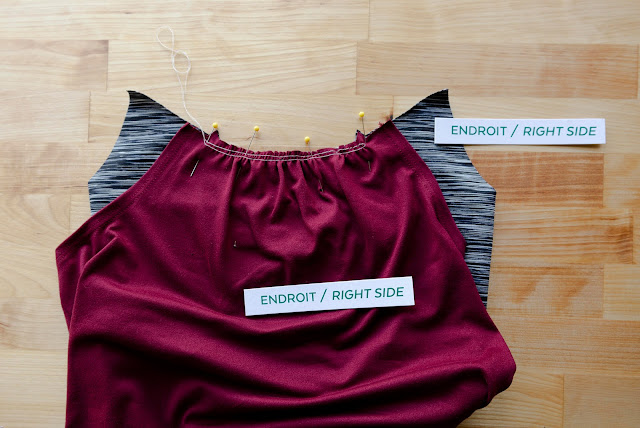


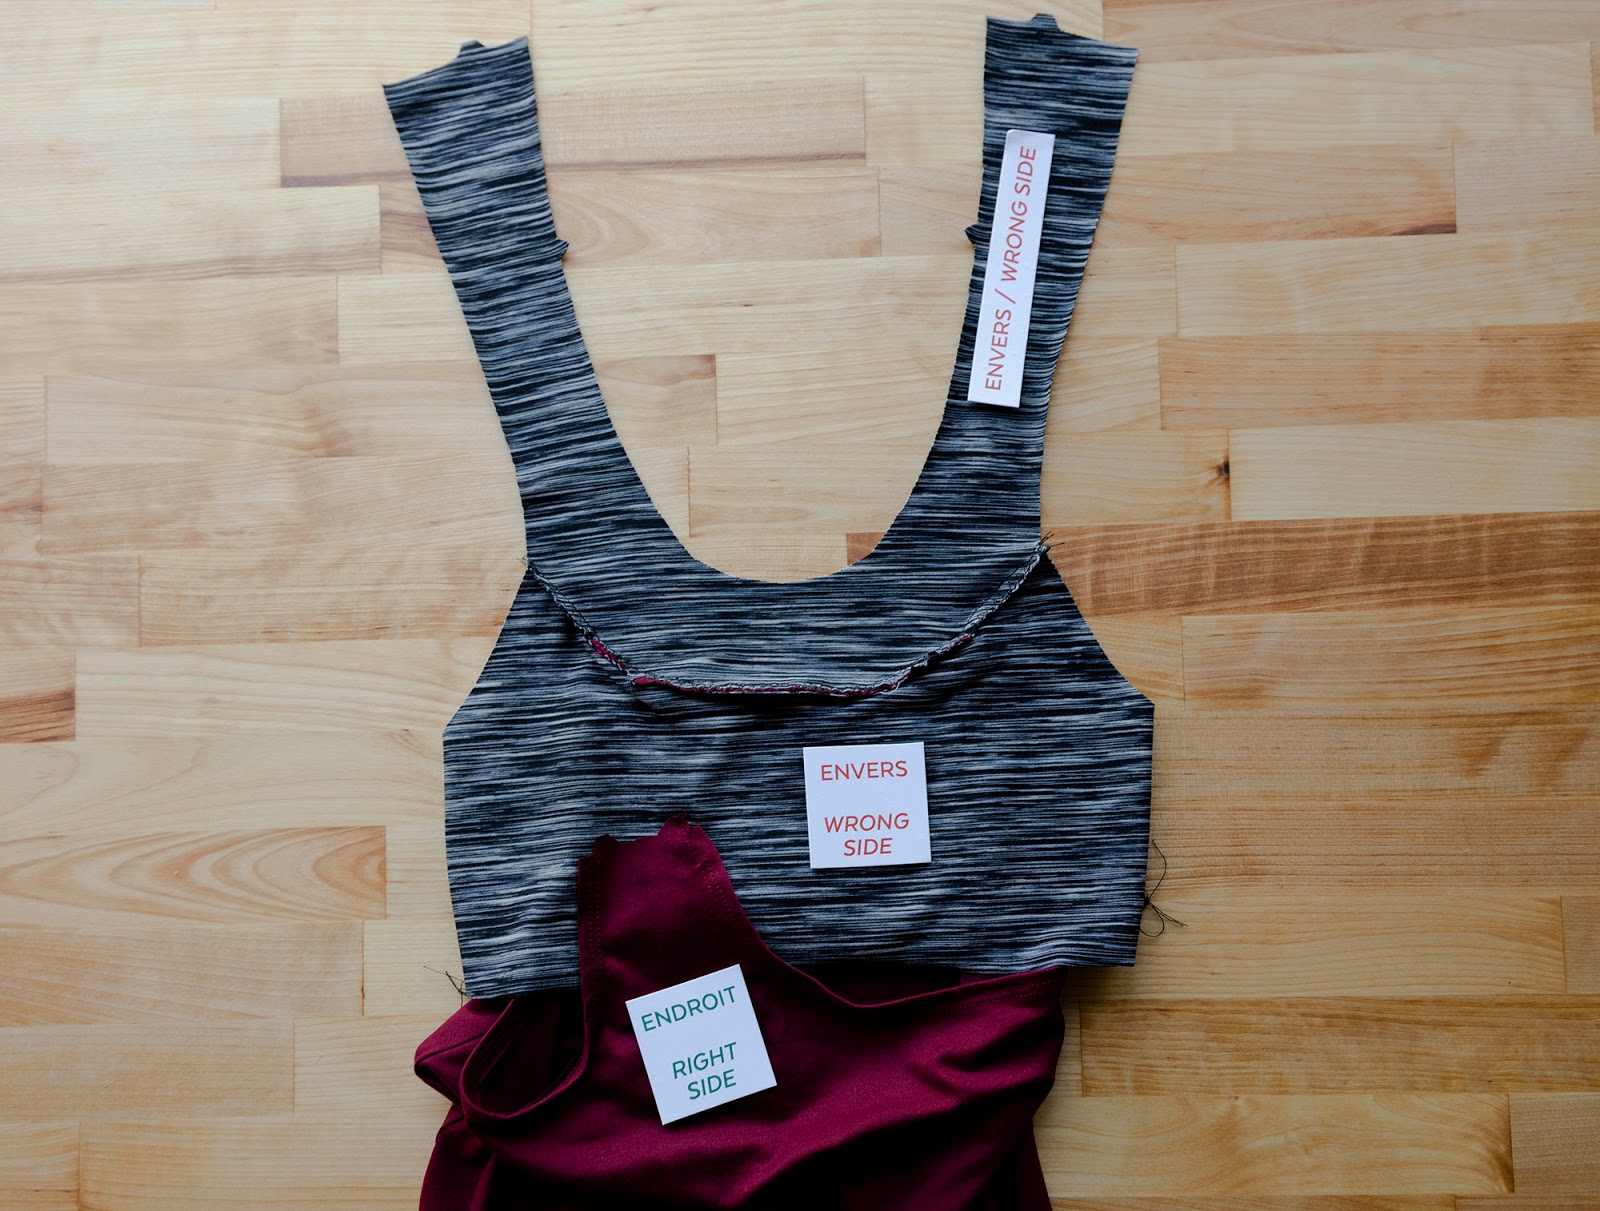
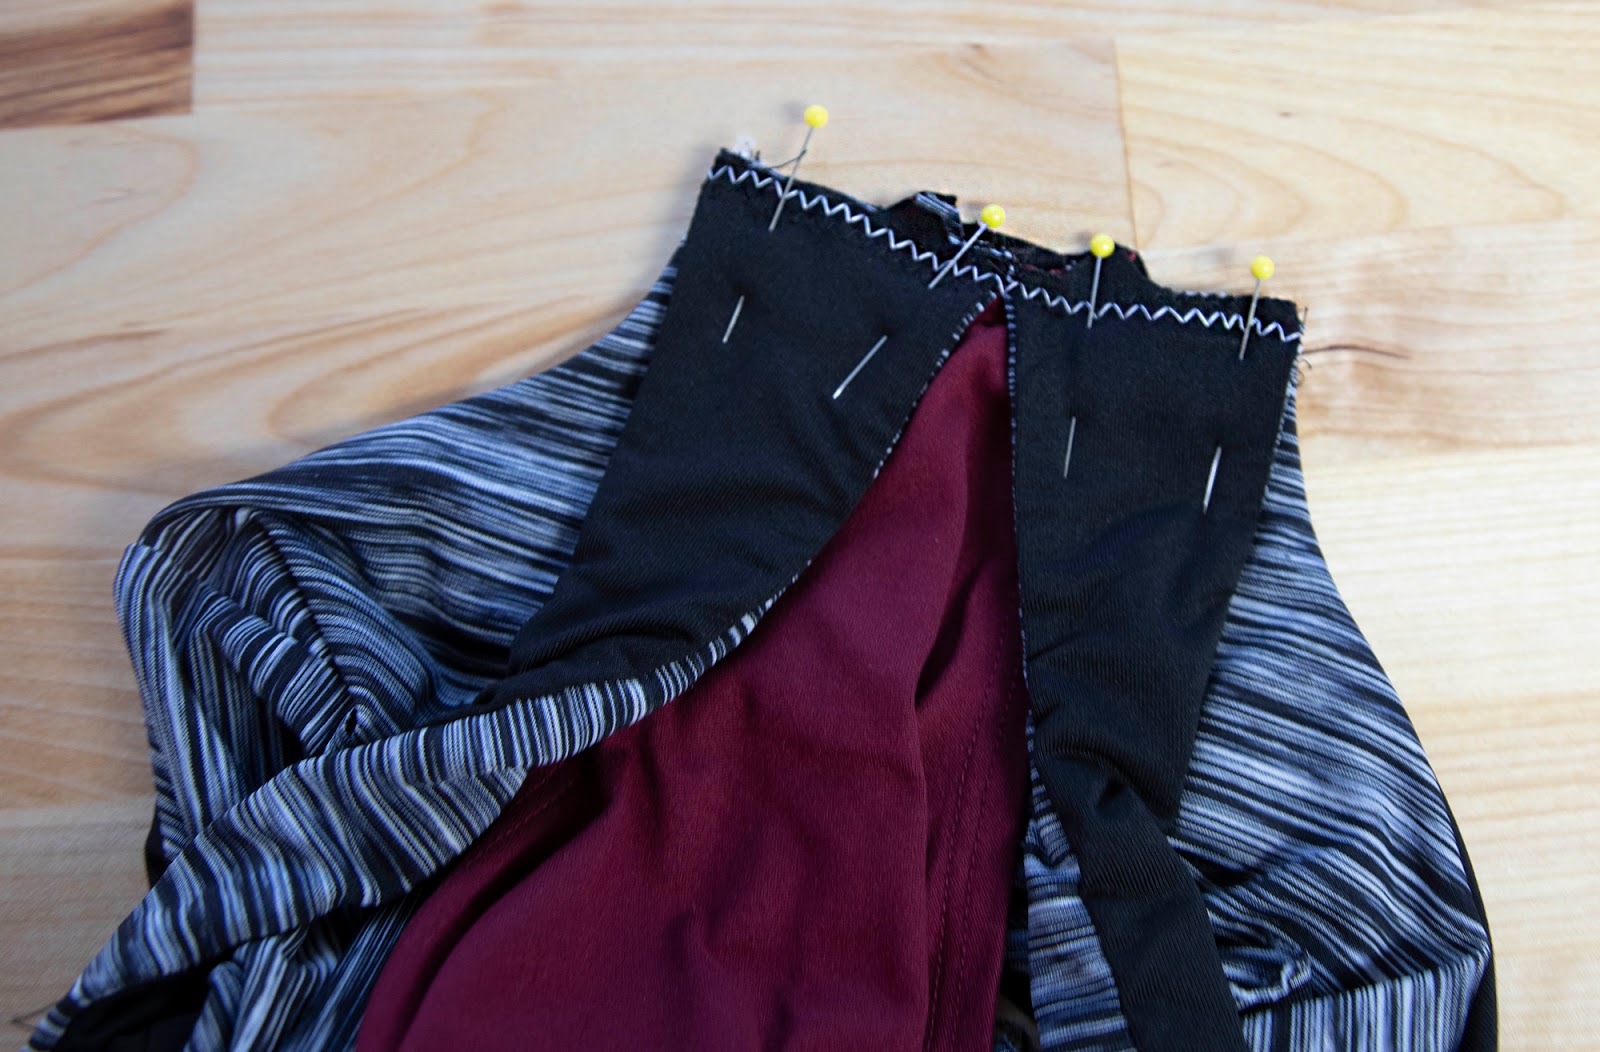
Pin bra straps over the tank back, matching the double notches again and baste with a zigzag. DON'T CATCH THE INNER LAYER OF THE BACK YET!

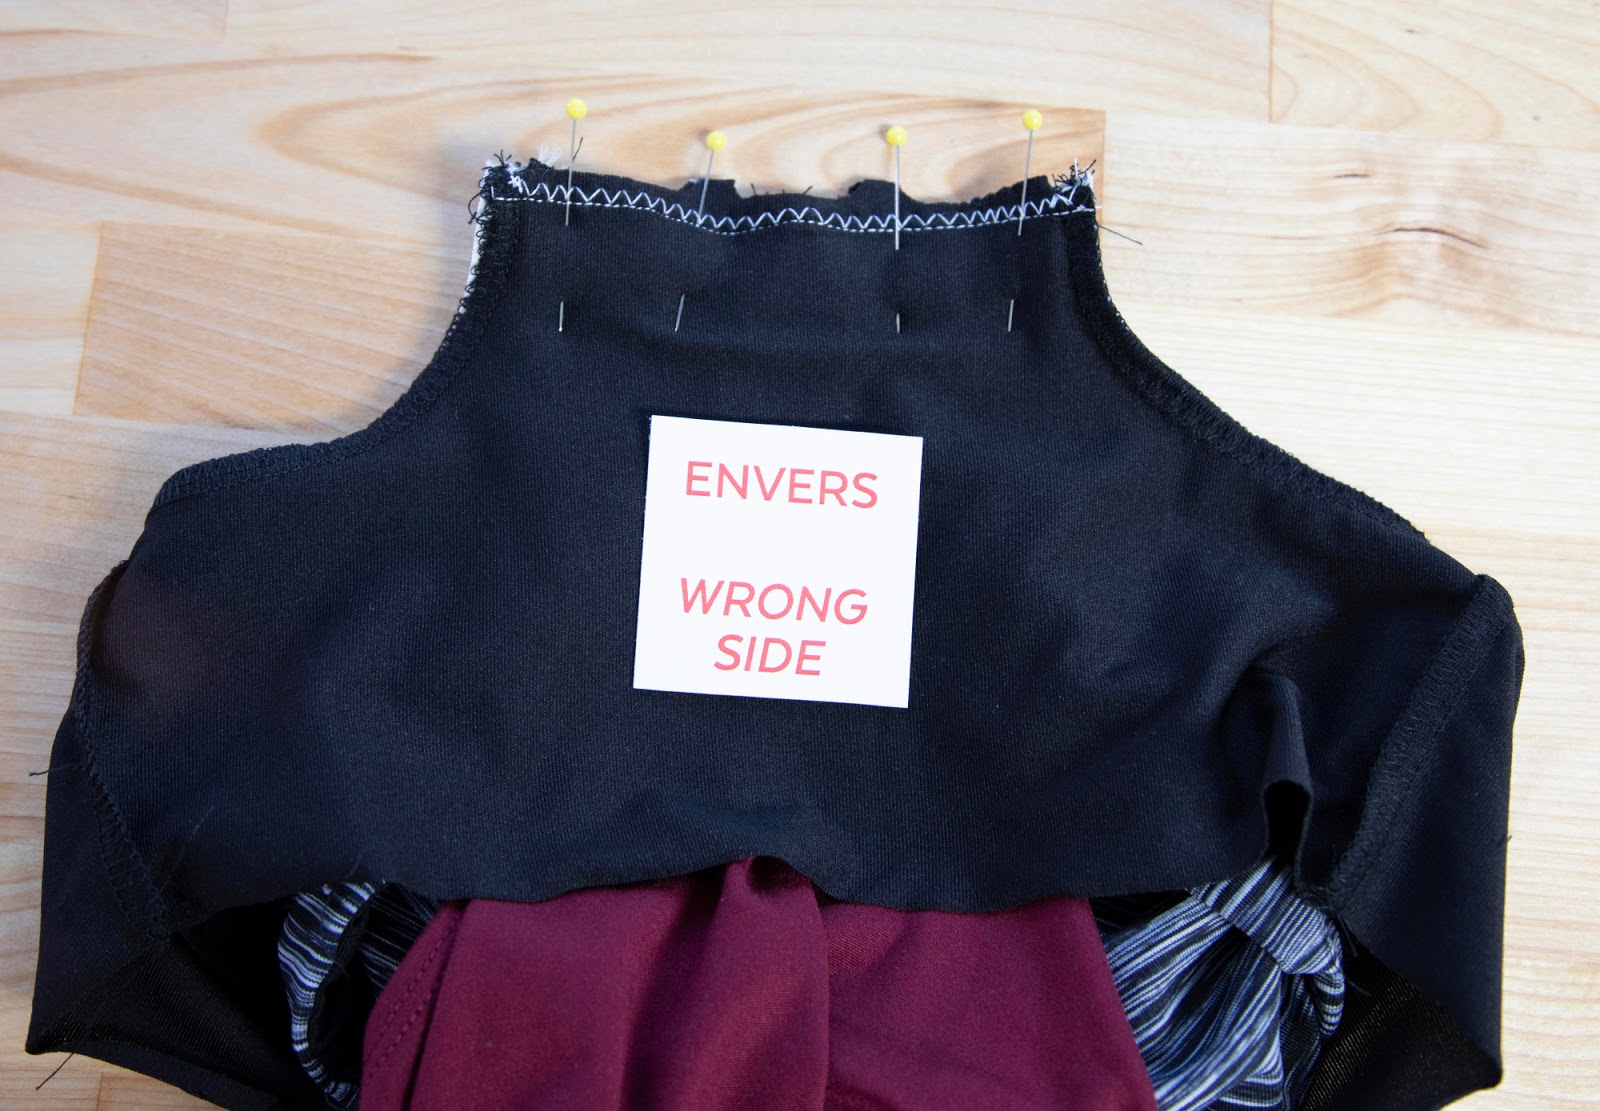
Turn inside out so that the straps are sandwiched between the bra layers and stitch across the back:

Now that all layers are held together in the back, it's time to join the front layers together at the seam. The illustration can be a bit confusing so we did a little video:
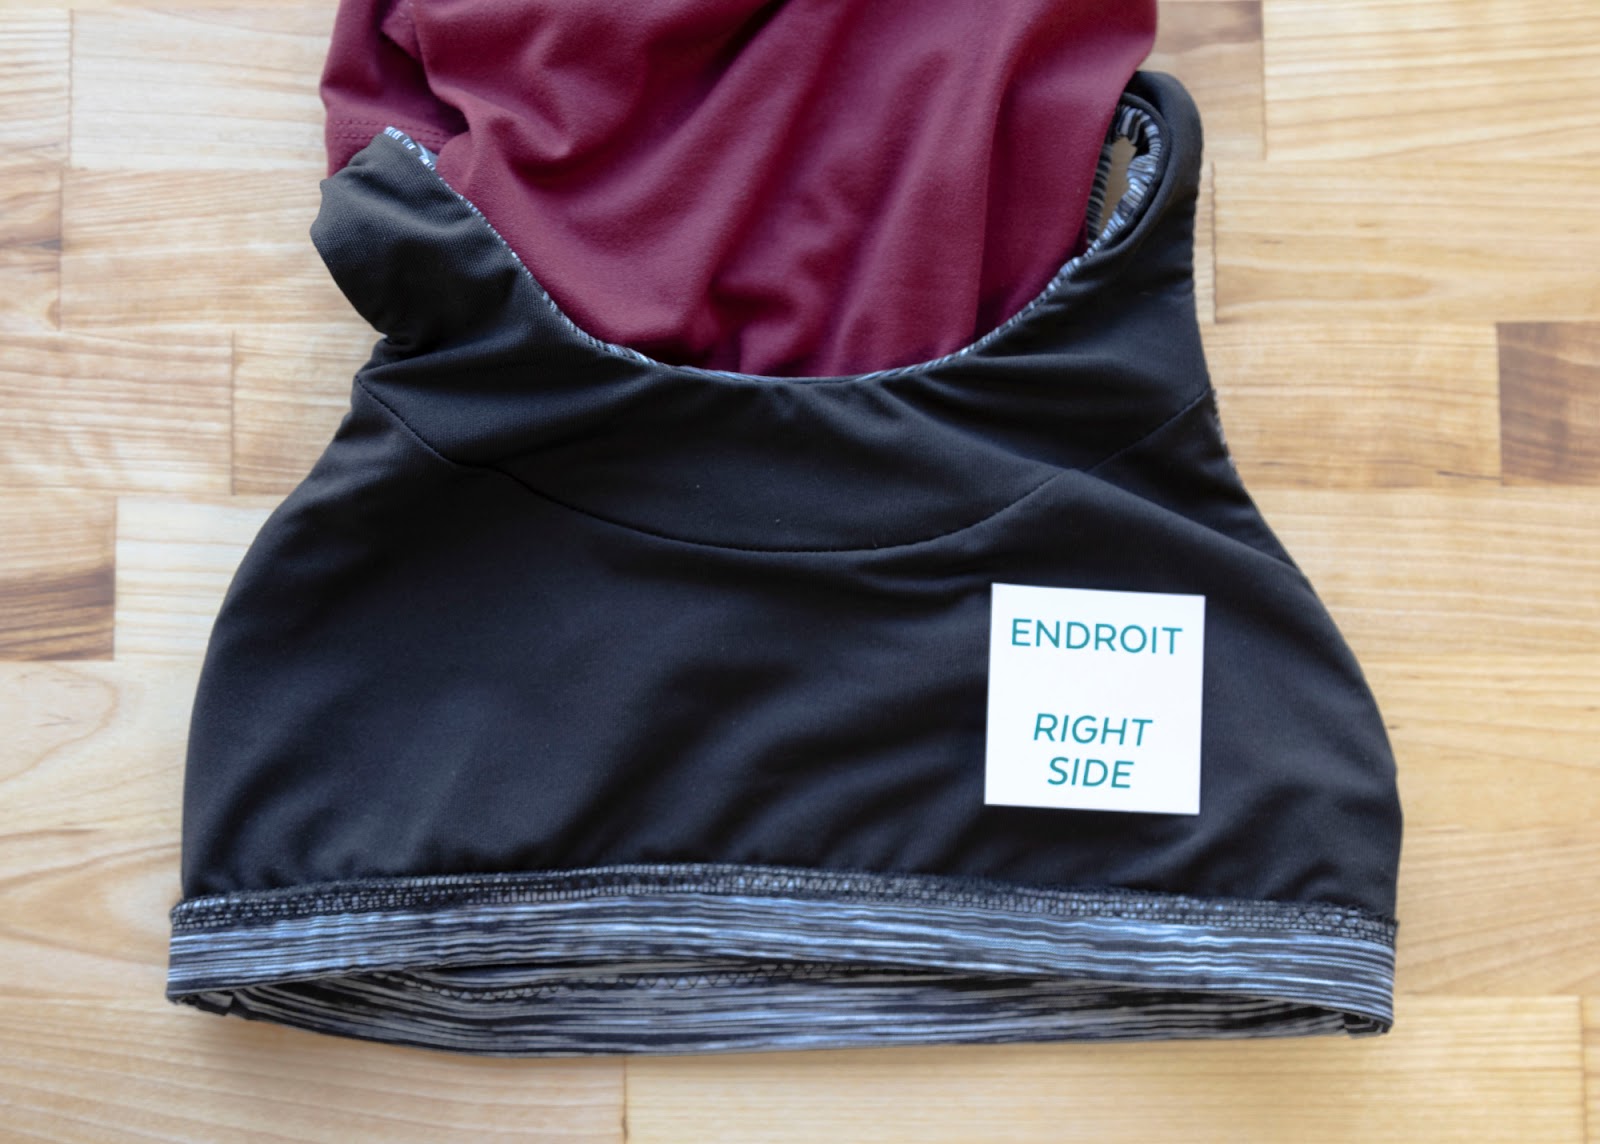
After you pin at the notches and stitch, the layers won't move or slip:
All that is left to do now is to apply elastic at the bottom of the bra (turned and topstitched) and hem the bottom edge of the tank:


We would like to thank Club Tissu for the fabric used in this tutorial. You can find their double brushed poly collection on their website. For the bra, we used an athletic knit that was not brushed so it would not cling to the outer layer.
Happy sewing!
 |
| A Pika top prototype, in kids size, as a blouson tank (the hip band is folded under on the photo) |
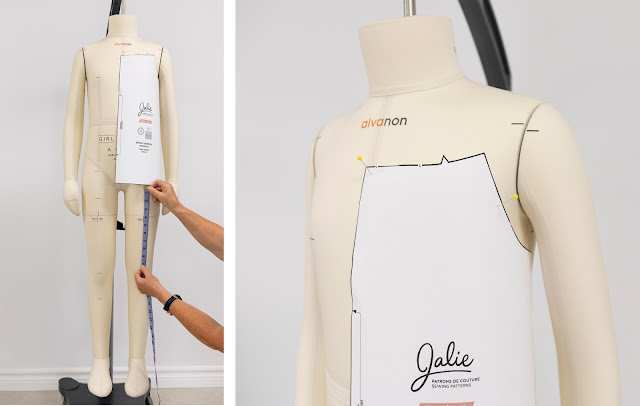
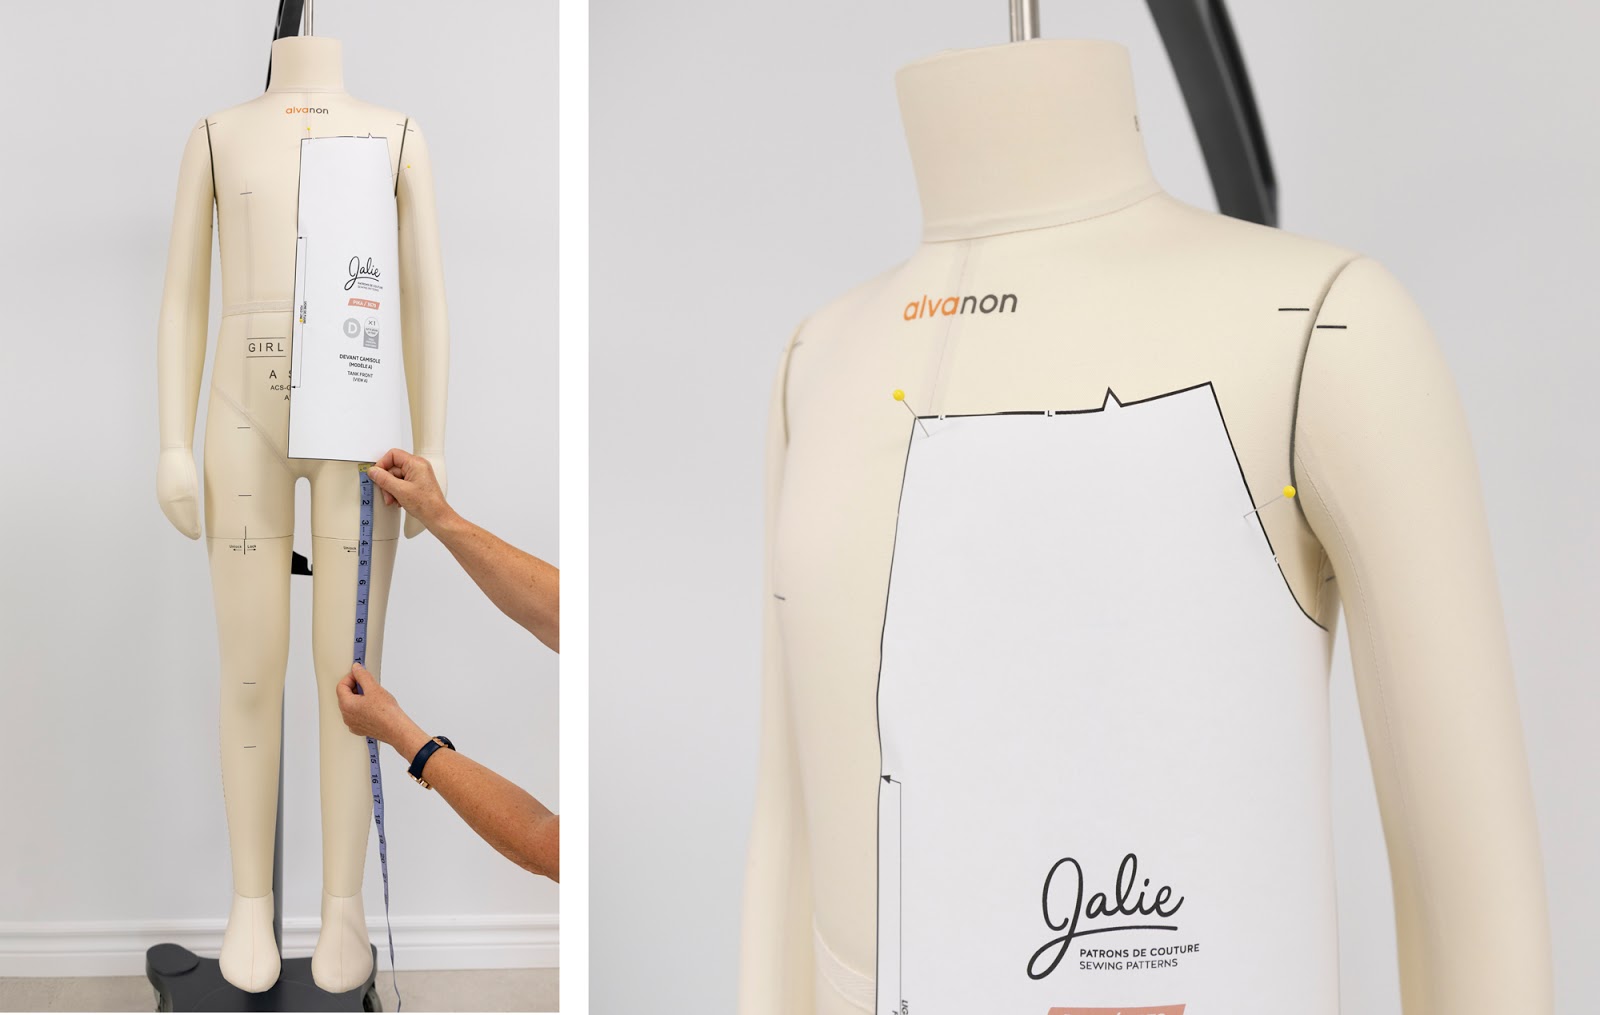
DETERMINE LENGTH
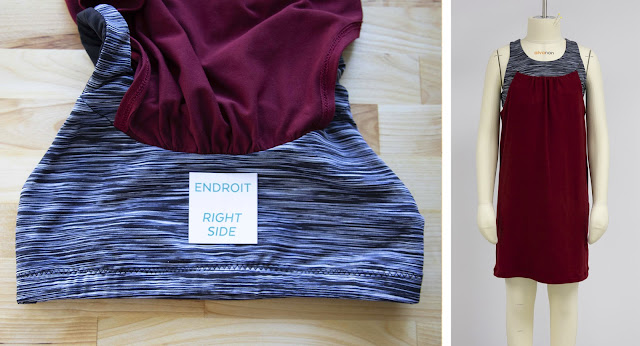
For our Size L (8) dress, we decided to go with a 10'' (25 cm) extension. It is not easy locating exactly where the pattern will sit on the body so we left some room under the arm and measured from the bottom edge of the piece to where we wanted to hit (just above the knee).
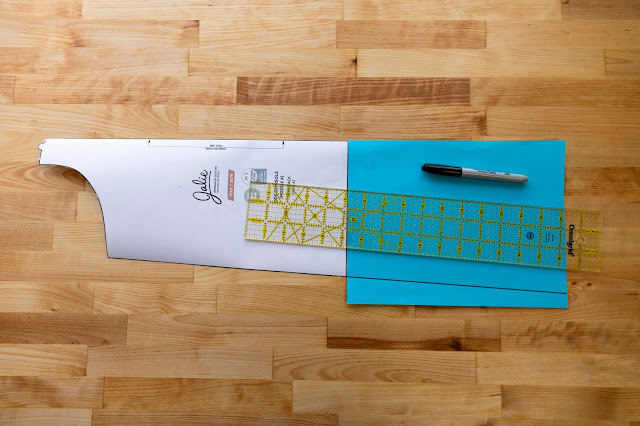
MODIFY THE PATTERN
Add length to the tank back piece (E), measuring at center front and keeping it straight. Then, prolong the side seam line in the same angle as the original pattern and the bottom aligned with the center back.

For the front tank piece (D), you will need to add at the side seam and at the bottom. Tape your paper so you have room to trace:
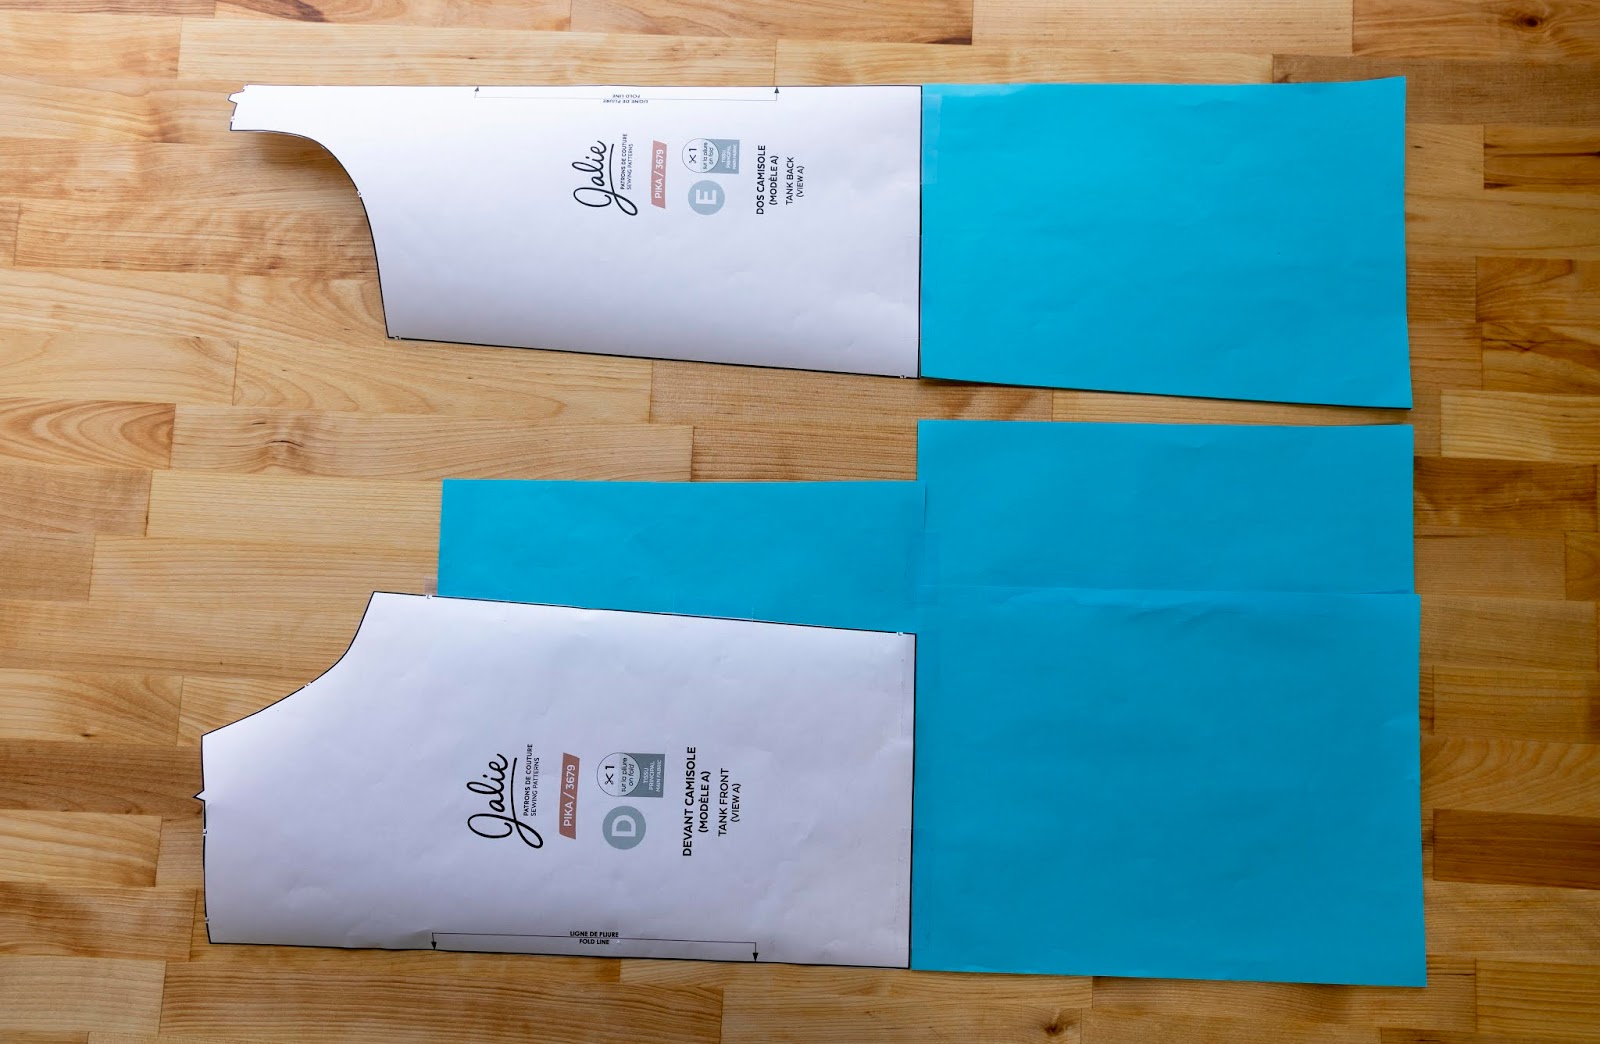
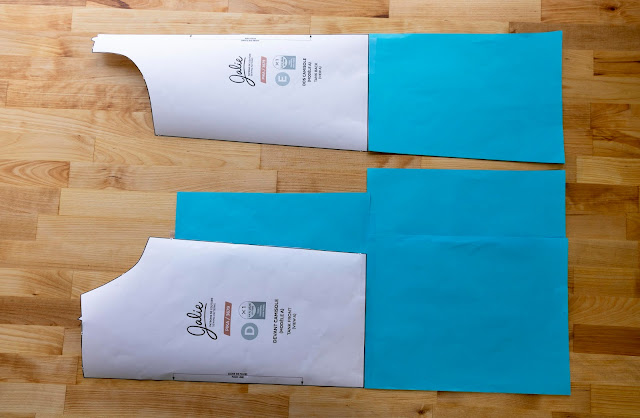
Using your back piece as a guide, trace the new side and bottom edges on piece D, making sure the center back edge is parallel to the center front edge:

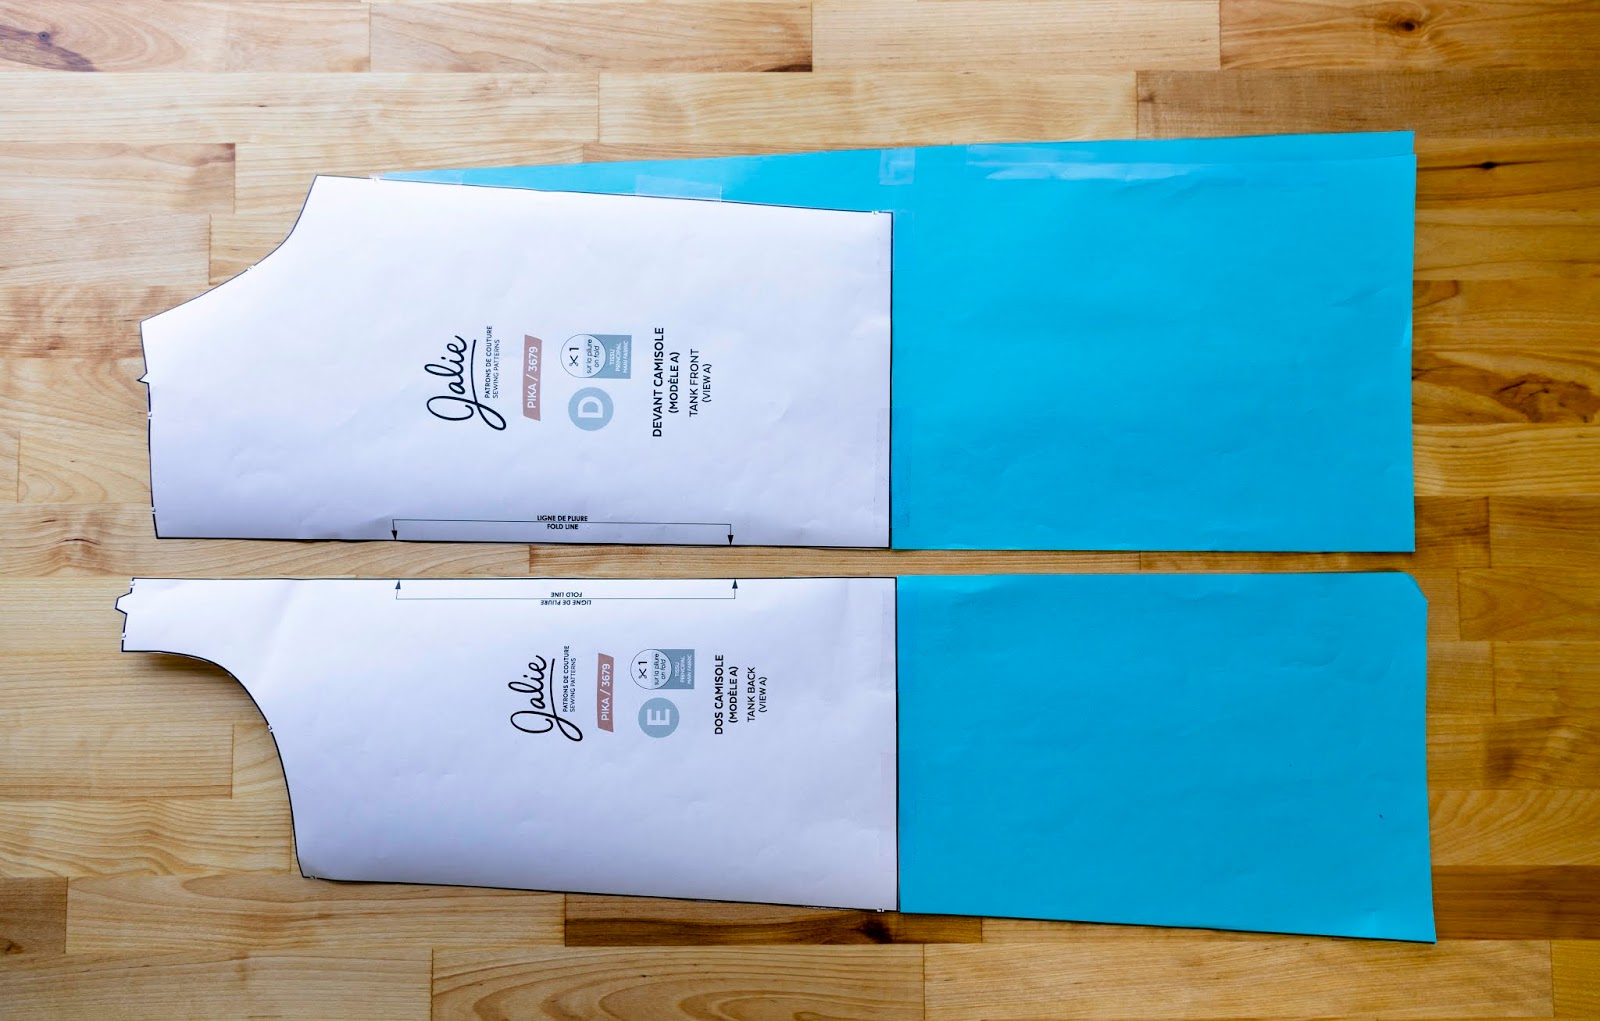
Cut your paper along the lines. You are ready to cut your fabric and sew it, following the sewing instructions for view A (without hem band):
TANK CONSTRUCTION
Folding the curves of the front and back tank armholes to the wrong side and topstitch:
On the front, sew two rows of gathering stitches along the top (one inside the seam allowance, one outside):

Pin front to back at side seams and stitch:

BRA CONSTRUCTION
Pin bra front to bra back at side seams and stitch. Repeat for the lining (inner fabric)

Turn right side out and mark the center front on the tank and bra with a pin:

Pull threads to gather the top edge of the tank and pin its wrong side to the right side of the bra, matching notches and centers:

Baste and then pin the right side of the straps (outer fabric) to the right side of the curved edge (bra+tank front), from one bra corner to the other. Make sure to match notches and centers, and stitch:

Pin strap lining (inner fabric) to right side of bra front lining / inner fabric and stitch:

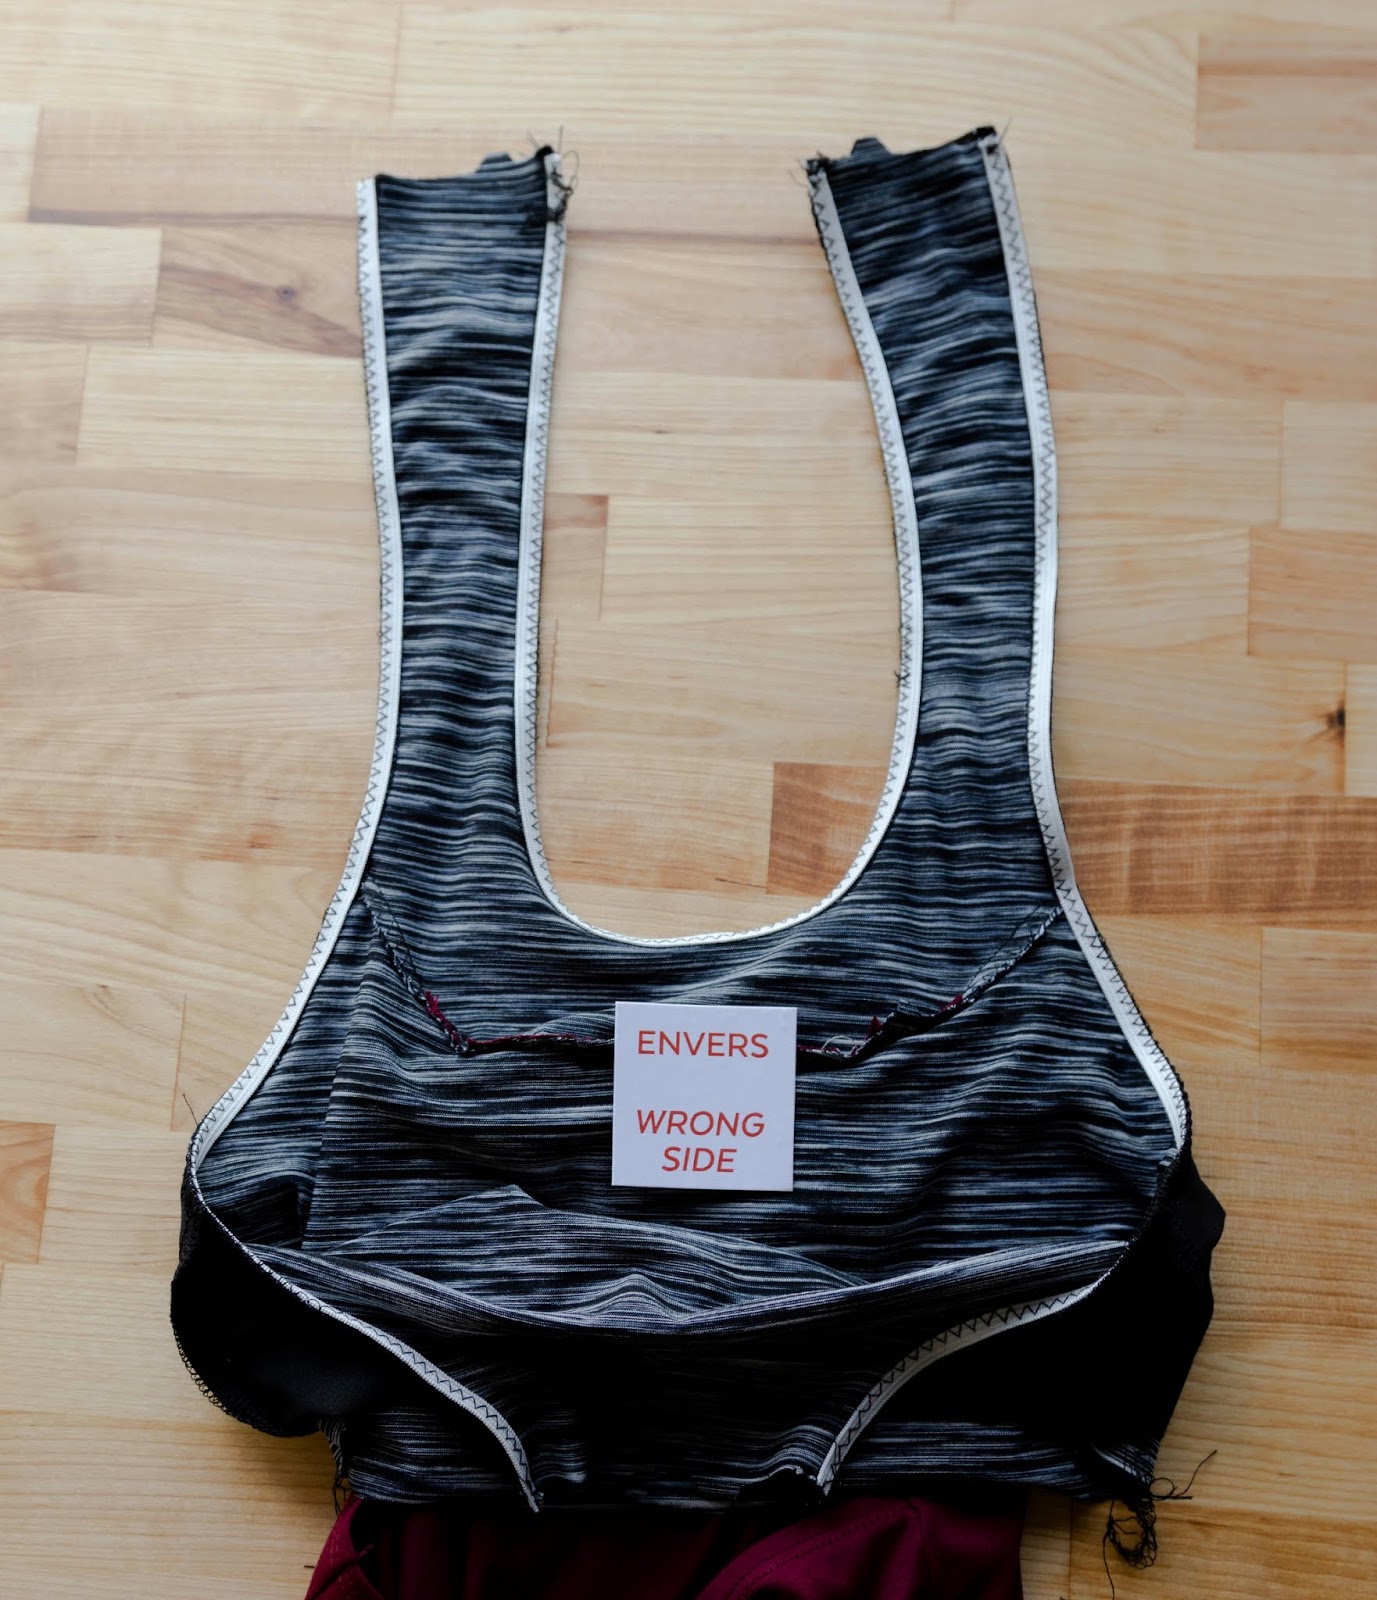
Bring the seam allowances towards the bottom (press if your fabric can handle some heat):
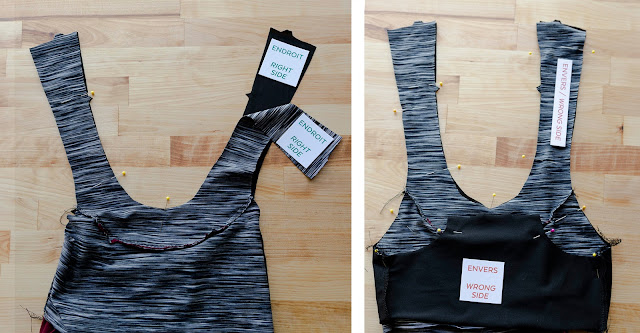
Pin strap inner fabric and outer fabric right sides together at the neckline, matching notches, and stitch:
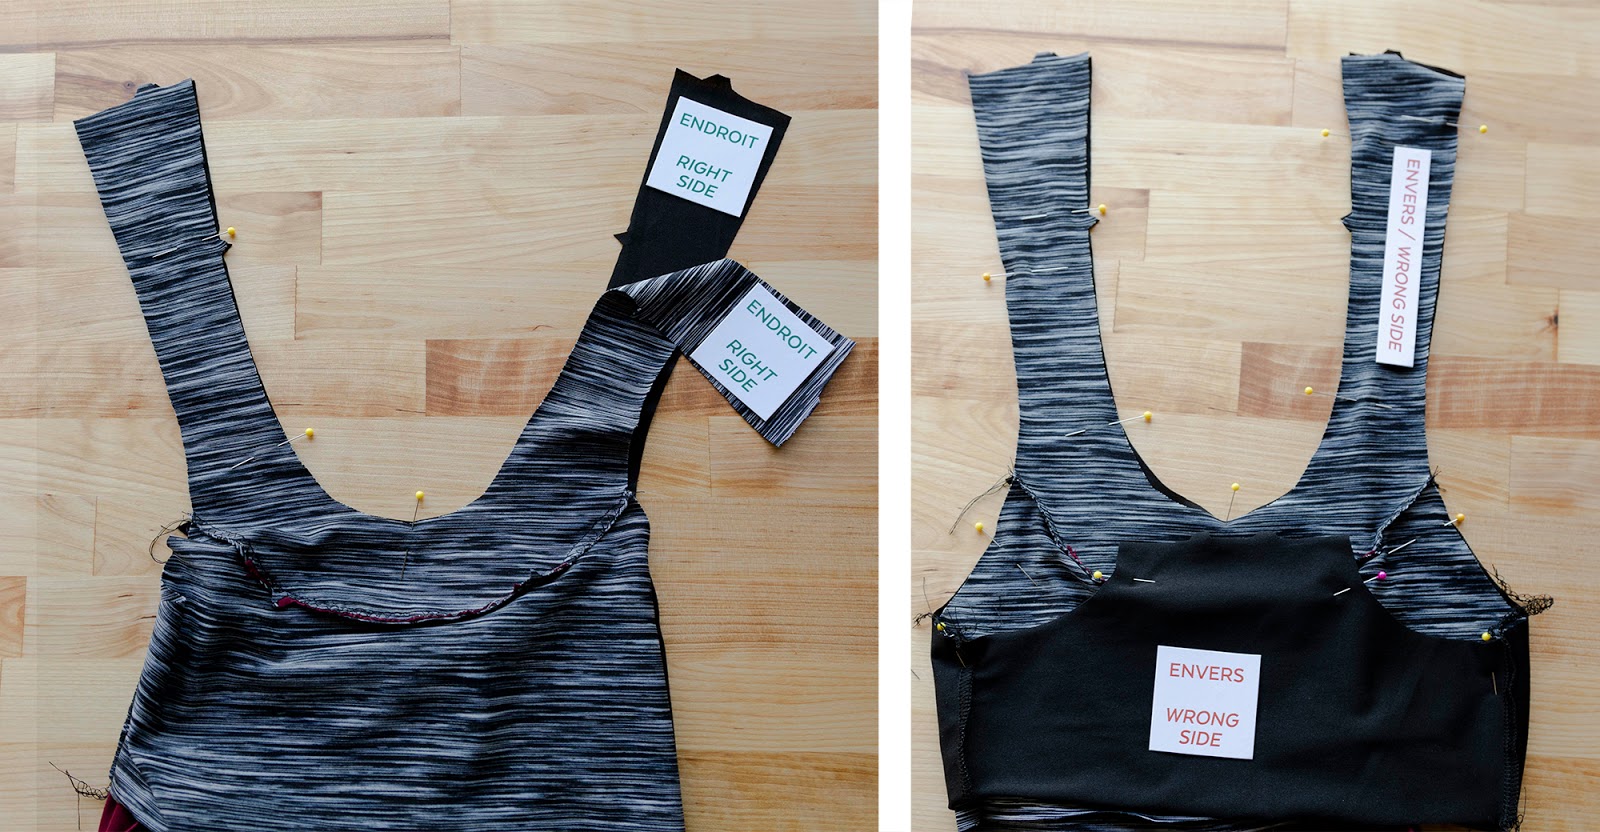
Apply elastic to the seam allowance, with a zigzag stitch. Make sure your zigzag stays within the seam allowance (6 mm (1/4'') from edge):
Pin wrong side of the tank back upper edge to the right side back of the bra (OUTER LAYER ONLY), matching the double notches, and baste:

Pin bra straps over the tank back, matching the double notches again and baste with a zigzag. DON'T CATCH THE INNER LAYER OF THE BACK YET!
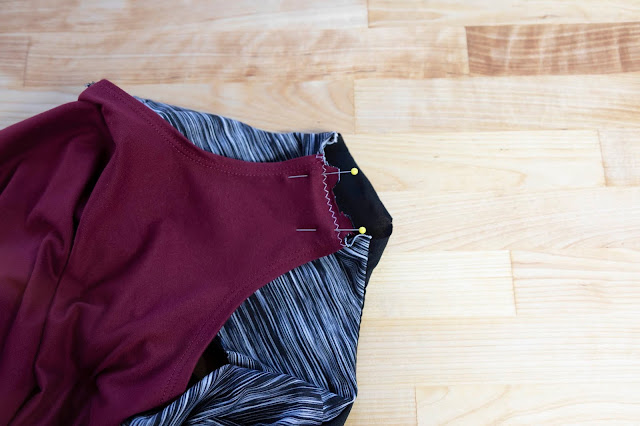
Turn inside out so that the straps are sandwiched between the bra layers and stitch across the back:
Now that all layers are held together in the back, it's time to join the front layers together at the seam. The illustration can be a bit confusing so we did a little video:
After you pin at the notches and stitch, the layers won't move or slip:
All that is left to do now is to apply elastic at the bottom of the bra (turned and topstitched) and hem the bottom edge of the tank:


We would like to thank Club Tissu for the fabric used in this tutorial. You can find their double brushed poly collection on their website. For the bra, we used an athletic knit that was not brushed so it would not cling to the outer layer.
Happy sewing!
2918 V-Neck T-Shirt // Video tutorial →