 Skip to content


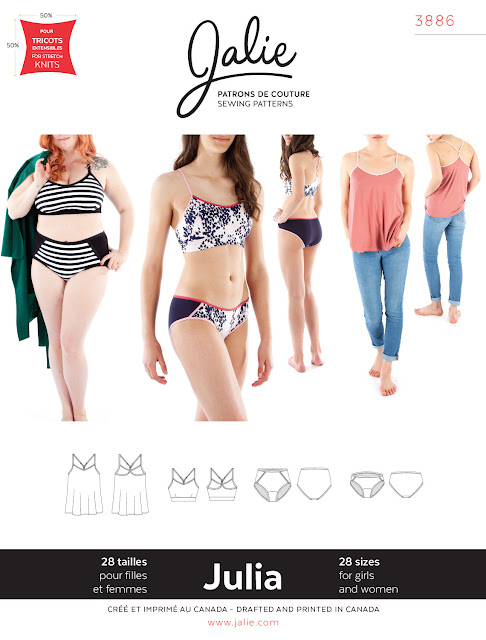
JULIA Underwear Tutorial // How to finish with Foldover Elastic
What is more satisfying than using sewing our fabrics down to the remnant, not wasting anything? One of our favorite stash-busting patterns is the JULIA panties pattern. The JULIA sewing pattern includes a bralette, cami, and panties (with a low or high waist), all finished with foldover elastic.
We covered the bralette in an earlier post. Today we will walk you through the sewing instructions for the panties and show you 2 ways to finish the waist with foldover elastic. You can download the sewing instructions directly on the website if you want to have all the steps handy instead of keeping your pattern sheet next to you.
If you prefer PDF patterns, please note that the Julia panties pattern is only a 6-page printout! You can print one size at a time to skip tracing and start sewing ASAP.
GETTING READY
The panties pattern (view C for high waist, view D for low waist) includes 3 pieces: FRONT, BACK, AND CROTCH. In this tutorial, we are using the same fabric for the crotch and its lining. You could use a different fabric for the lining if you are using synthetic fabric for the panties but want natural fibers for the crotch lining for example.
You need to cut three pieces of foldover elastic (FOE): two for the leg openings and one for the waist. Lengths are listed in a chart on the pattern. To make sure you don't end up sewing a waist elastic into a leg opening, tie the leg elastics together before you start. This way, no matter if you get distracted or pause your project, you will always know which elastic is which.
Make sure the notches on the back piece (little triangles) are cut neatly so that they are visible. They are very important because they indicate where to start stretching the elastic when you sew it later on.

For the assembly, we will use contrast thread so you can see everything. Normally, we would use thread that matches the fabric for assembly, a thread that matches the FOE color for topstitching.
ASSEMBLY
Pin the crotch piece (narrowest end) to the front, right sides together, and stitch: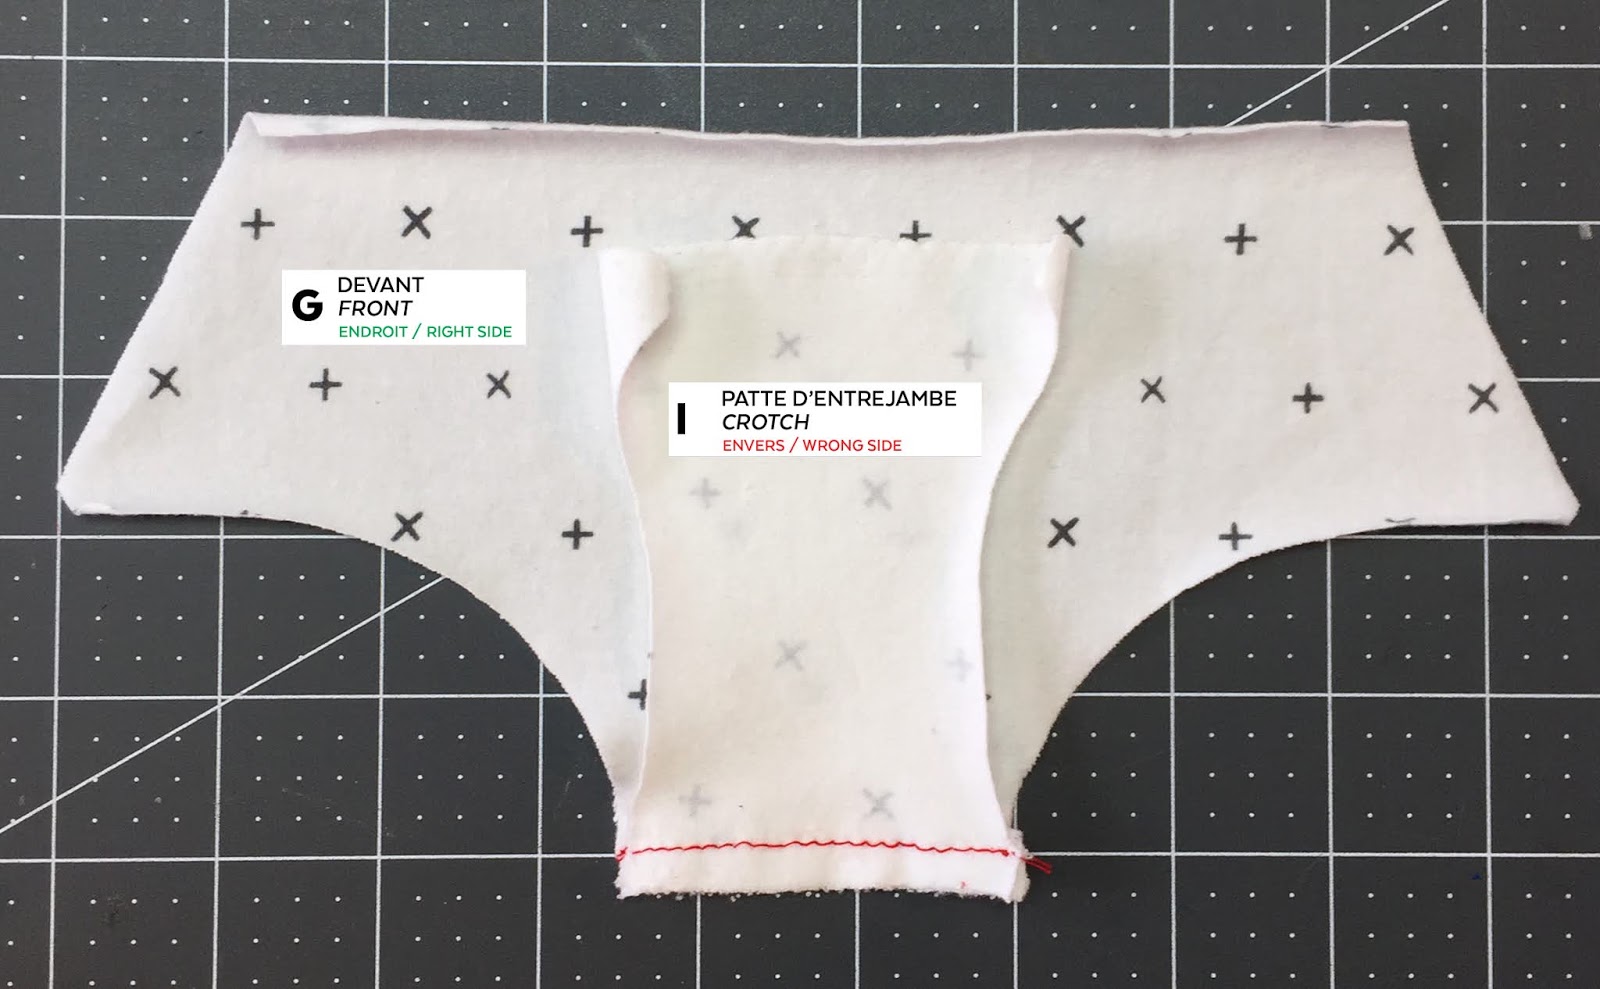
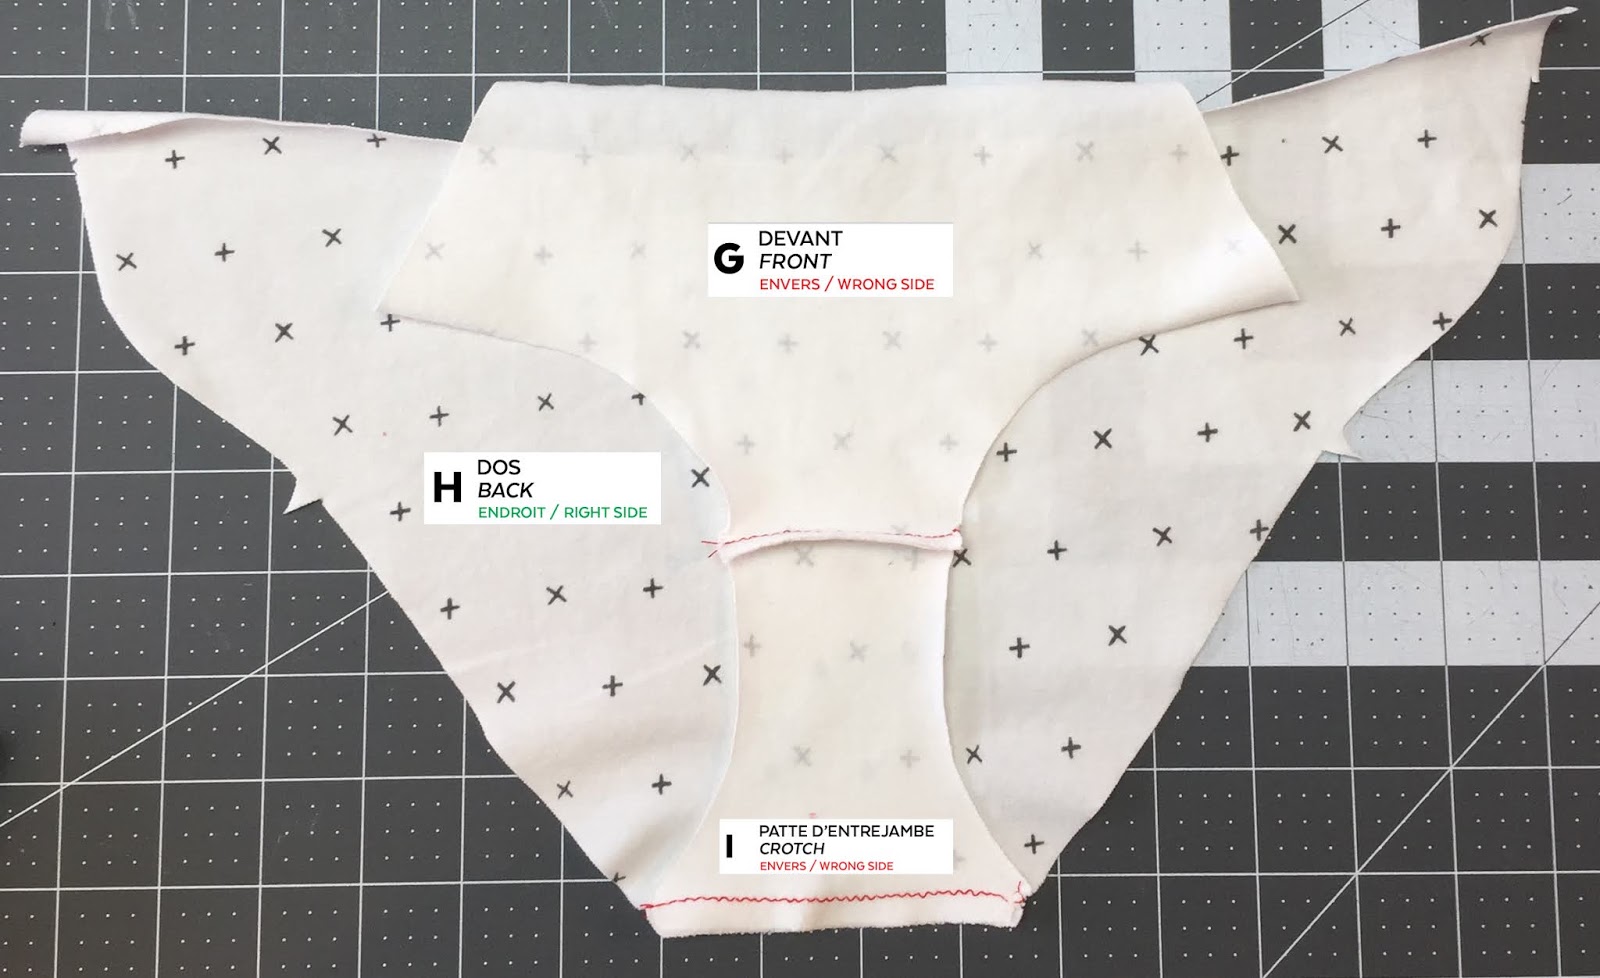
Pin the widest end of crotch piece to the back, right sides together, and stitch:
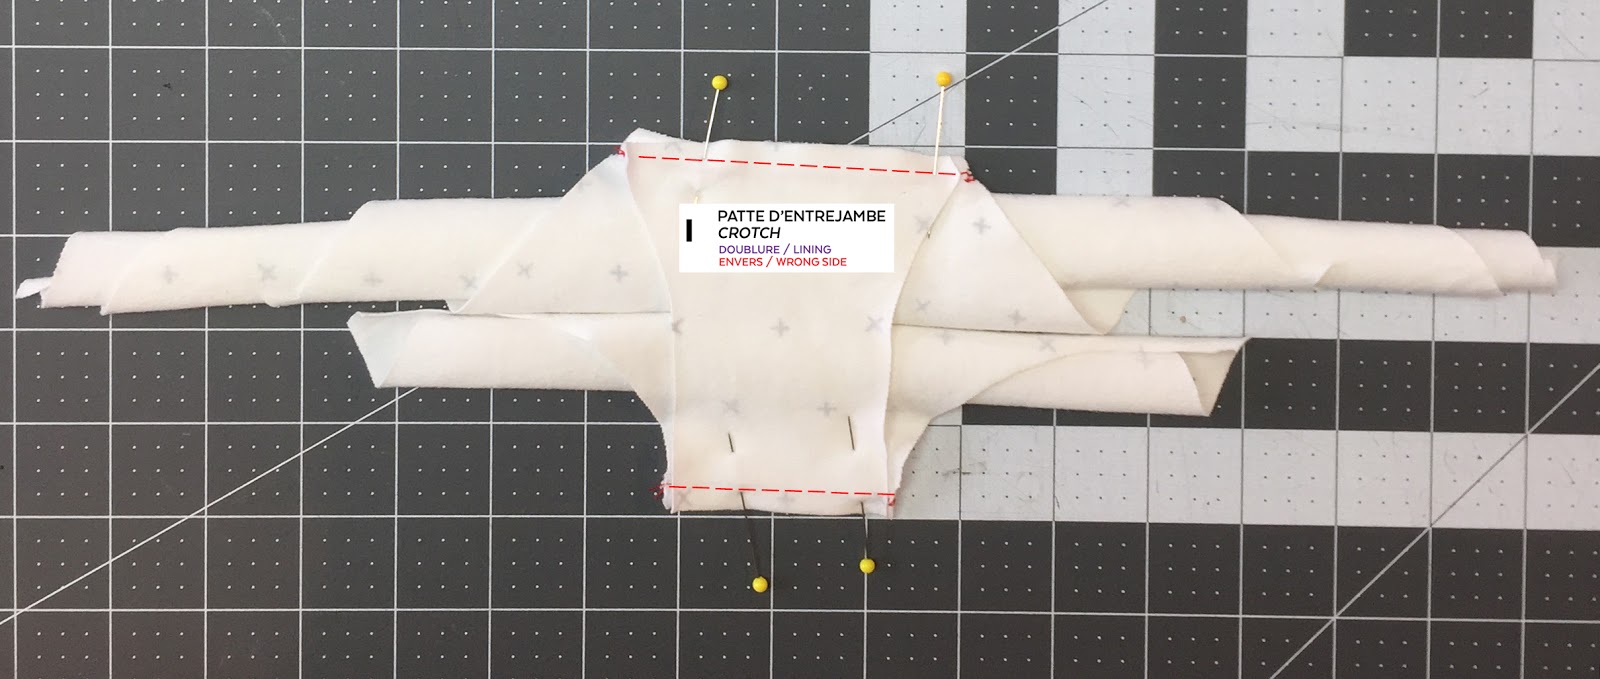
Place piece right side up on your sewing table. Roll the front and back piece onto the crotch piece, until you can see the seam allowances:
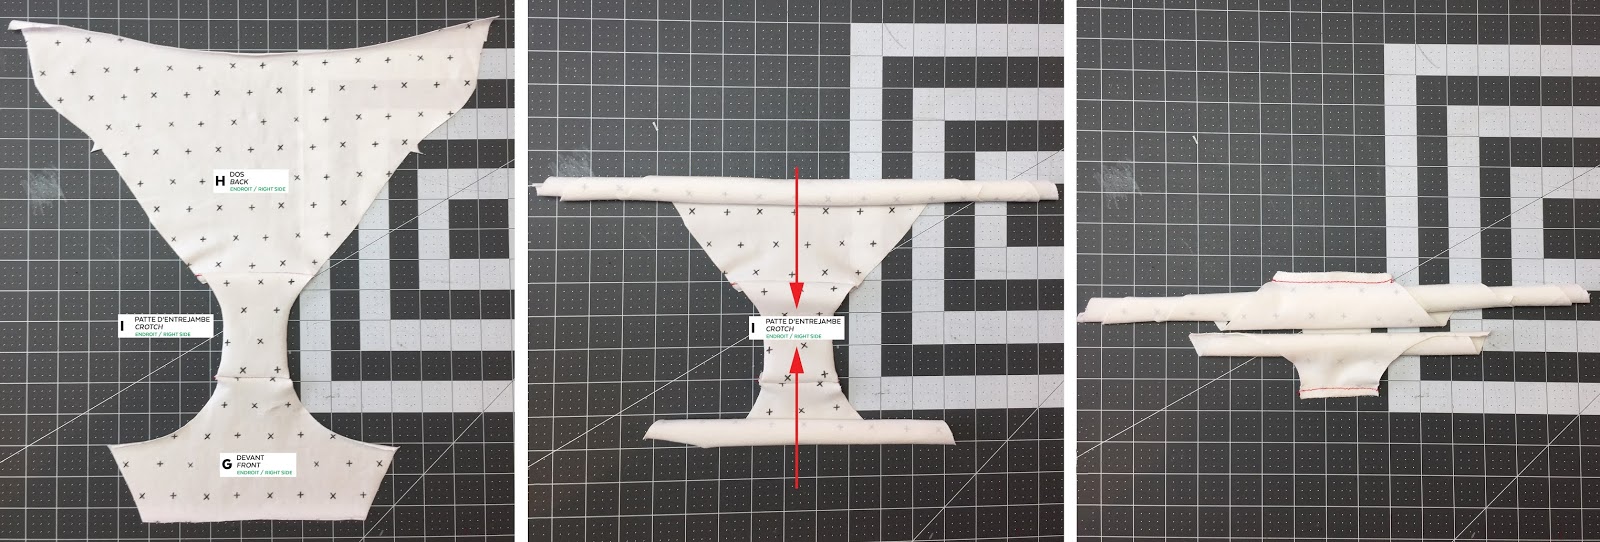
Pin your crotch LINING piece, right side against the rolls, at the seam allowances. Stitch over the visible seam:
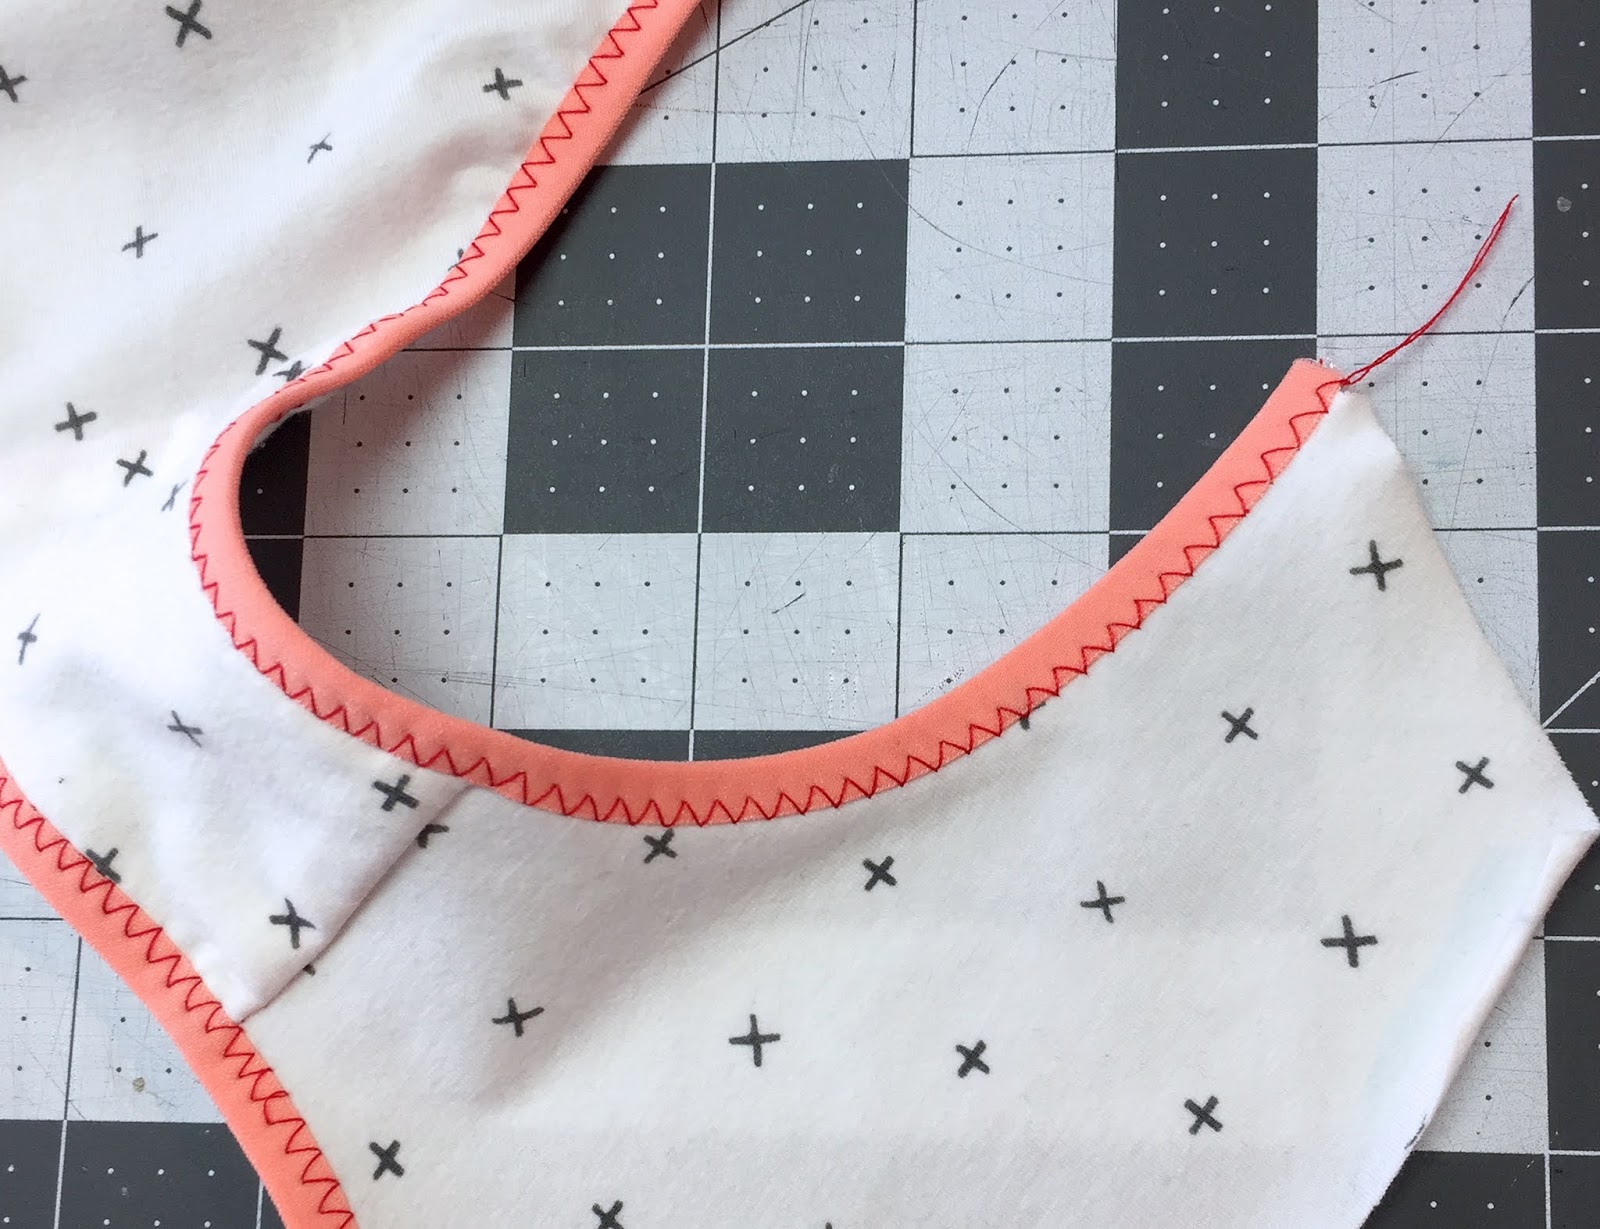
Turn right side out and baste crotch edges together with a zigzag:

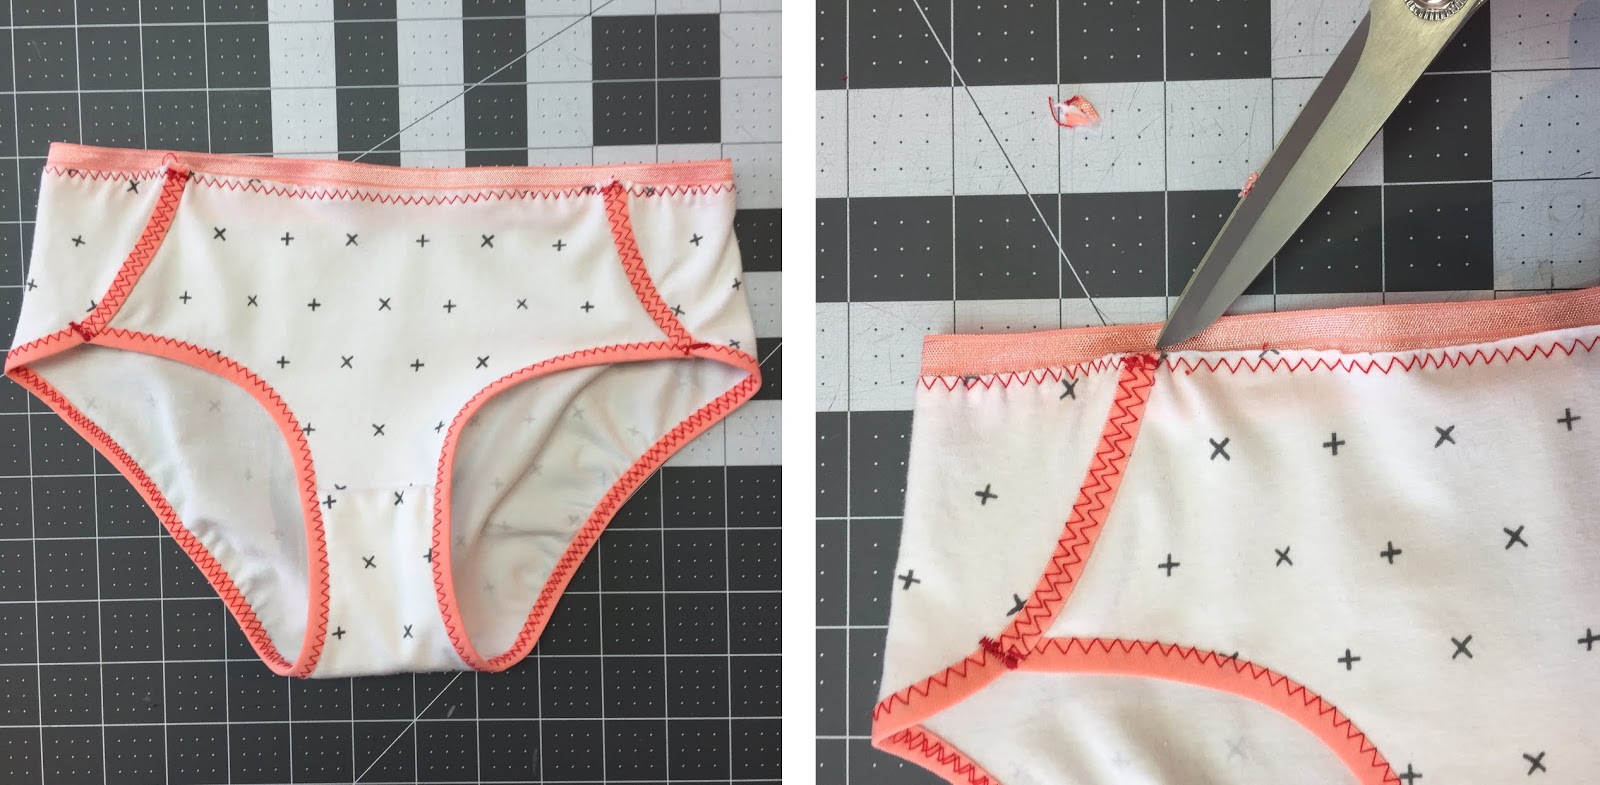
FOLDOVER ELASTIC AT LEG OPENINGS
The JULIA panties are quite unique. They do not have the usual side seam. We came up with a "wrap" effect that eliminate that seam. People with sensory issues love these because there is no seam allowance inside. The technique is easy, don't worry :)Start by pinning (or clipping) the wrong side of the fabric to the wrong side of the FOE, the raw edge against the line running down the center of the elastic. For this project, we want the matte side of the elastic to be visible at the end so the shiny side is the wrong side.
Pin from back waist corner to the notch, then at the crotch and in the front leg opening curve WITHOUT STRETCHING:
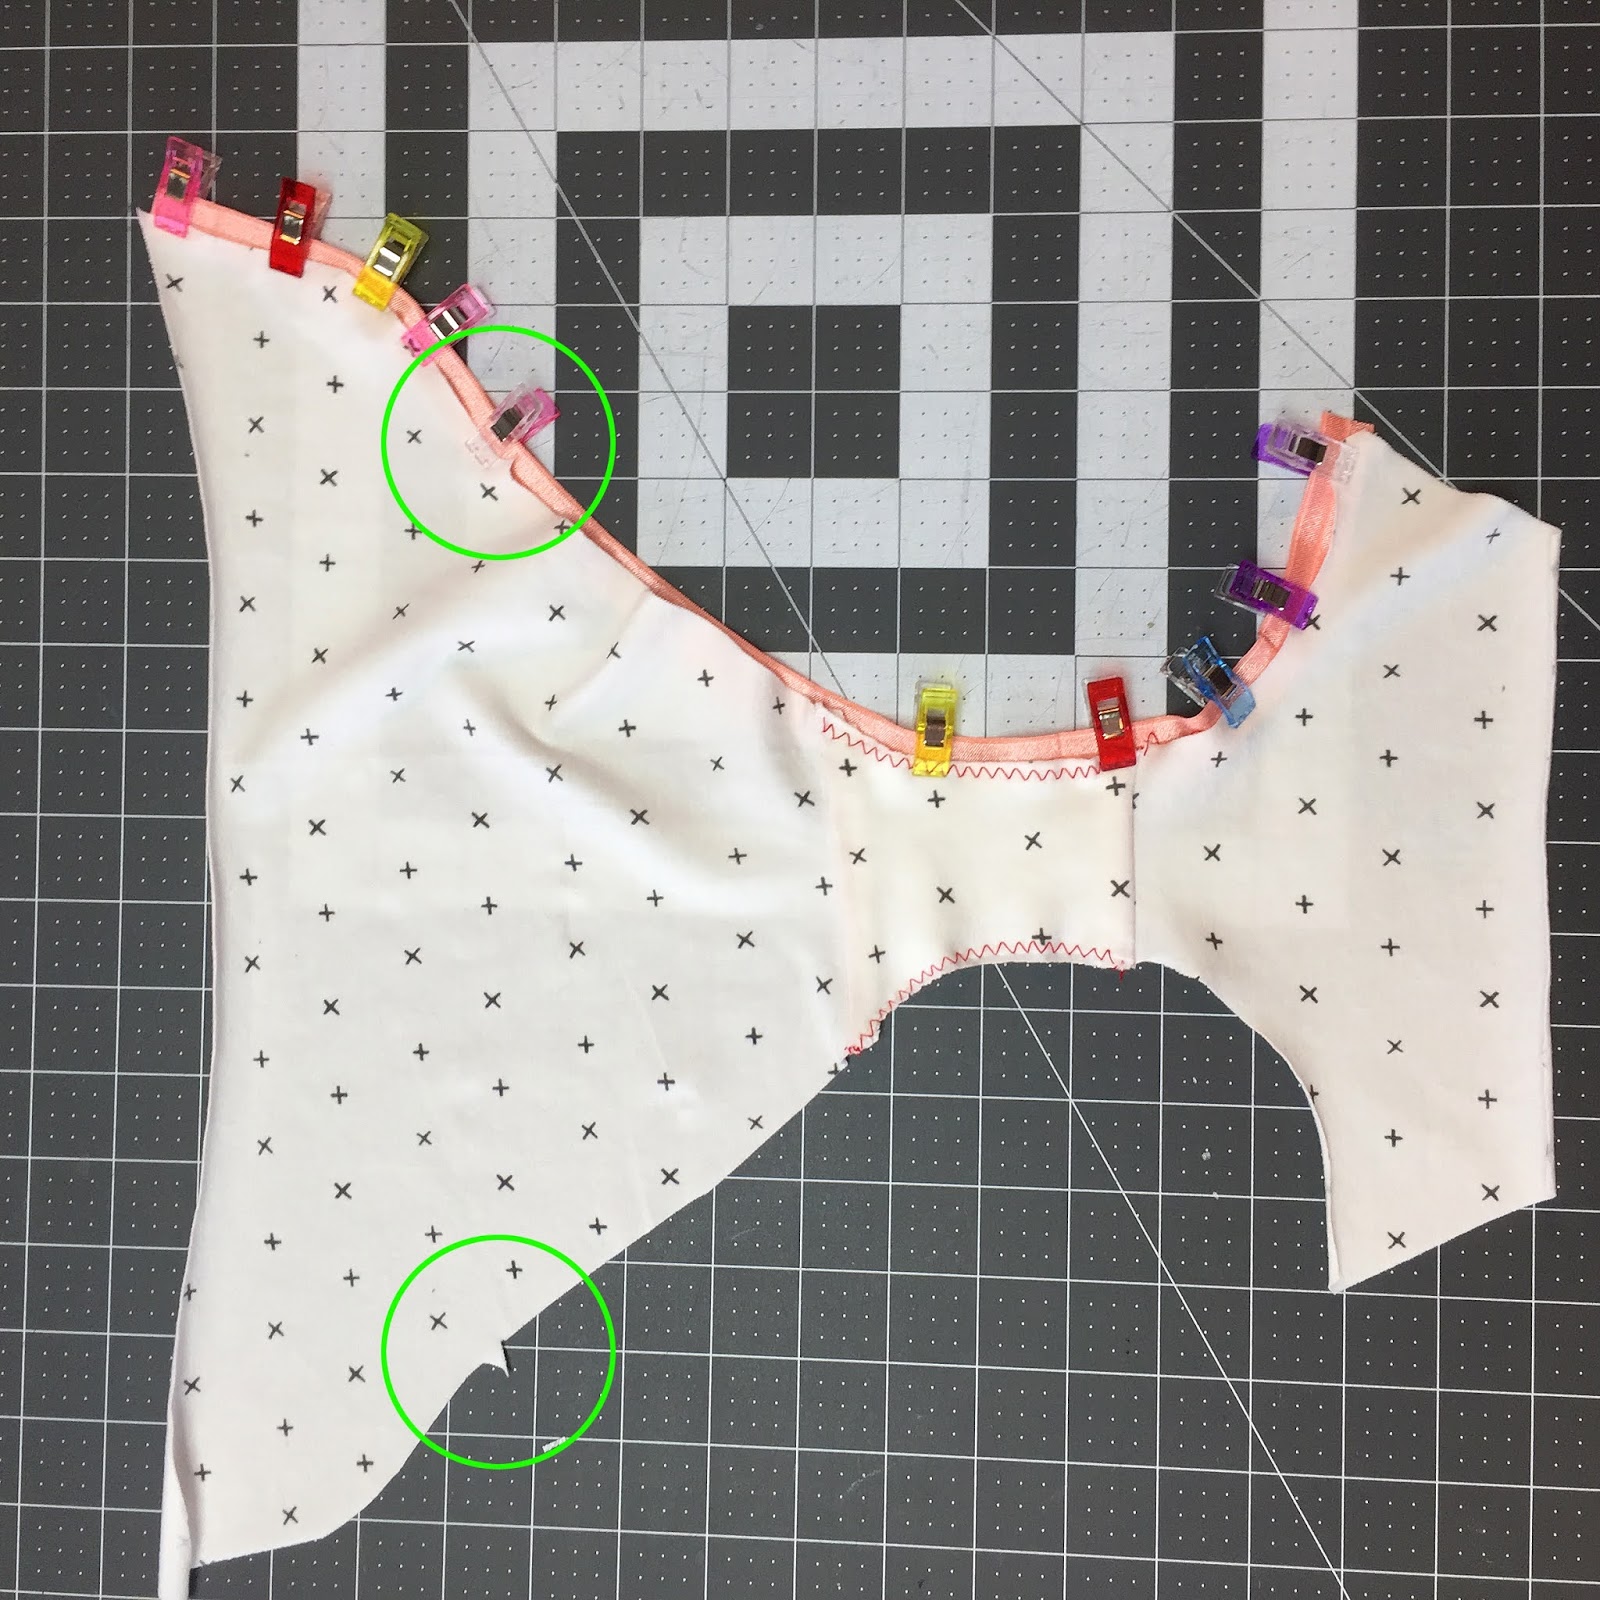
Then, stretch the elastic between the notch and the crotch to fit the fabric and add a pin / clip in the middle:
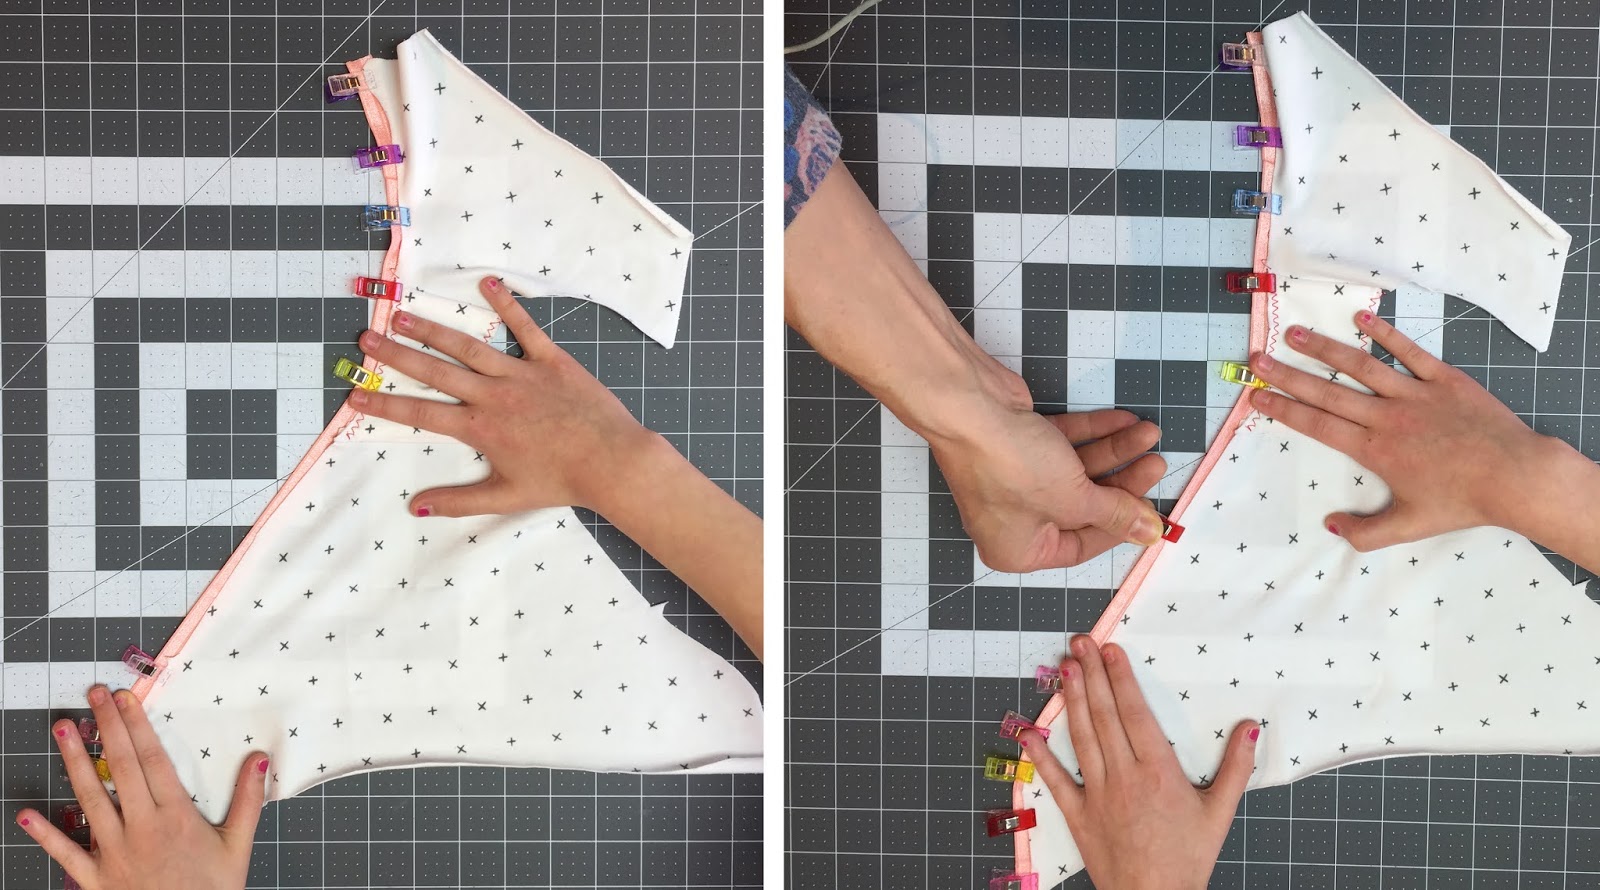
Baste with a zigzag stitch (zig on the fabric, zag skimming the edge of the fabric), stretching ONLY between the notch and crotch to keep the fabric flat. Do not stretch too much. Only the FOE should be stretch, you do not need to stretch the fabric itself. When you are done, the fabric should look like this (flat elastic, little "waves" on the fabric):

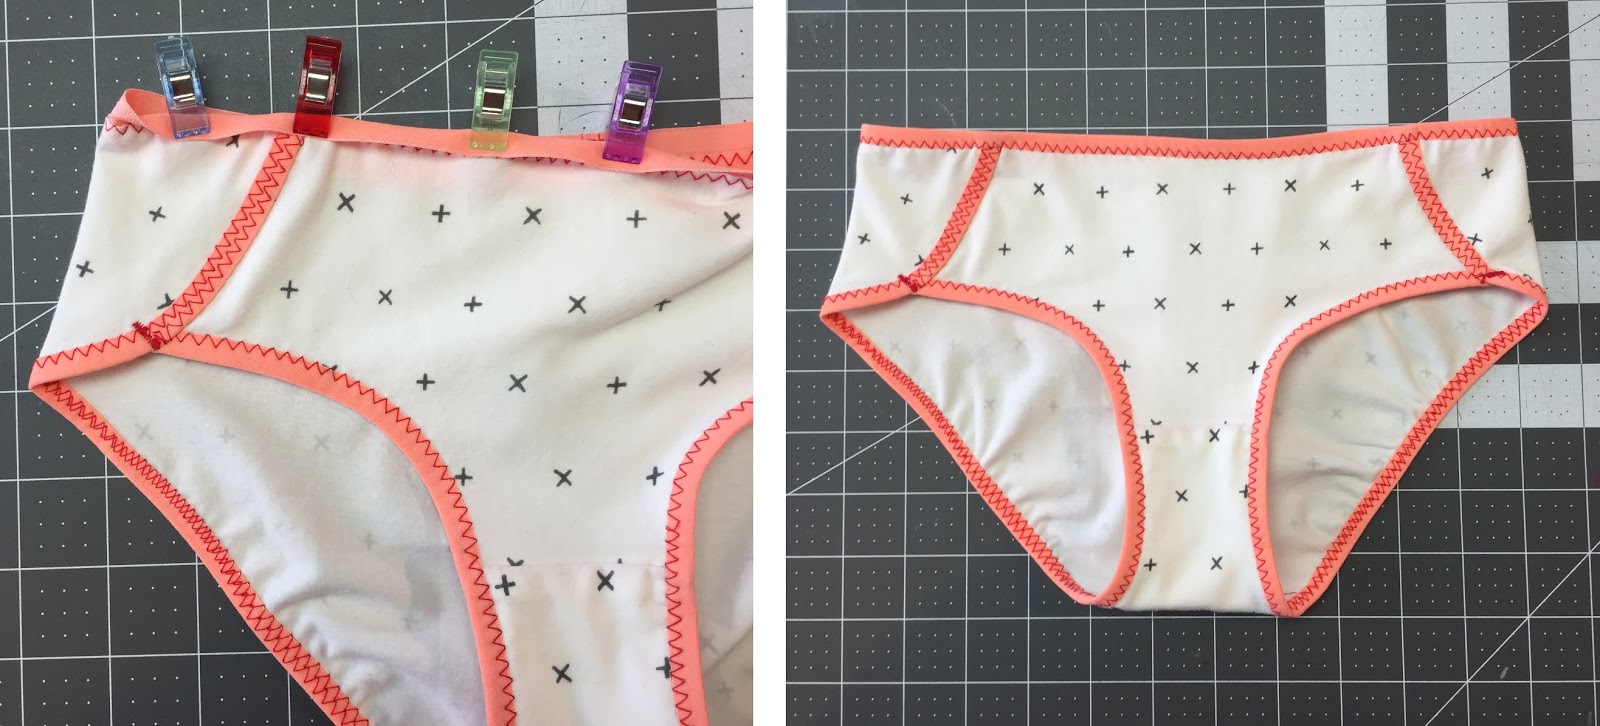
Clip the notches and fold the elastic to sandwich the fabric edge:
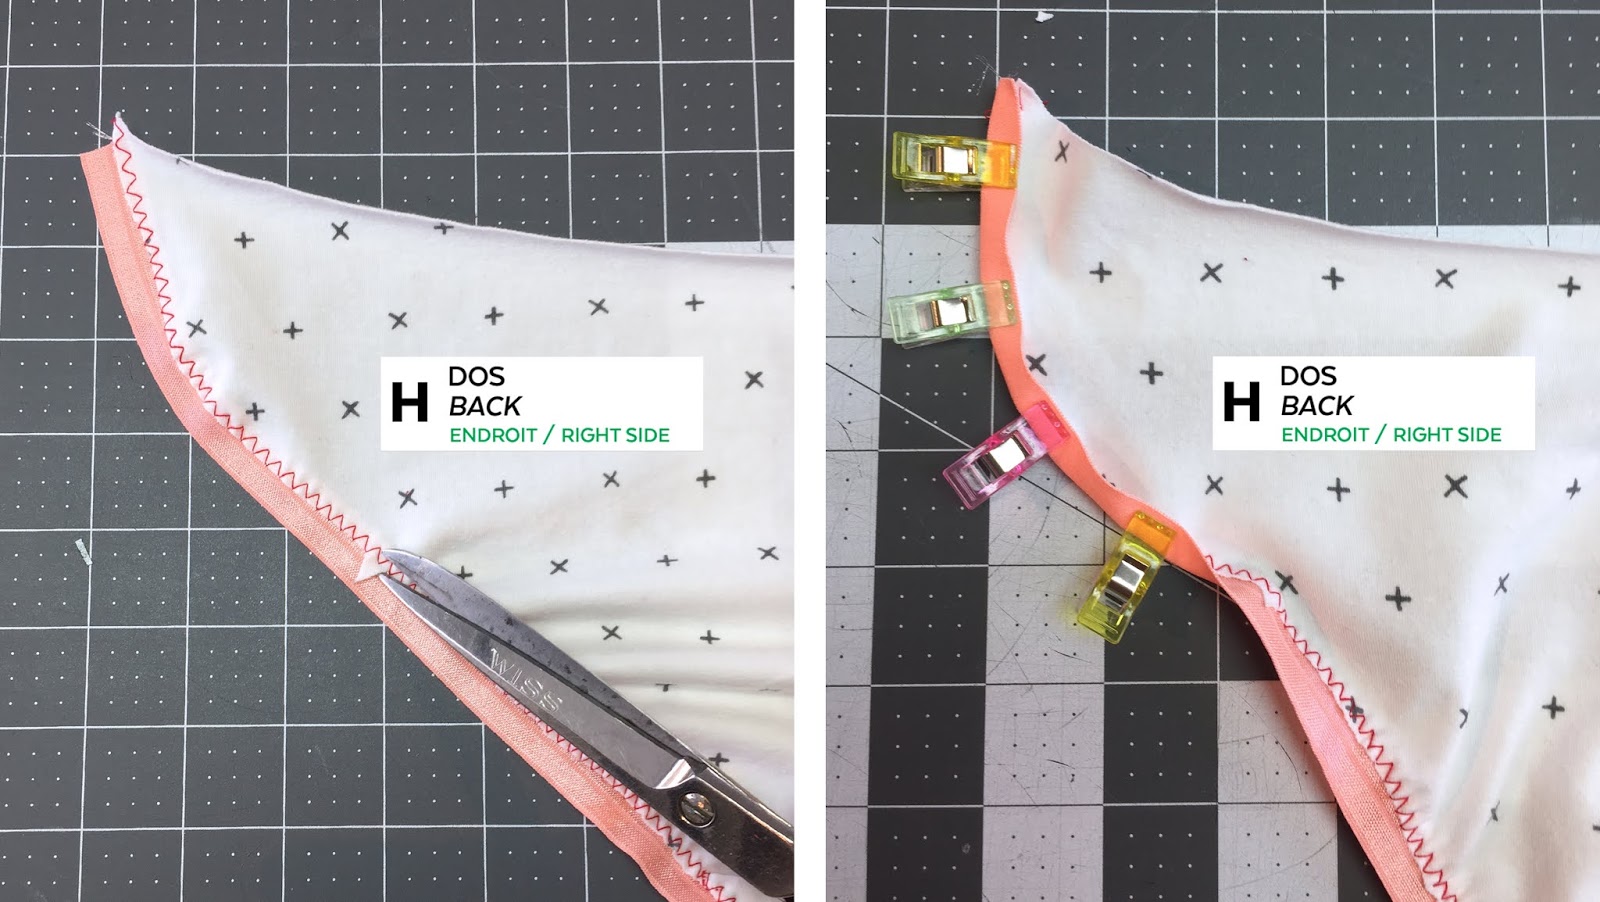
Pin and topstitch with a regular zig-zag, three-step zigzag or cover stitch. Again, you only need to stretch gently in the back section where you stretched earlier to keep the fabric flat:
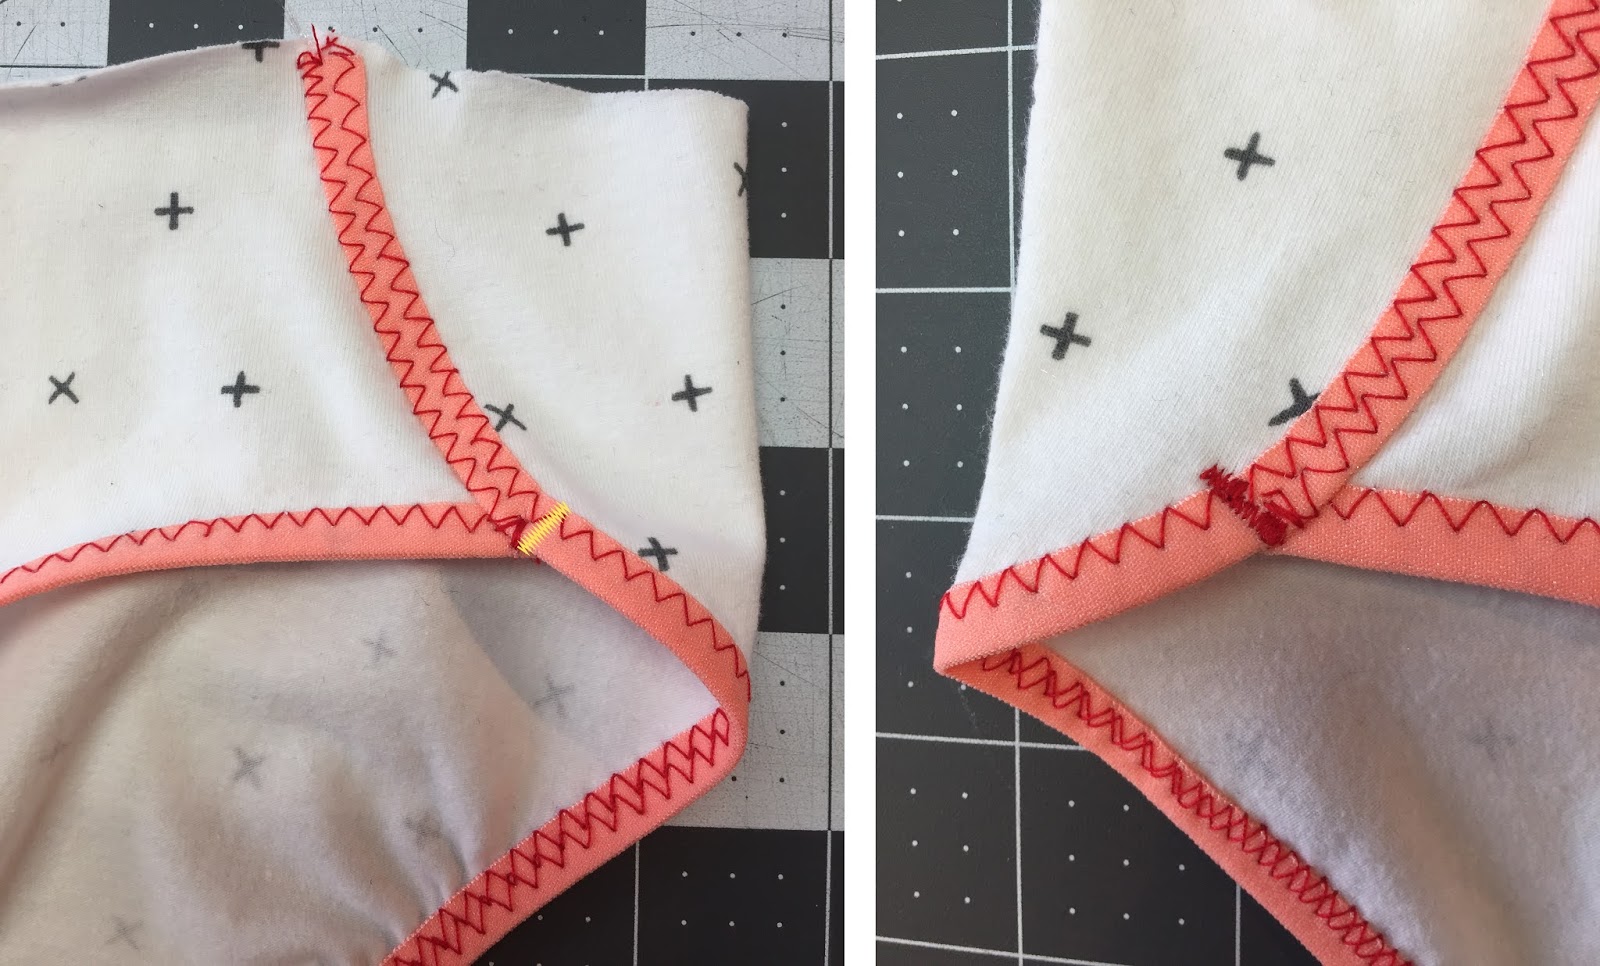
ASSEMBLY
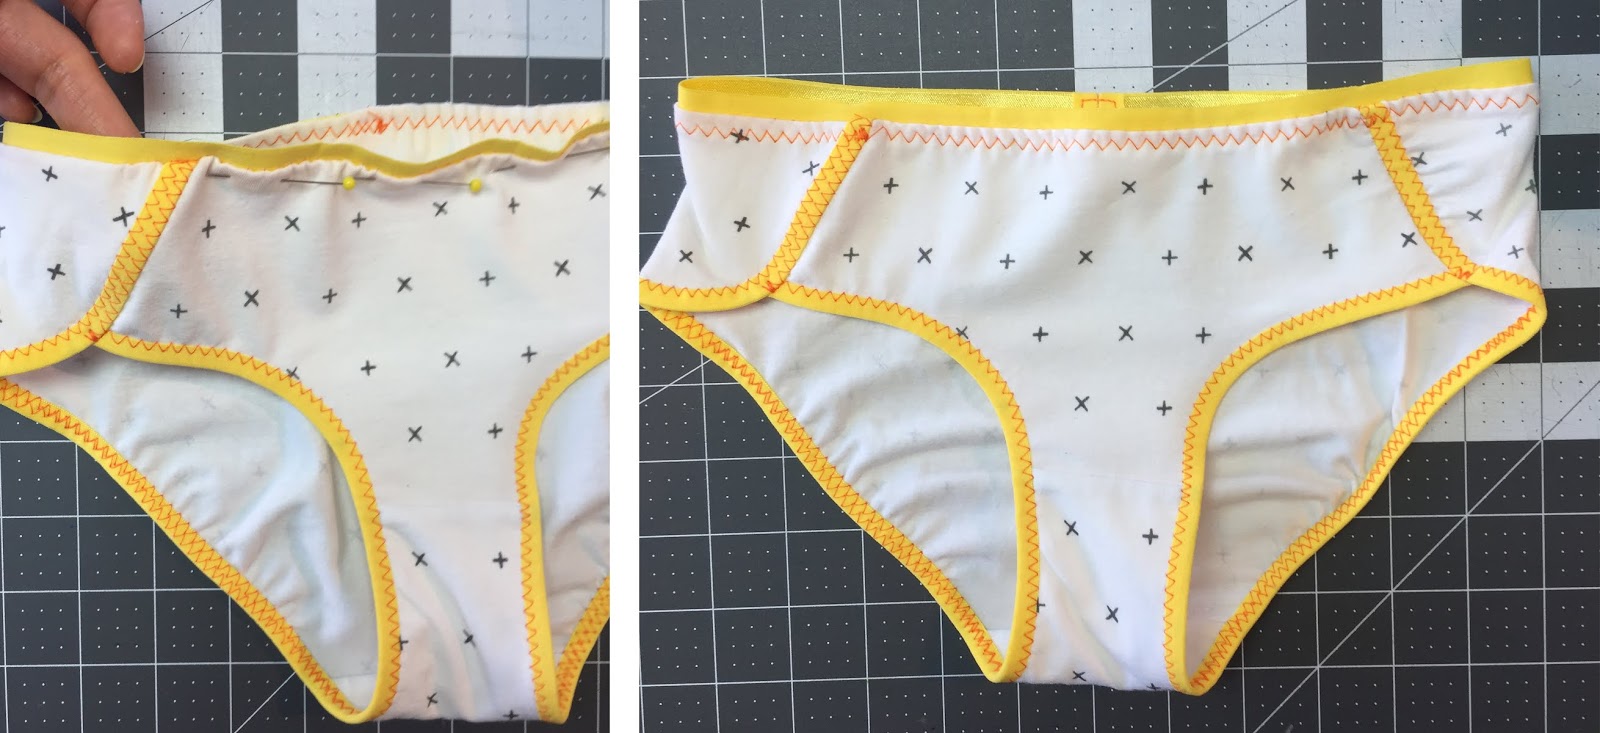
On the front, mark a guide, 1 cm (3/8'') from edge to help you pin the back to the front straight:

FOLDOVER ELASTIC AT THE WAIST
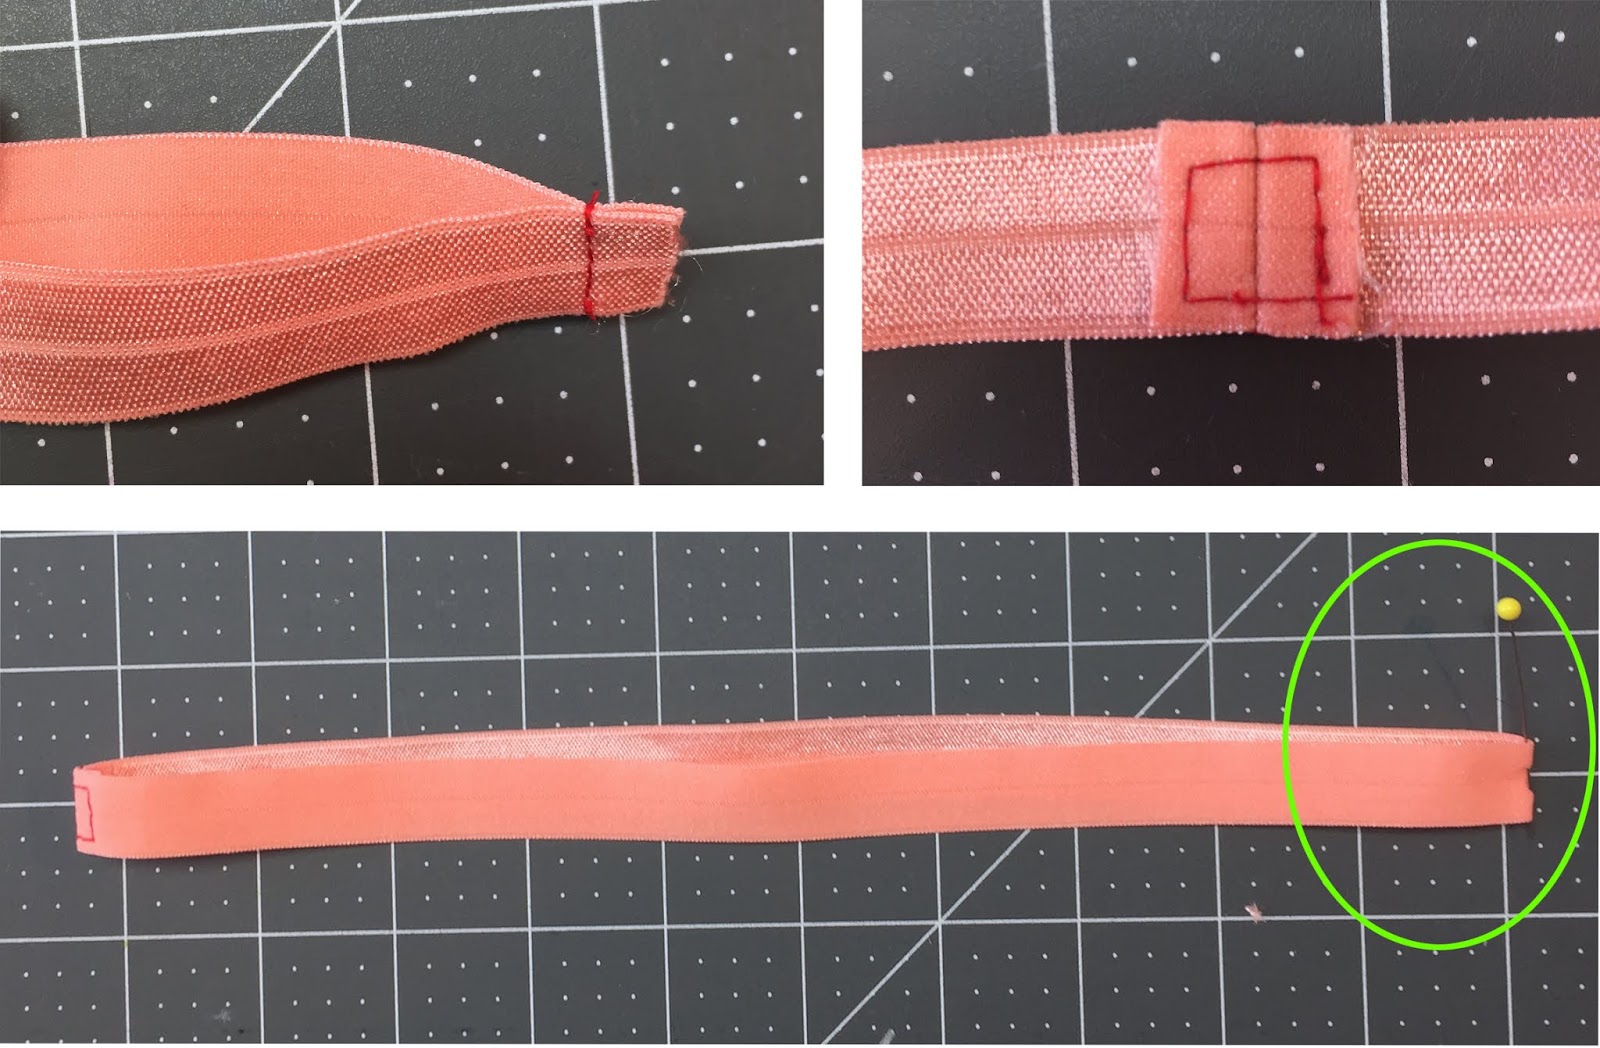
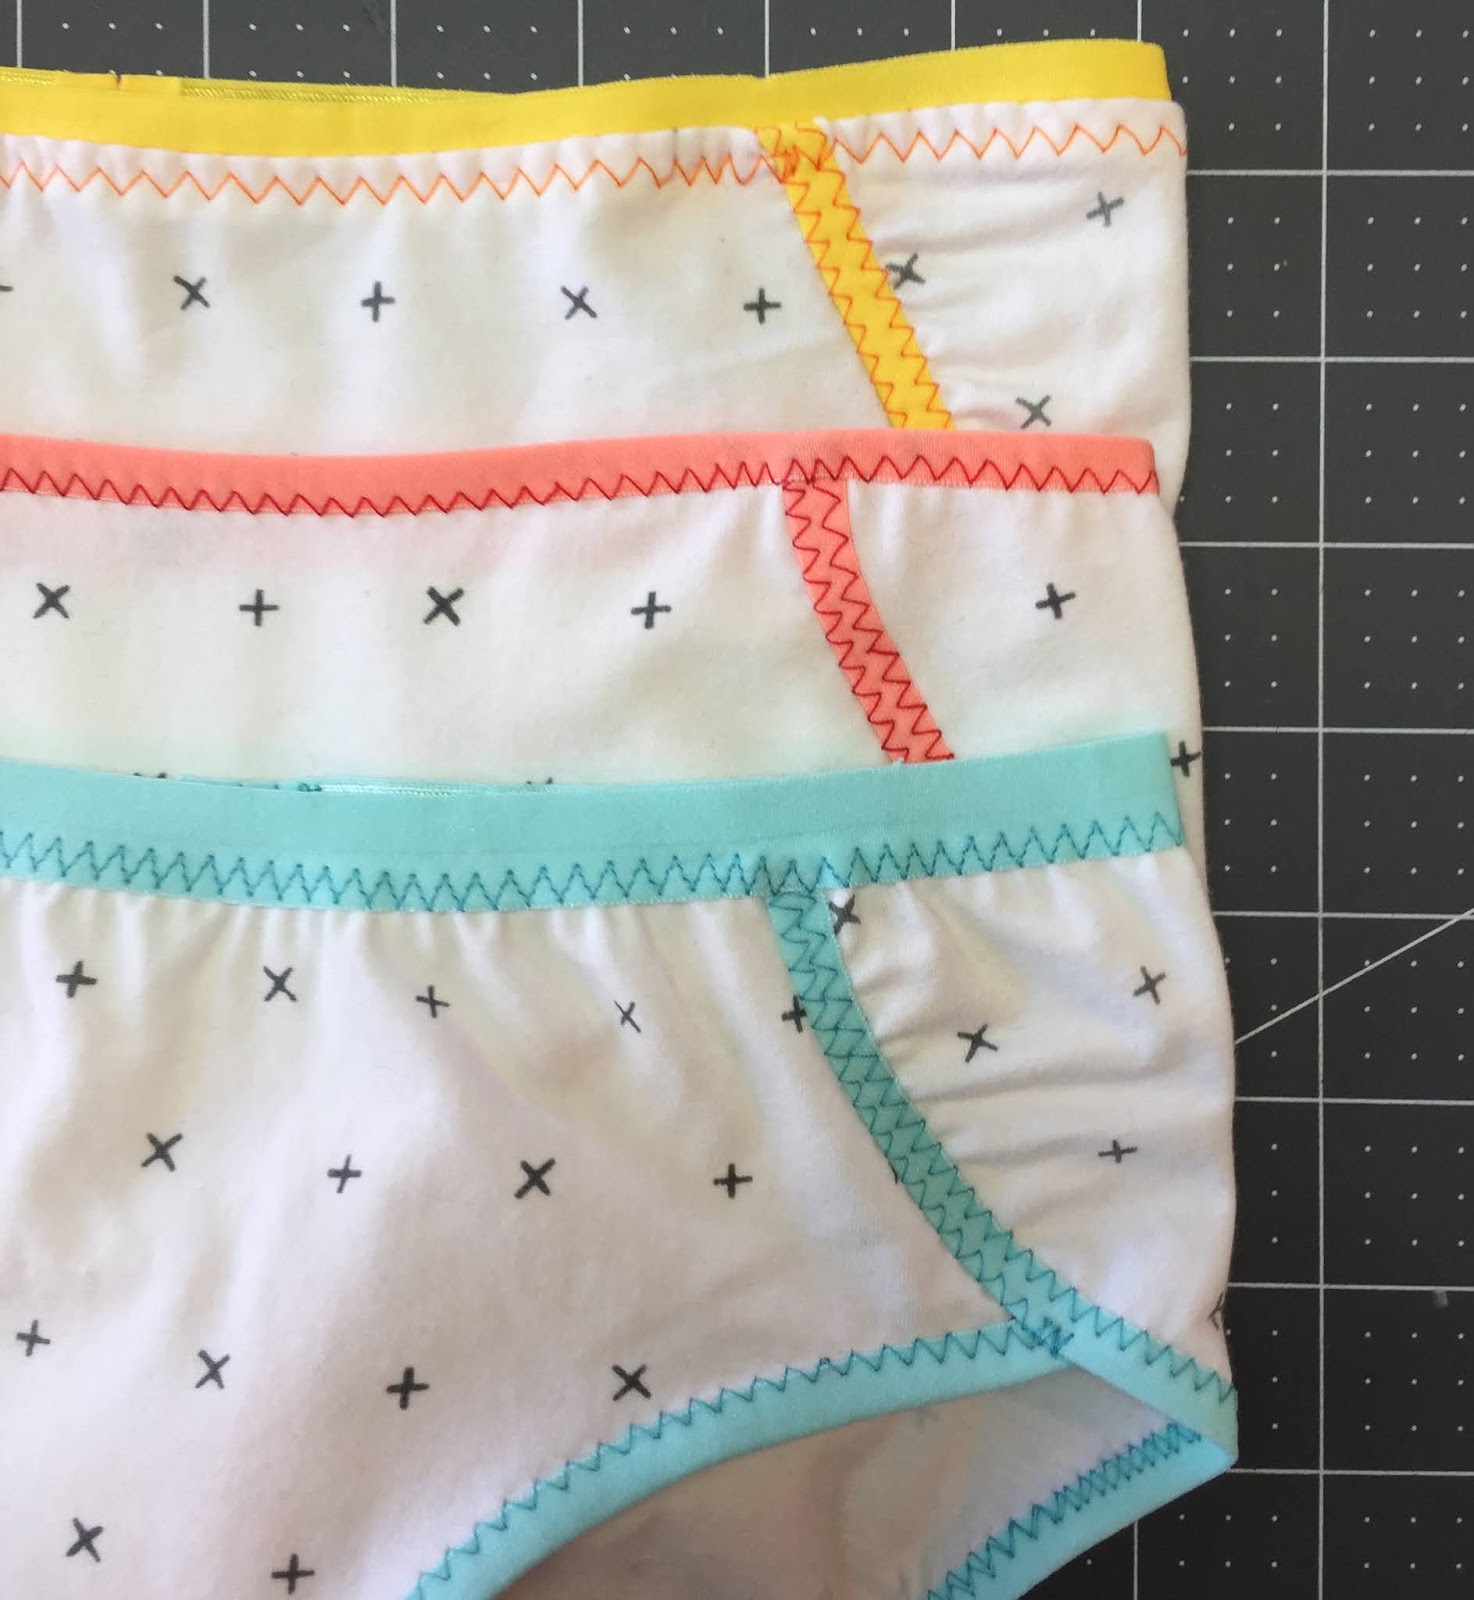
Now that you are done with the assembly, the only thing left to do is to apply foldover elastic at the waist. We will show you 3 alternatives that you can use for the JULIA panties waist. Have fun, experiment and pick you favorite!PREPPING THE WAIST ELASTIC
Pin and stitch the ends of the waist elastic ends right sides together, 1 cm (3/8'') from the edge. Open the seam allowance and topstitch it down as shown on the photo (a square is stronger than two lines). Mark half (opposite to seam) with a pin or marker:
TECHNIQUE 1: ELASTIC FOLDED OVER (BASIC TECHNIQUE SHOWN IN THE PATTERN INSTRUCTIONS)
Mark center front and back of the waist and pin WRONG SIDE of waist to WRONG SIDE of the elastic, along the center line. Match half mark with center front, seam with center back:
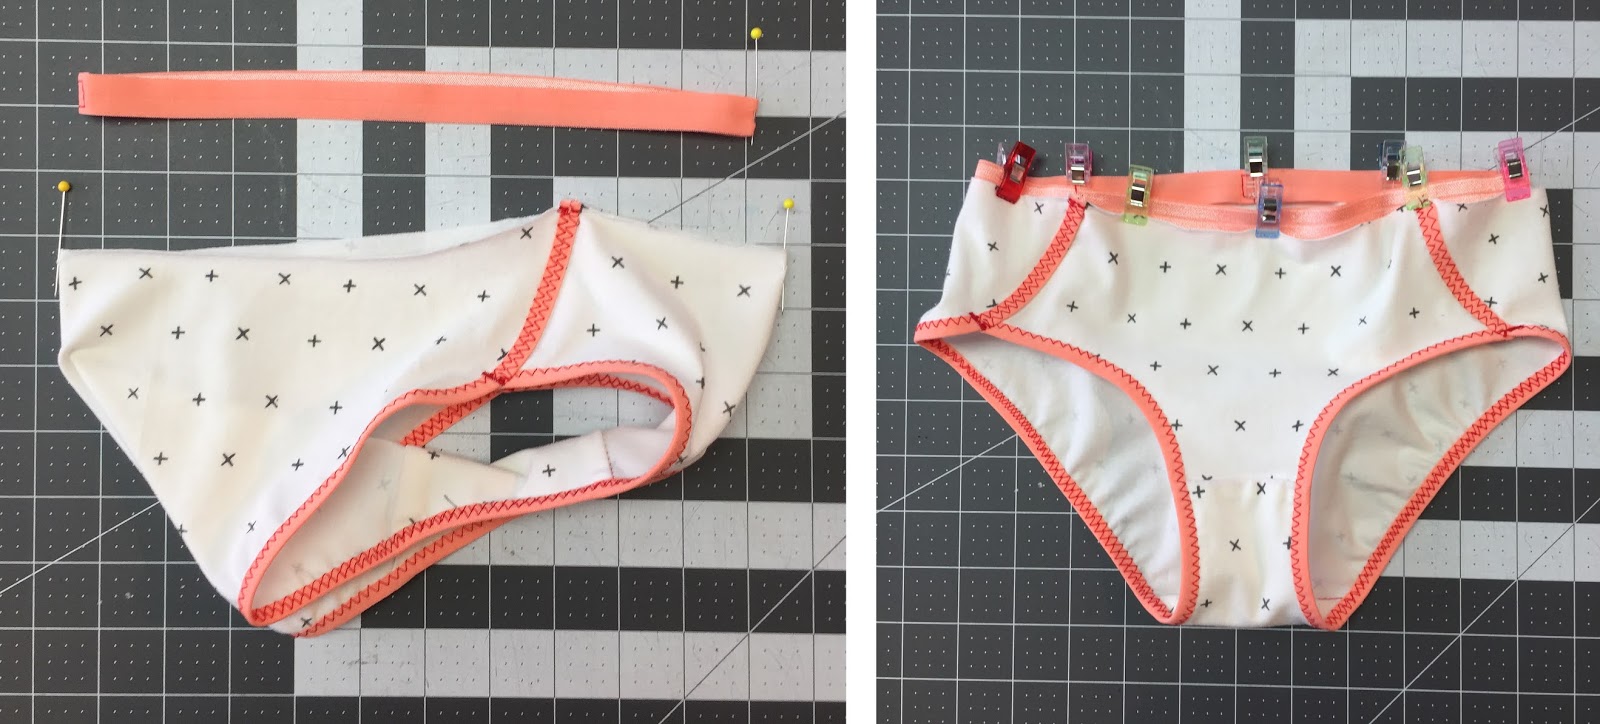
Baste with a zigzag, stretching the elastic between the pins to fit the waist opening. Then, trim the back elastic corner to have a straight edge. It will make the next step easier:
Fold elastic over the fabric and topstitch with a regular zigzag, triple zigzag or a cover stitch:
TECHNIQUE 2: OPEN ELASTIC ON THE OUTSIDE (IF YOU PREFER THE LOOK OF A WIDER ELASTIC OR WANT TO HIGHLIGHT A PRINTED FOE)
Mark center front and back of the waist and pin RIGHT SIDE of the waist to the WRONG SIDE of the elastic, along the center line. Match half mark with center front, seam with center back:
Sew with a regular or triple zigzag, close to the bottom edge, catching the fabric in the zigzag:

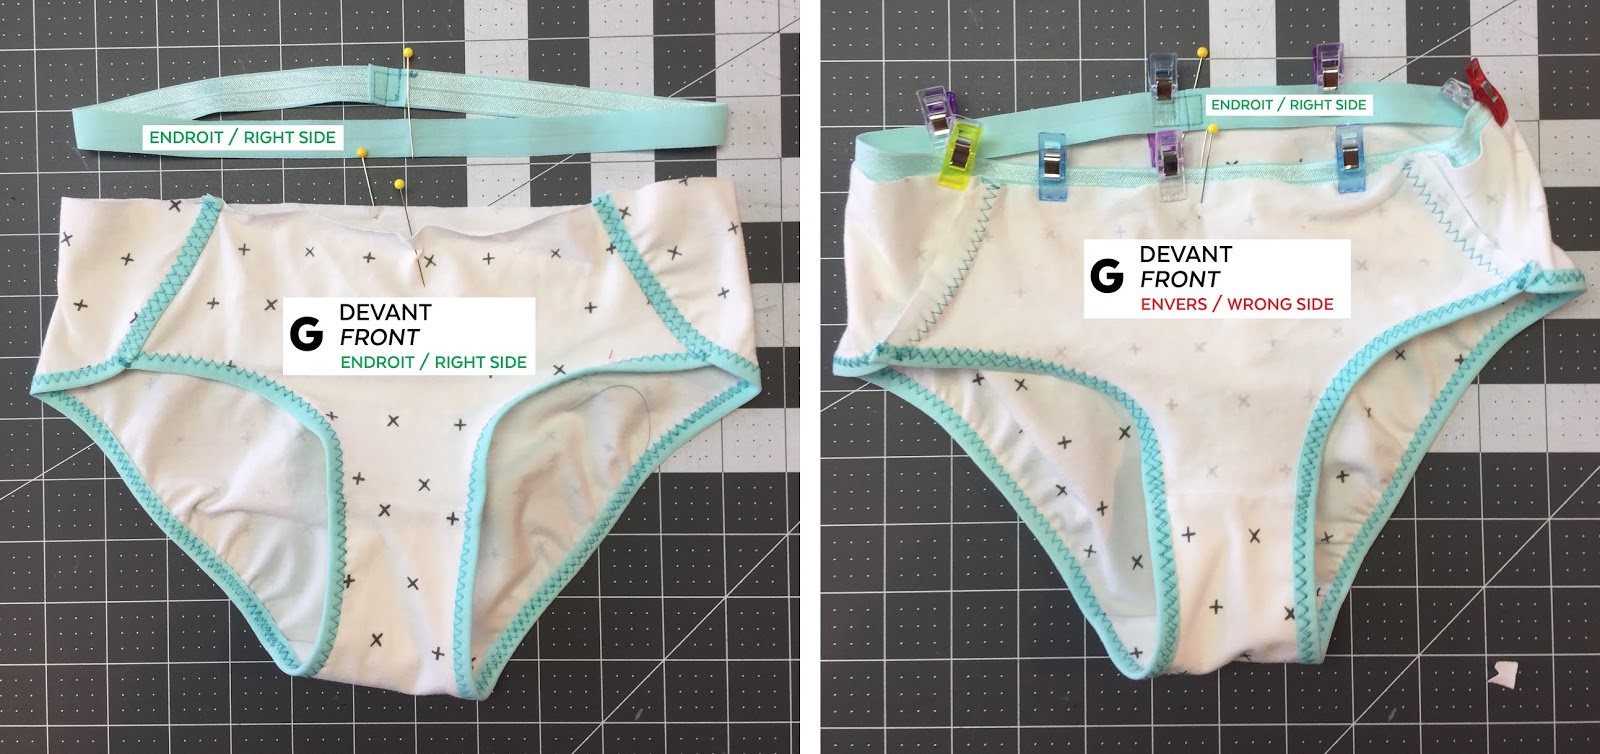
TECHNIQUE 3: OPEN ELASTIC INSIDE (FOR A NARROW SECTION OF THE FOE VISIBLE, WITHOUT FOLDING THE ELASTIC)
Mark center front and back of the waist and pin RIGHT SIDE of the waist to the RIGHT SIDE of the elastic, along the center line. Match half mark with center front, seam with center back:

With the FOE wrong side up, baste with a zigzag along the top edge, above the center line, stretching the elastic between the pins as you sew to fit the waist opening:
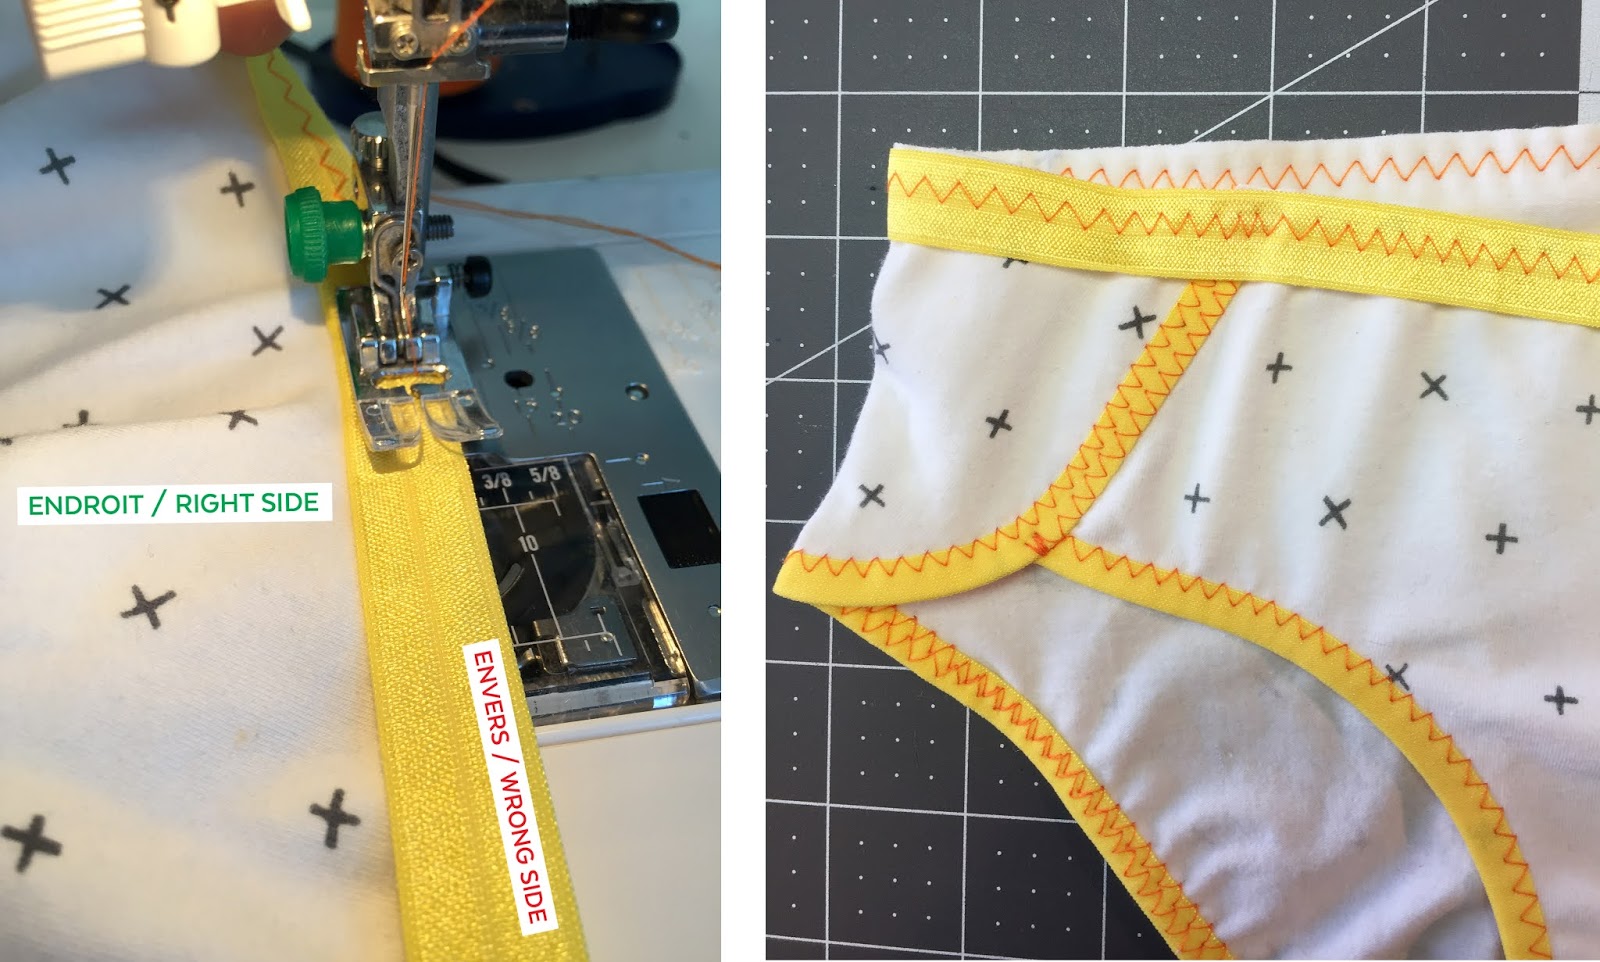
Brin the elastic to the wrong side of the waist and topstitch on the fabric:
Voilà! One pattern, 28 sizes, three FOE techniques. Enjoy :)
Share you JULIA panties on Instagram #jaliejulia and in our Facebook group!
Happy sewing!
← ELIANE Scrub Top // Tips, Tricks ROSE Shirt // Shirt Collar Tutorial →