 Skip to content


FREDERIC HOODIE // TIPS AND TRICKS - PART 2/2
Welcome to this second part of the FREDERIC HOODIE tutorial. If you missed the first part where we explain how to sew the zippered kangaroo pockets and line up construction seams, click here.
Today we will show you how to:
- SEW A LINED HOODIE WITH GROMMET INSET AT THE ENDS OF THE CASING
- HIDE A NECKLINE SEAM ALLOWANCE WITH JERSEY BINDING
- EASILY LINE UP SEAMS THAT MEET AT THE FRONT ZIP
- MAKE A DRAWSTRING WITH COORDINATING FABRIC
LINED HOOD
HOW TO INSTALL A GROMMET (INSTEAD OF MAKING BUTTONHOLES)
After the hood pieces are sewn together, pin pieces of interfacing AND woven fabric to the wrong side of the hood, at the buttonhole placement mark (black dot).

If you are using an oversize grommet like are are doing, you will have to make a wider casing and reposition the mark. You want it to be centered on the casing. Turn your piece to the right side, draw the seam lines. Then position the grommet and determine the casing width you want, the line not too close to the grommet. Trace the casing topstitching line:
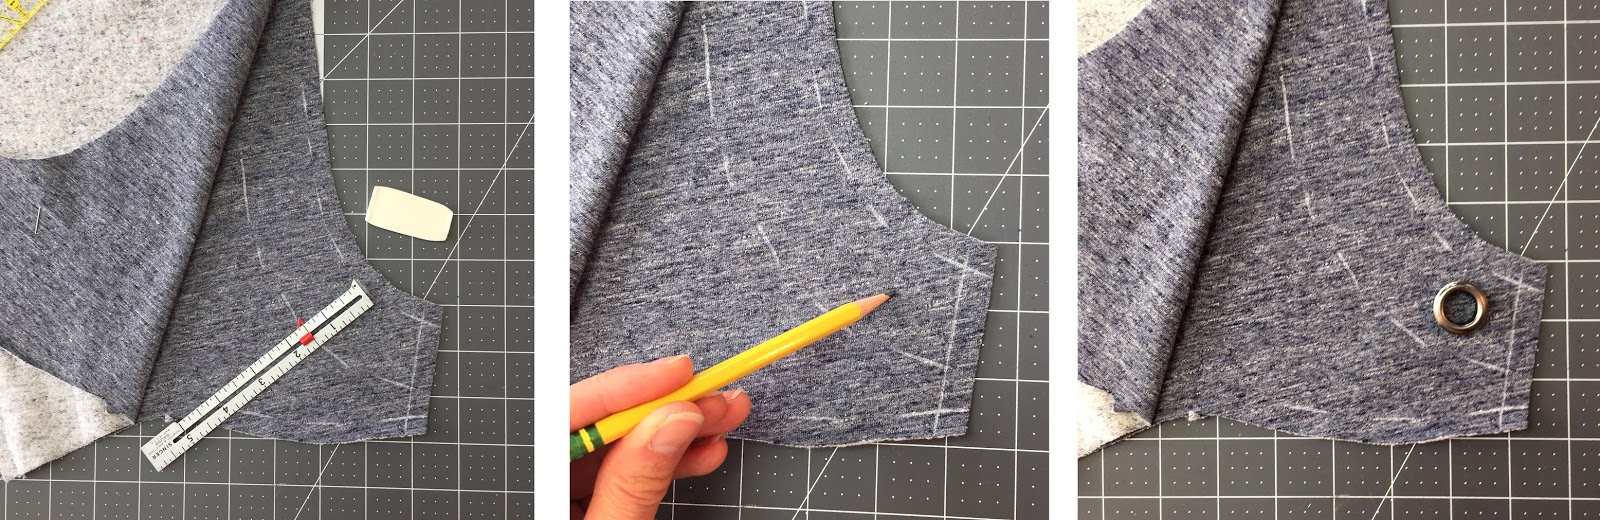
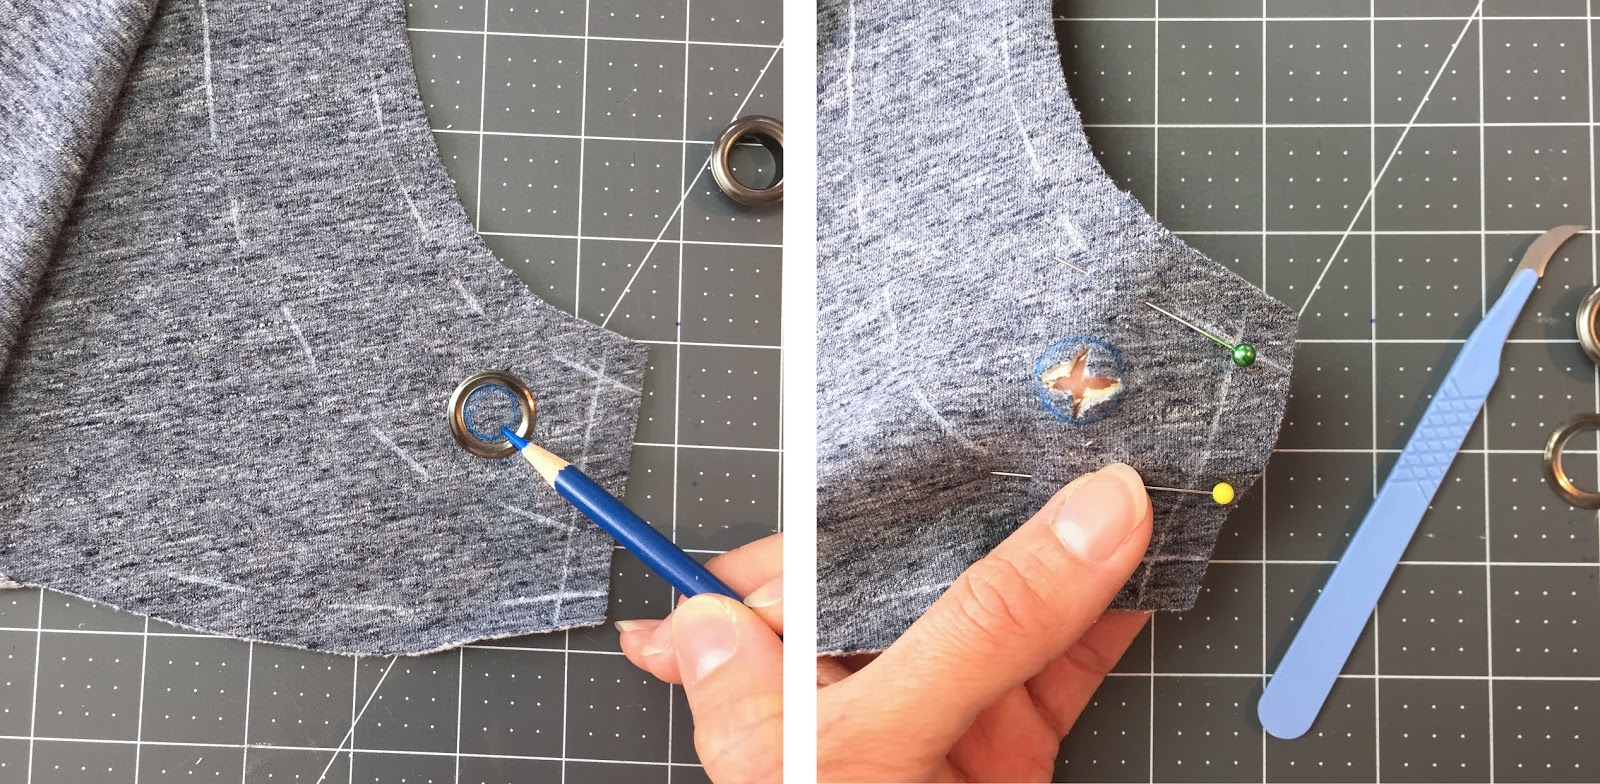
On one side only (right or left), trace the shape of the grommet opening and cut an X inside:
Then, insert the shank of the grommet from the right side of the fabric:

On the wrong side, place the washer part of the grommet onto the shank. Place the grommet on the base/die included with your kit (it will protect the grommet, otherwise it would become flat when you hit it!). Place the tool over the washer and hit it with a hammer:

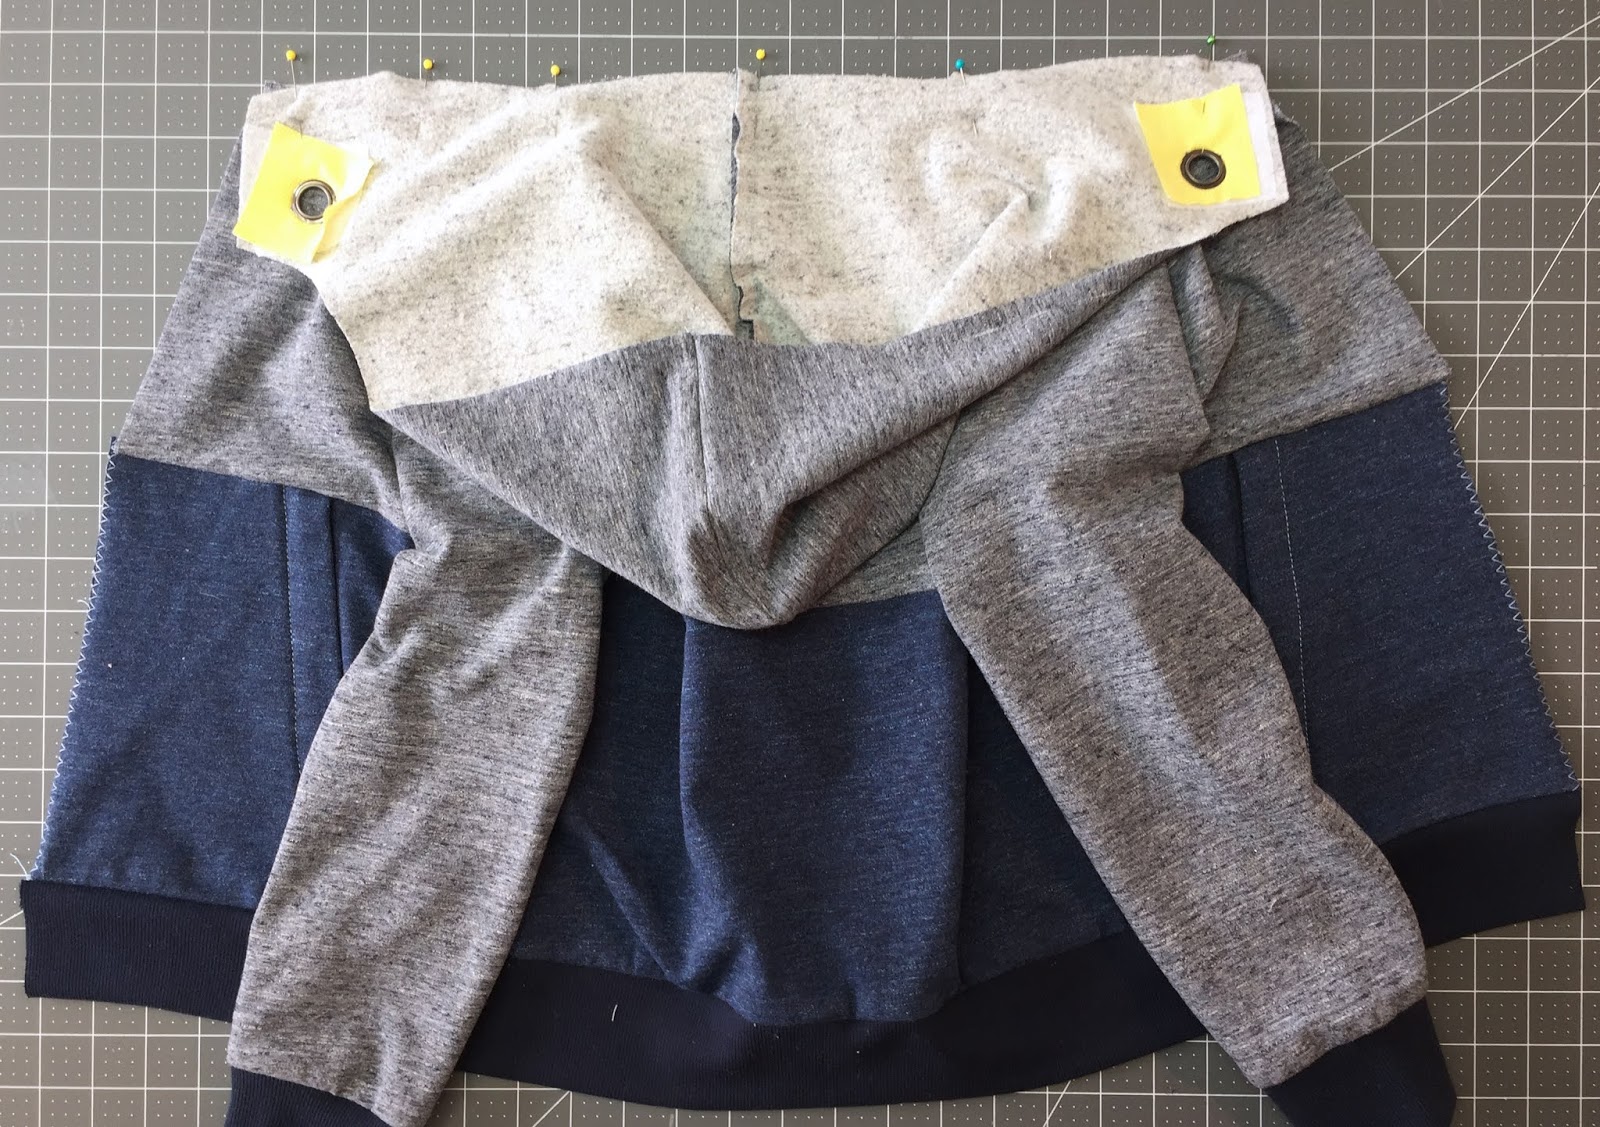
Transfer the grommet placement from the right side to the left side and install the second grommet using the same technique:
You can now pin your hood to the neckline, matching notches and centers:
HOOD LINING
Lining a hood hides the construction seam. In the FREDERIC pattern, we also add a binding to hide the neckline seam. If you are using a heavy fabric like polar fleece for the outer fabric, we recommend you cut your jersey binding piece a bit wider. It will be easier to cover the beefier seam allowance when you get there.
Fold your binding lengthwise, wrong sides together and press:

Pin the FOLDED binding to the right wide of the assembled hood lining. Raw edges are together, the folded edge of the binding towards the lining and centers are together:

Put the hood lining aside. It's now time to add the front zip.
FRONT ZIP // ALIGNED SEAMS, THE EASY WAY
Prepping the zipper: With your seam allowances marked on the hood piece, position the zipper next to the center front and mark where the seam and top edge of the fabric hit on the RIGHT SIDE of the zipper. Then pin the zipper, face down, onto the right side of the fabric:
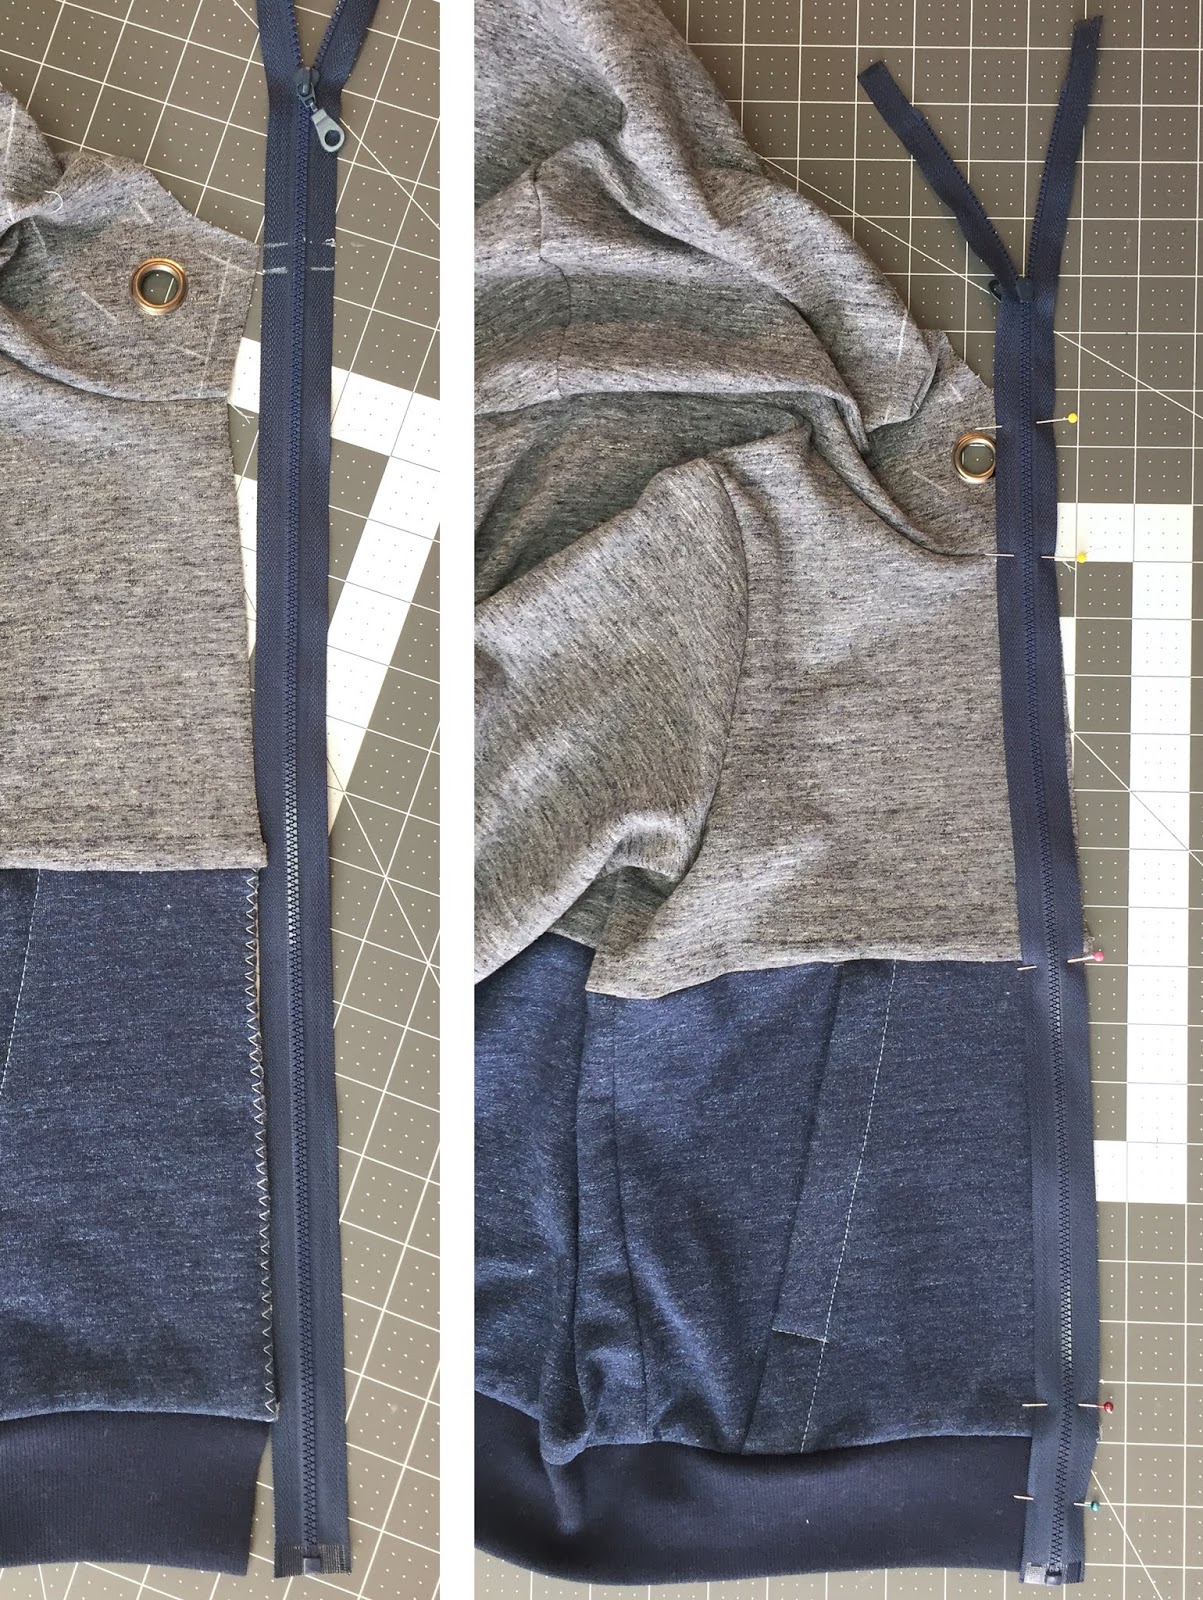
As you sew, make sure your seam allowances are in the right directions:
If you do not feel comfortable sewing with a straight stitch right away, you can baste with a zigzag first, remove the pins and then proceed to the straight stitch (only a straight stitch is shown here).
On the right side of the free zipper tape, tranfer seams and top edge. Pin, matching the marks with the edge and seams on the left front. Baste (optional) and stitch.
Make sure your seams are aligned and that you are happy with the way everything looks on the right side BEFORE moving on.
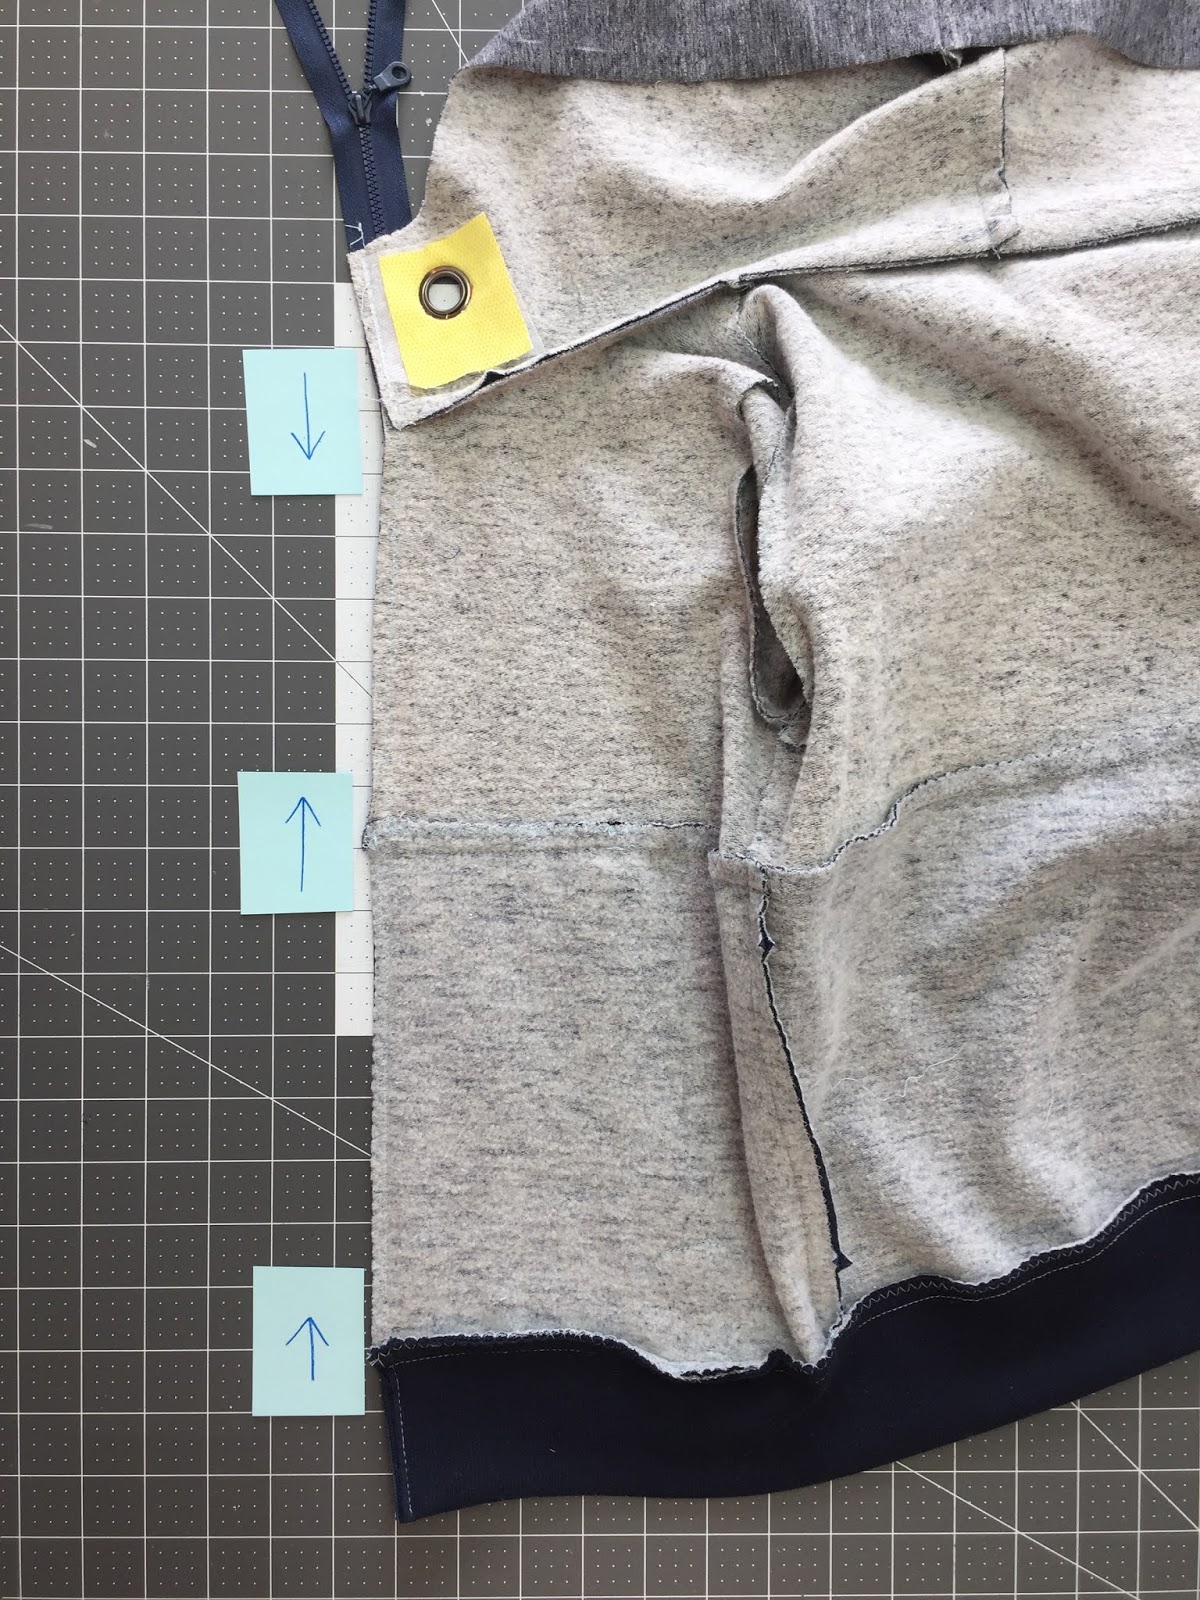
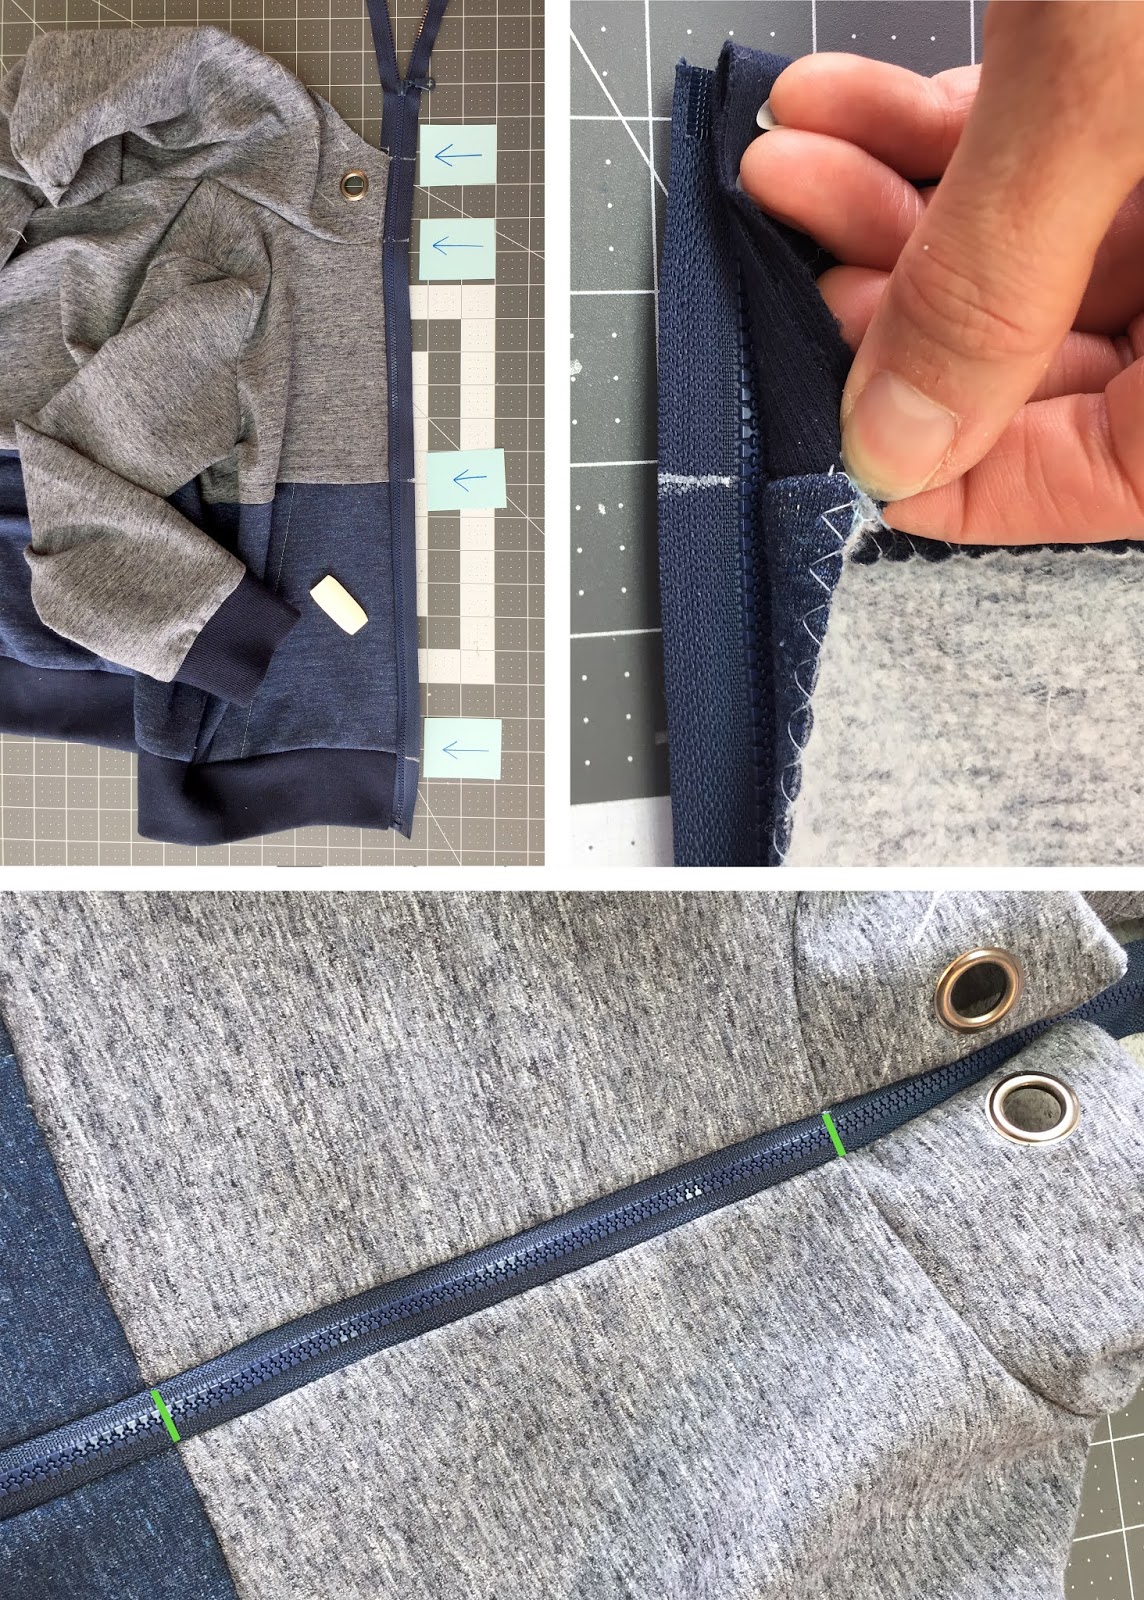
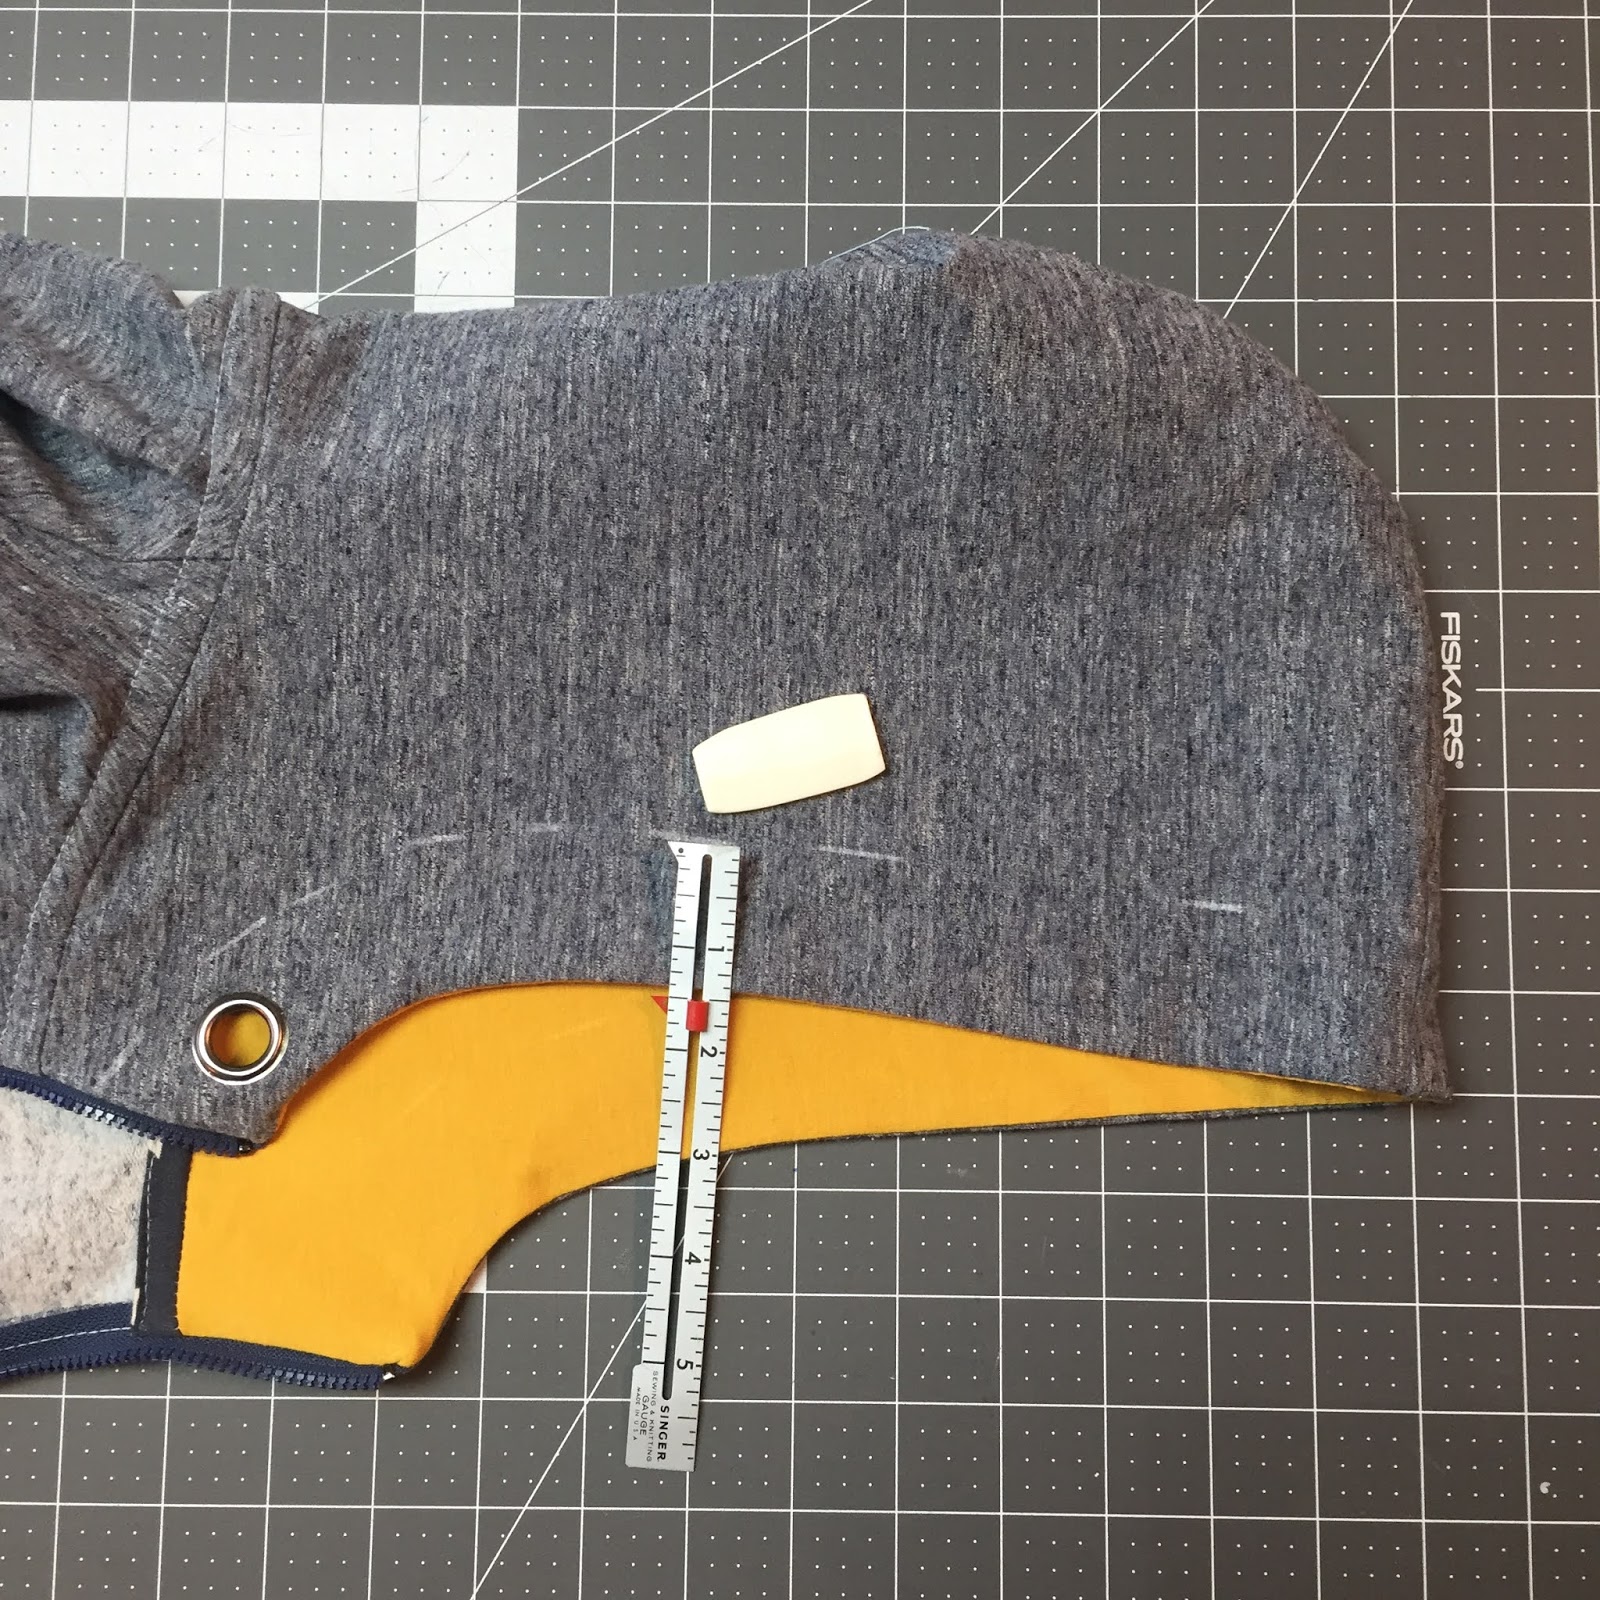
LOWER THE SLIDER as shown on the photo and cut the zipper tapes about 1 cm (3/8'') above the hood edge mark:
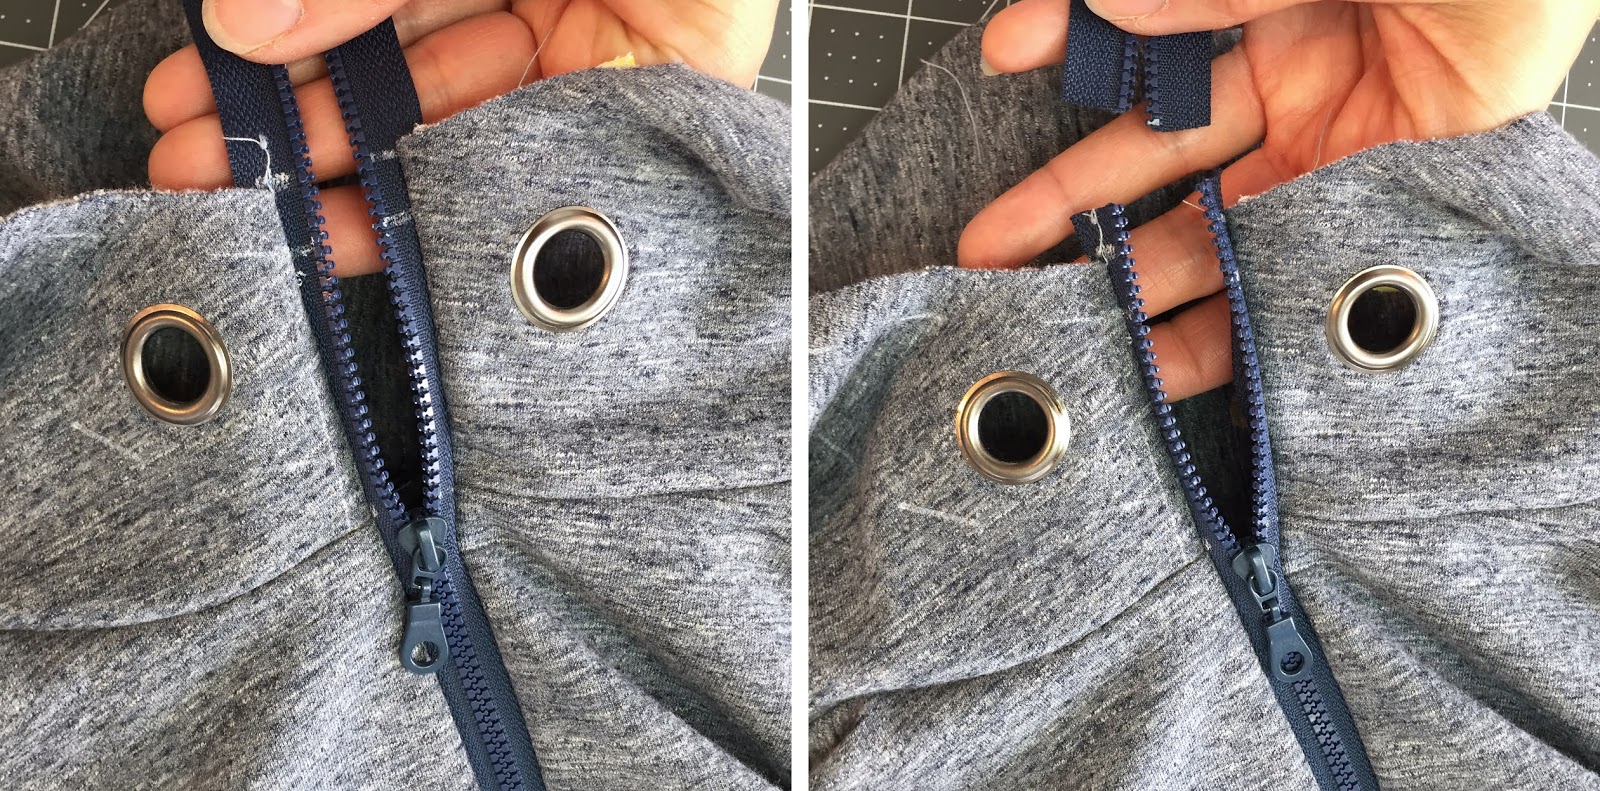
Remove zipper teeths from the seam mark up and install a new zipper stop:

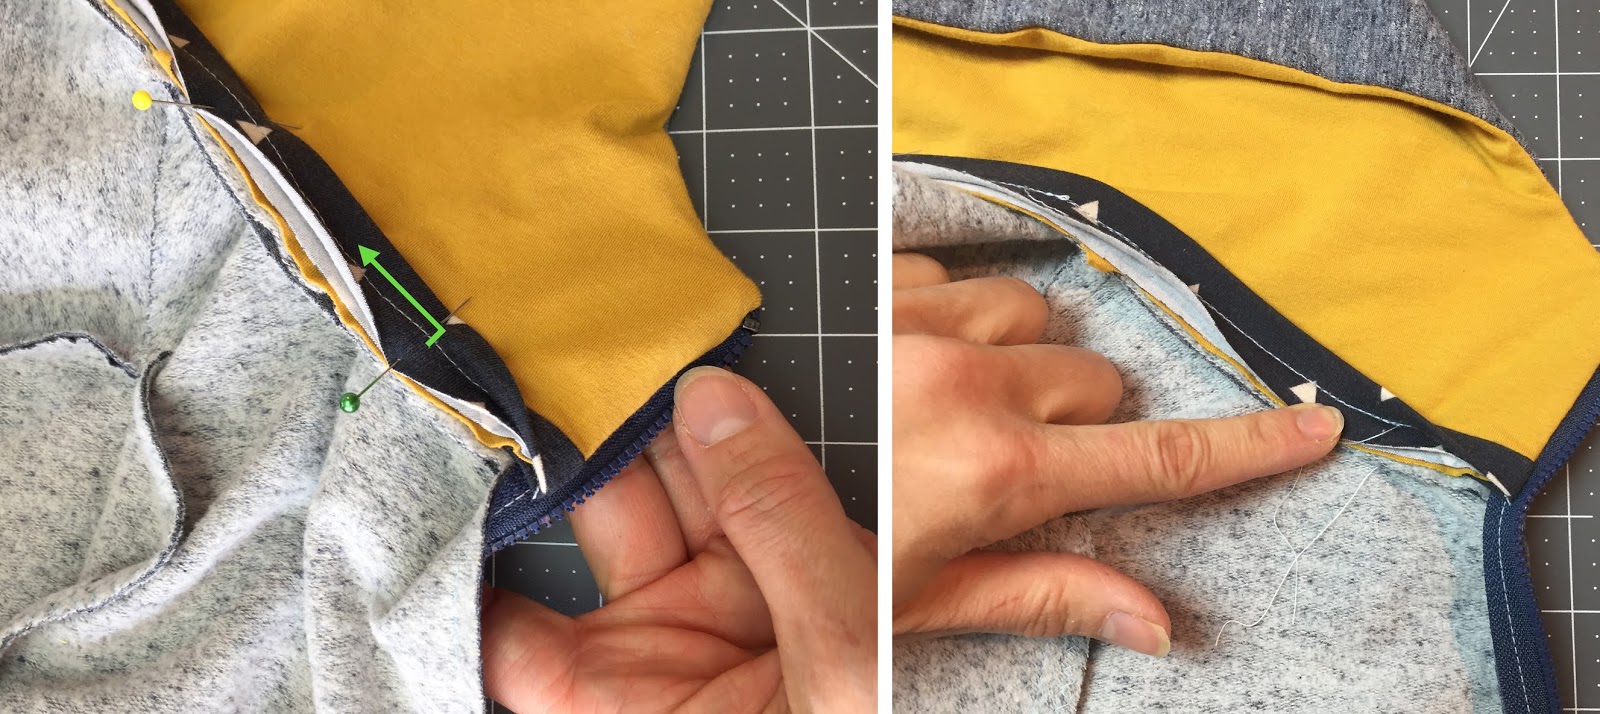
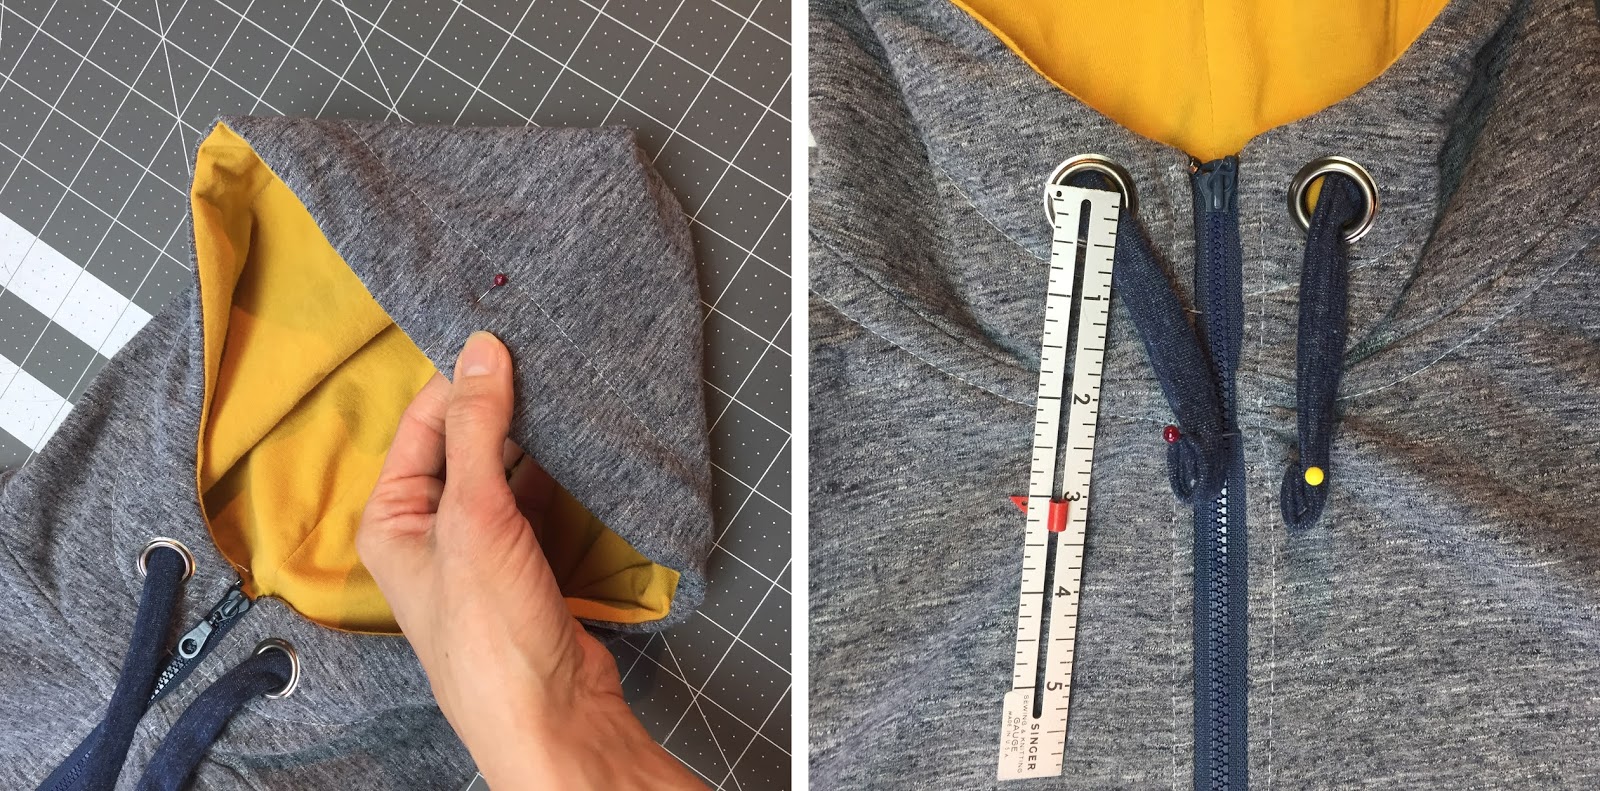
Fold the binding down (folded edge towards the raw edge) and pin hood lining to hood, right sides together. Before you stitch, pay attention to two things on the photo: 1) the zipper is right sides together with the garment (in the position that it was when you sewed it) and 2) the binding is sewn FOLDED DOWN:

Turn the corner right side out and bring the hood lining and hood wrong sides together. Now, grab all the layers at the neckline, pin together and stitch over the visible seam.
PLEASE NOTE: You will not be able to stitch from one zipper to the other. Just go as far as you can. The purpose of stitching here is only to hold the layers together, it will not be visible from the outside.
Trim the seam allowance and cover the seam allowance with the binding and pin:
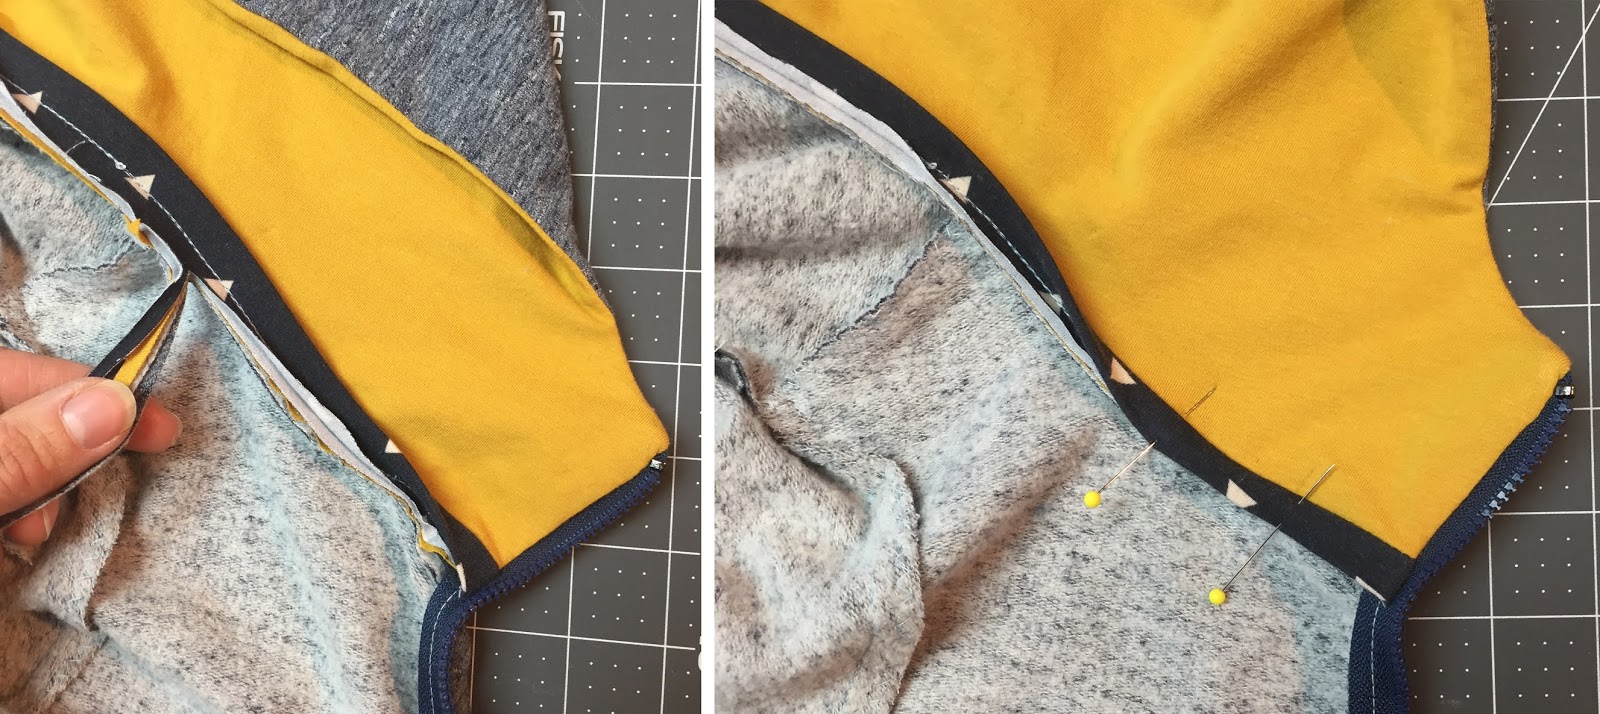
Topstitch along the folded edge. This topstitching will be visible inside and outside the garement:
CASING AND DRAWSTRING
CASING AND TOPSTITCHING
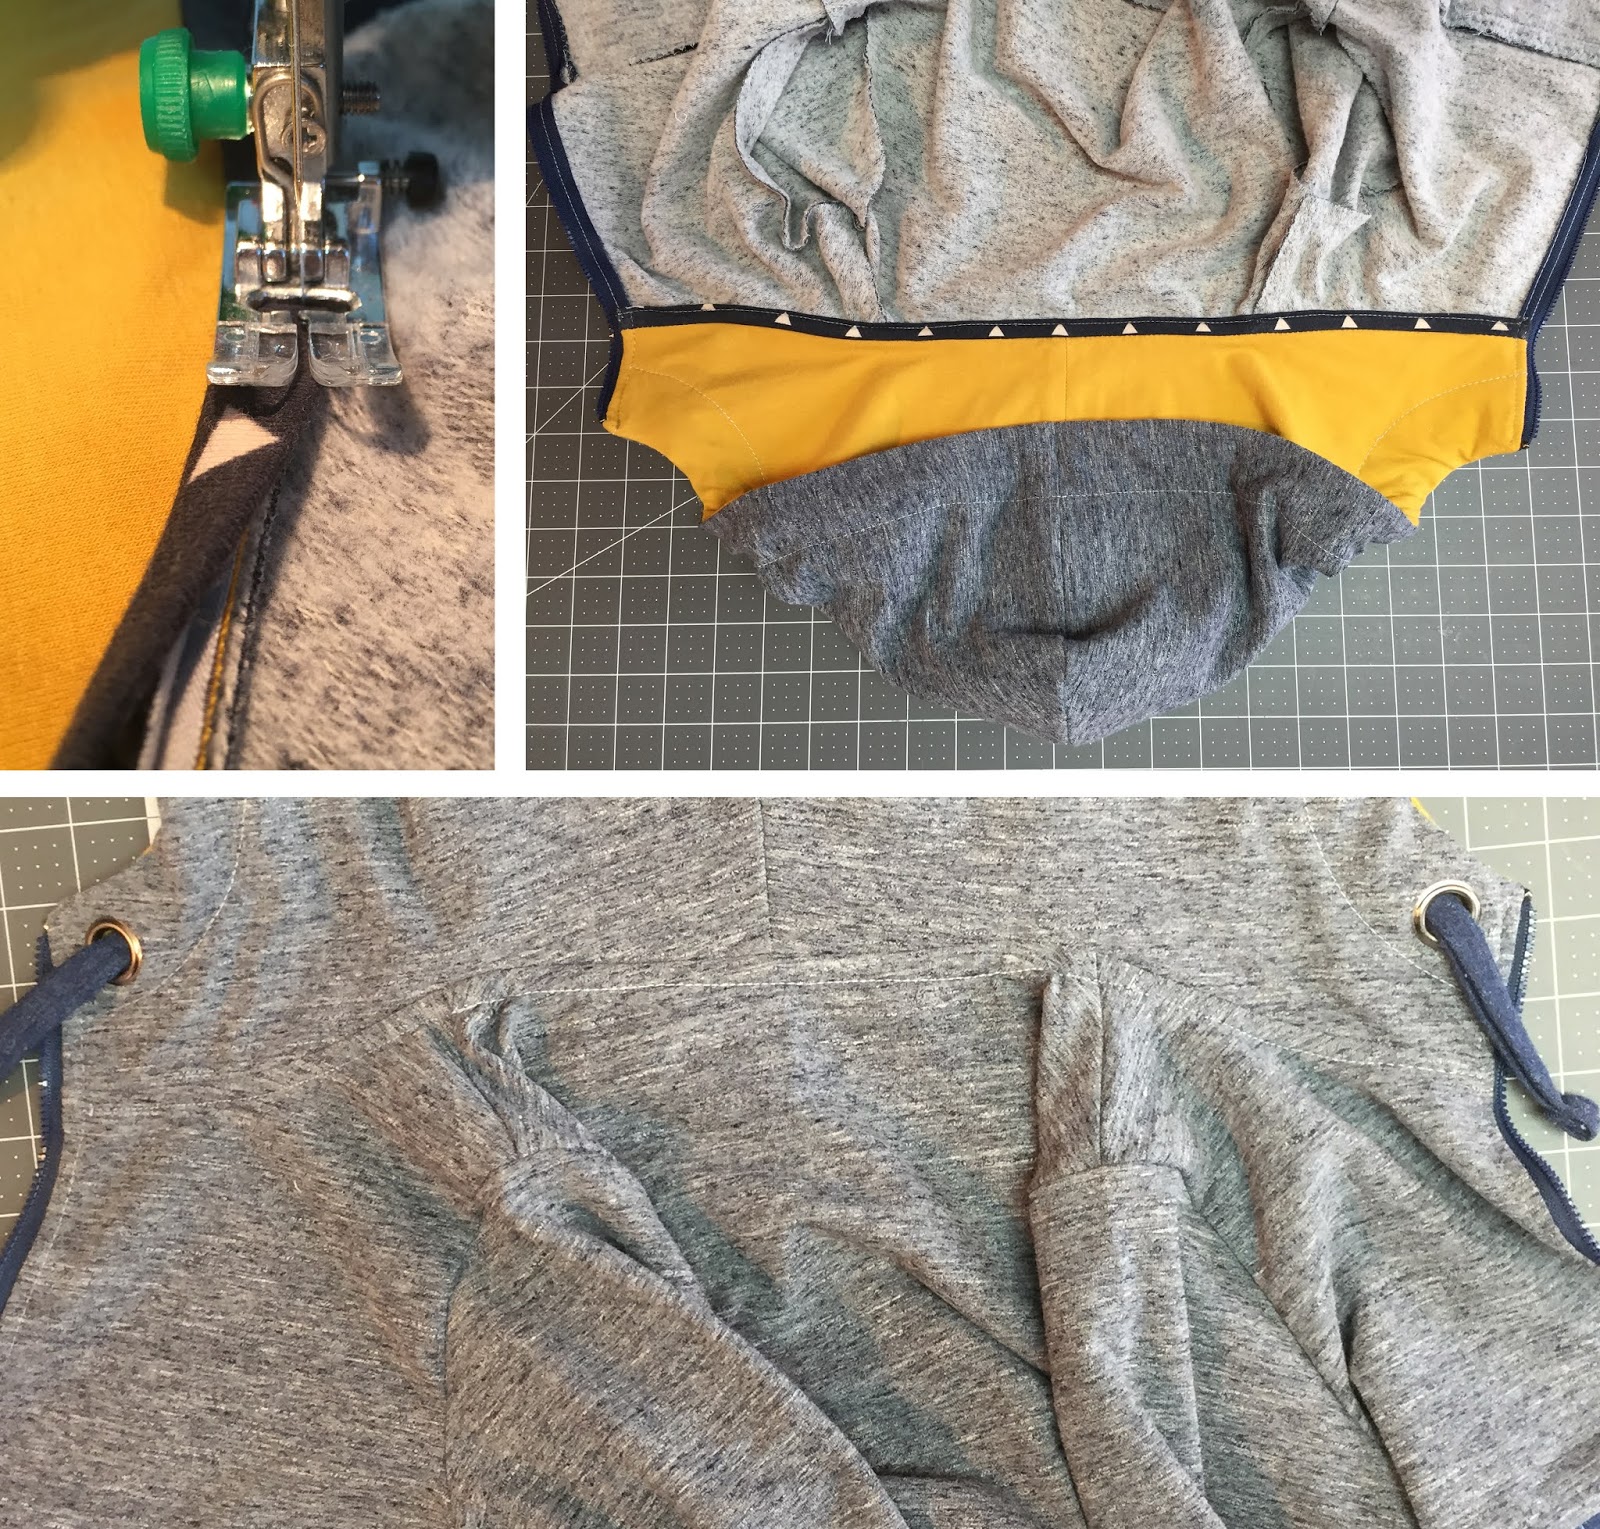
If they faded, redraw your casing marks. Use a ruler to keep your casing width equal all along, pin layers so they won't move and topstitch.
Then, topstich center front along the front zip:
MAKE YOUR OWN DRAWSTRING
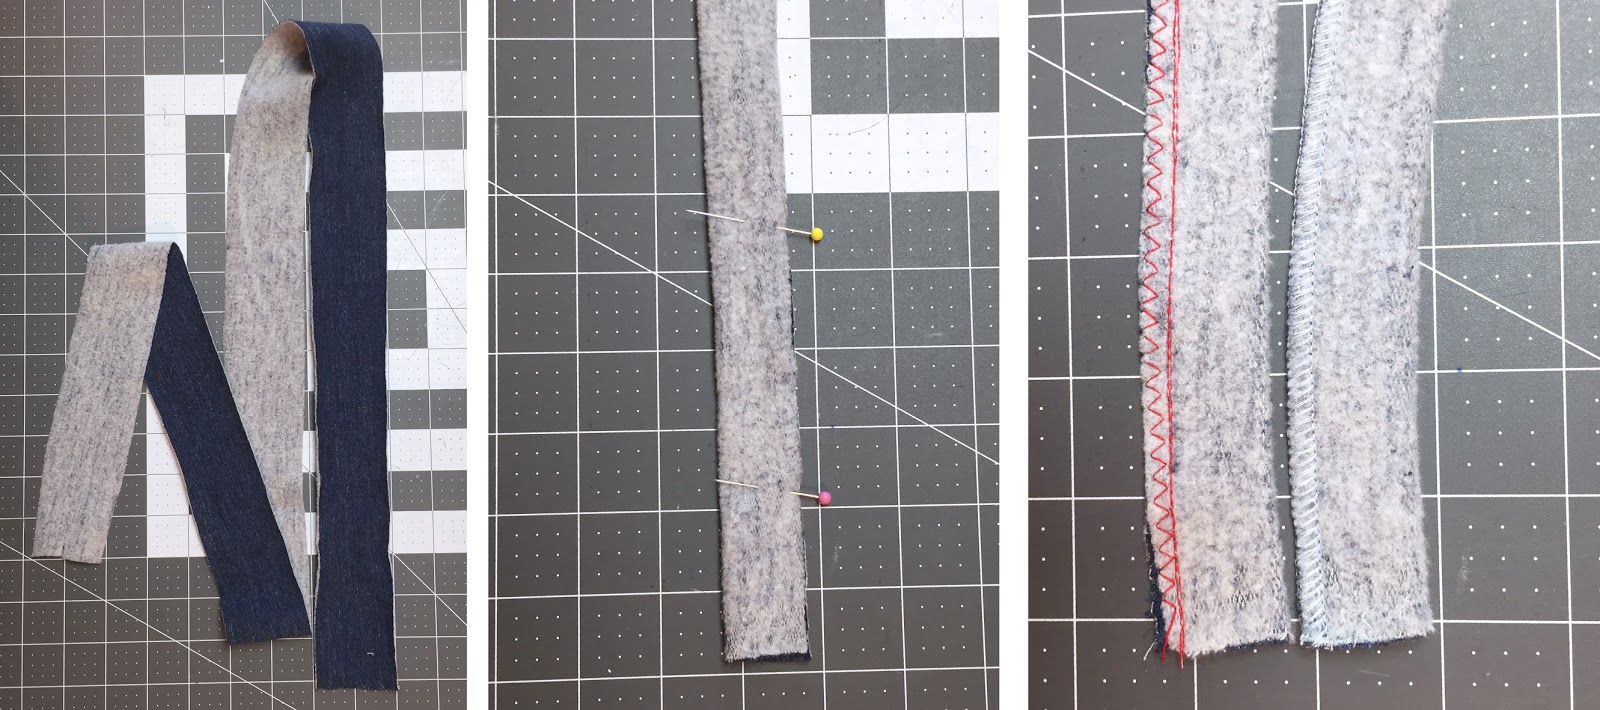
You do not have drawsting on hand or want to match colors perfectly? Use one of the fabrics you used for the hoodie to make custom drawstring. Simply cut a strip of fabric that is 5 cm (2'') wide, long enough so you have extra hanging at the ends of the casing (no more than 10 cm (4'') should be outside the casing if the hoodie is intended for a child).
Fold right sides together, sew with a serger or zigzag + long straight stitch, stretching gently as you sew to keep the stretch of the fabric:
Turn drawstring right side out using your favorite tool (hair pin, safety pin, loop turner or quick turn tool), feed through the casing.
Distribute evenly, stitch in the ditch (on the seam) at the top of the hood to secure the drawstring in place and finish the ends of your drawstring my turning folding on themselves and topstitching or installing caps:
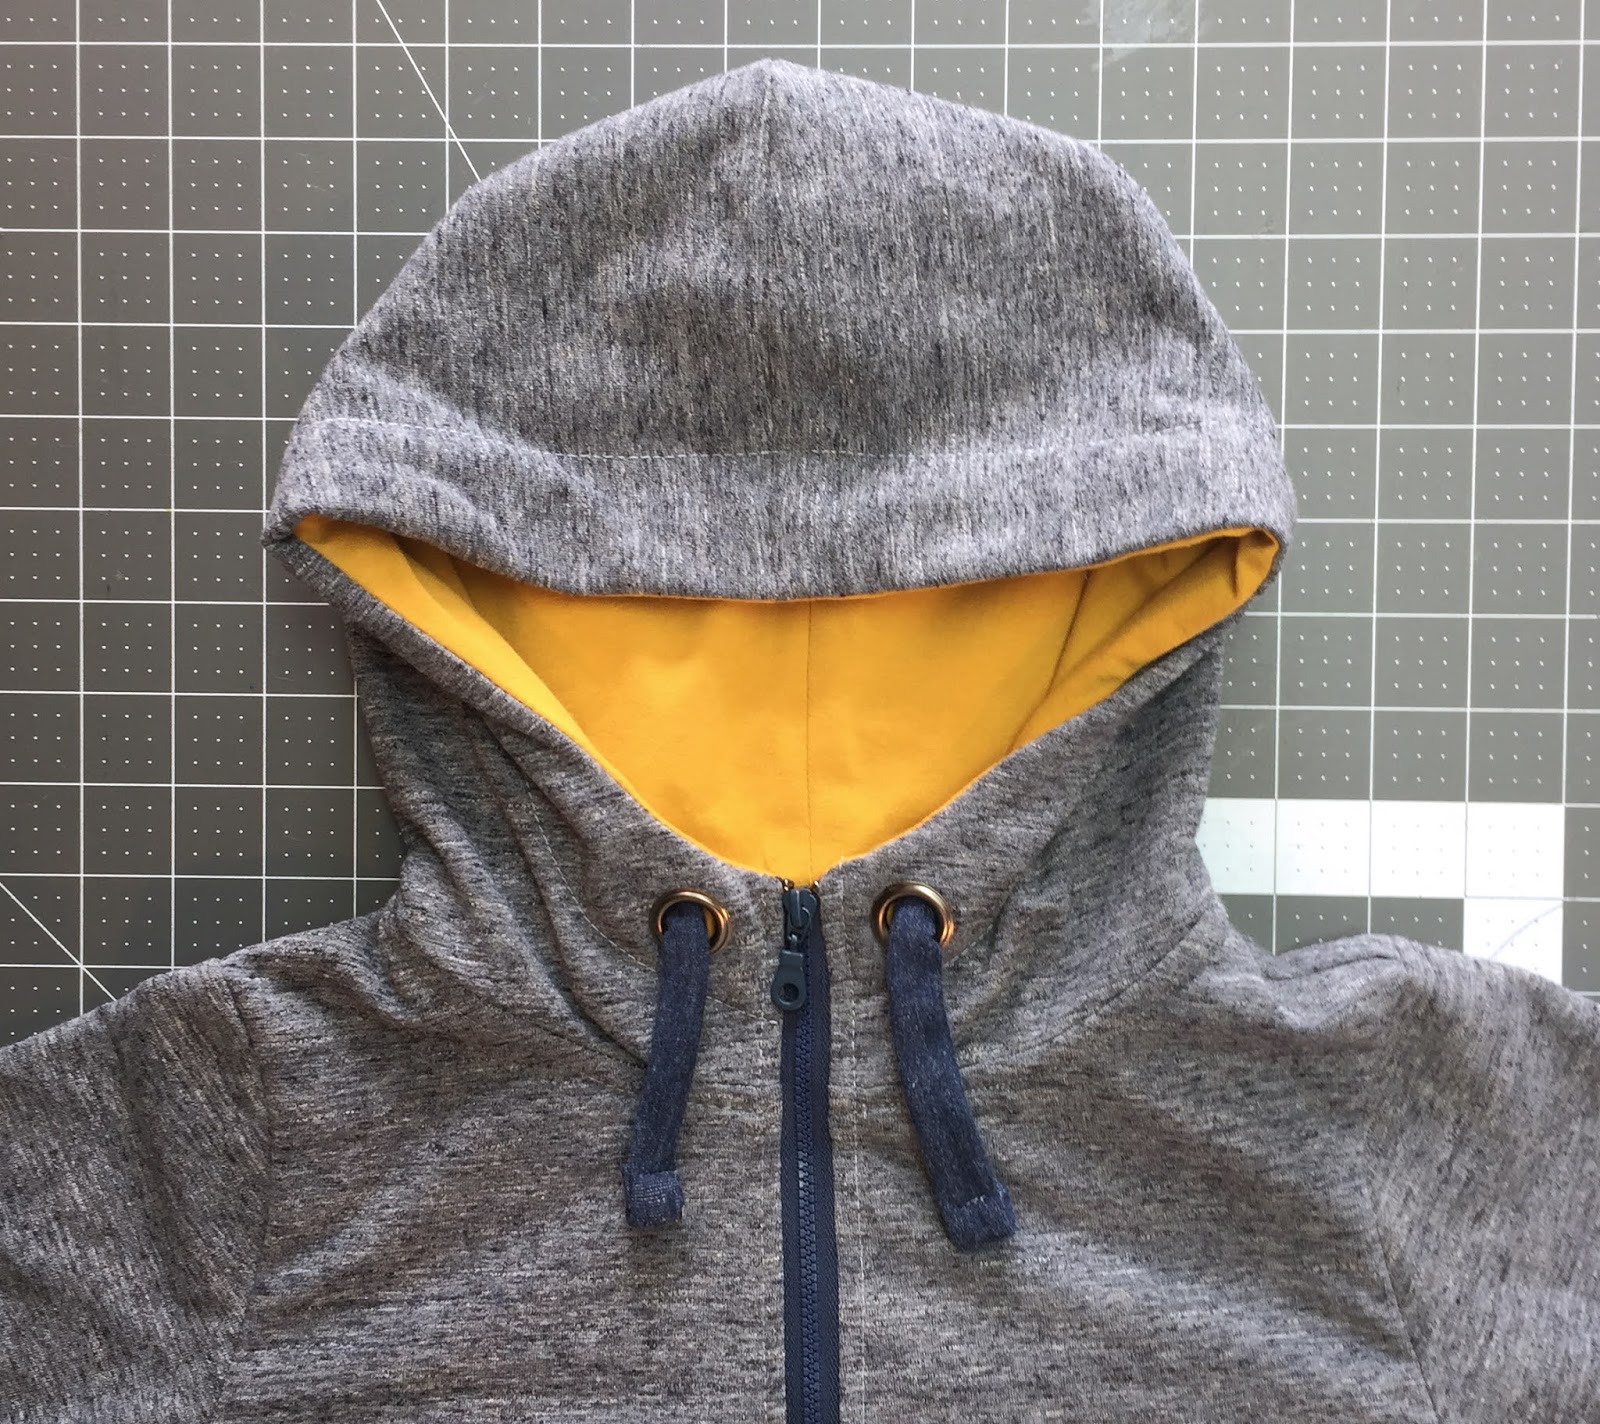
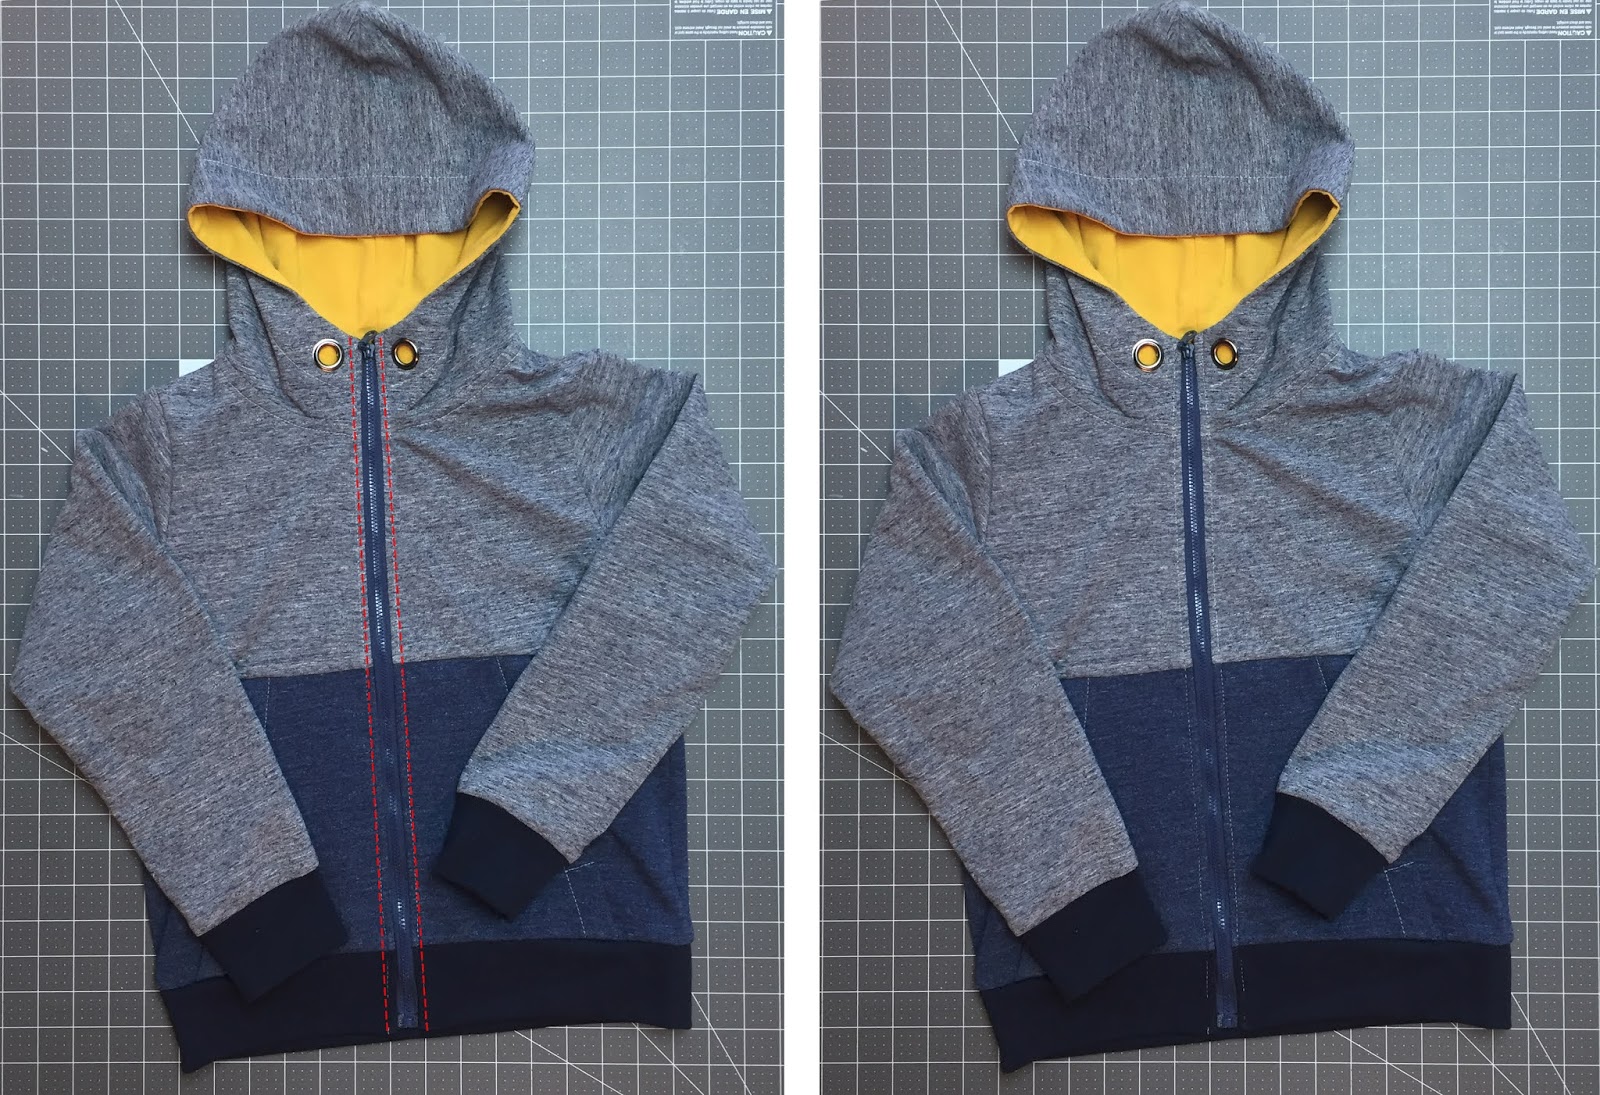
Here is the final result in sizes L(8) for kids:

We can't wait to see your versions of the FRÉDÉRIC in our photo gallery! Come and chat with us and Jalie fans in our Facebook group and check out photos on Instagram #jaliefrederic for inspiration.
Happy sewing!
← BOBBIE V-NECK TOP // Color block and construction FREDERIC HOODIE // TIPS AND TRICKS PART 1/2 →