 Skip to content


3350 Sewalong // Part 5 // Neckline + Back
You can now put the front and back aside while you work on the bust pieces.
Bust Lining
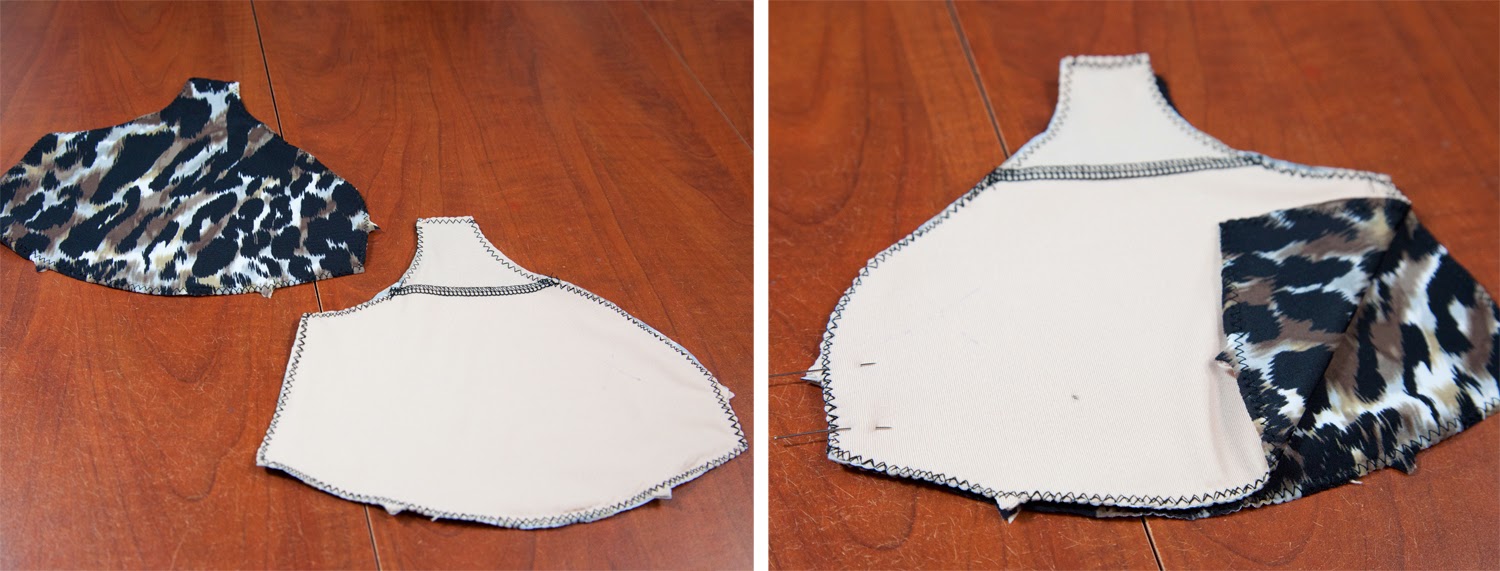
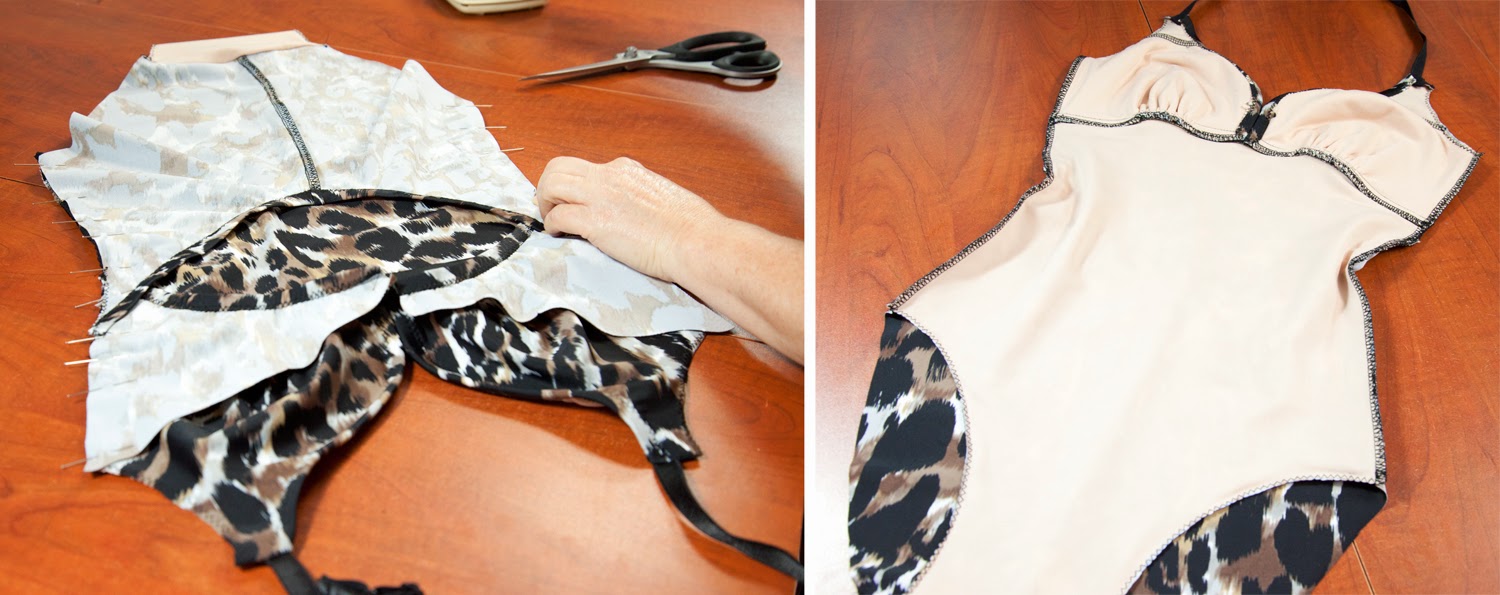
Cut two of the bust linings as shown below. This will create an opening for shapers/cups insertion. We like to finish the edge with the serger to give it a bit more body.

Pin the wrong side of the cut pieces on the right side of the full pieces and baste with a zigzag. Pin the lining pocket to the wrong side of the Bust piece (A) and baste all around. Make sure you line up all the notches.

Once both lining pockets are sewn to the but pieces, pin them together at center front.
Strap and neckline
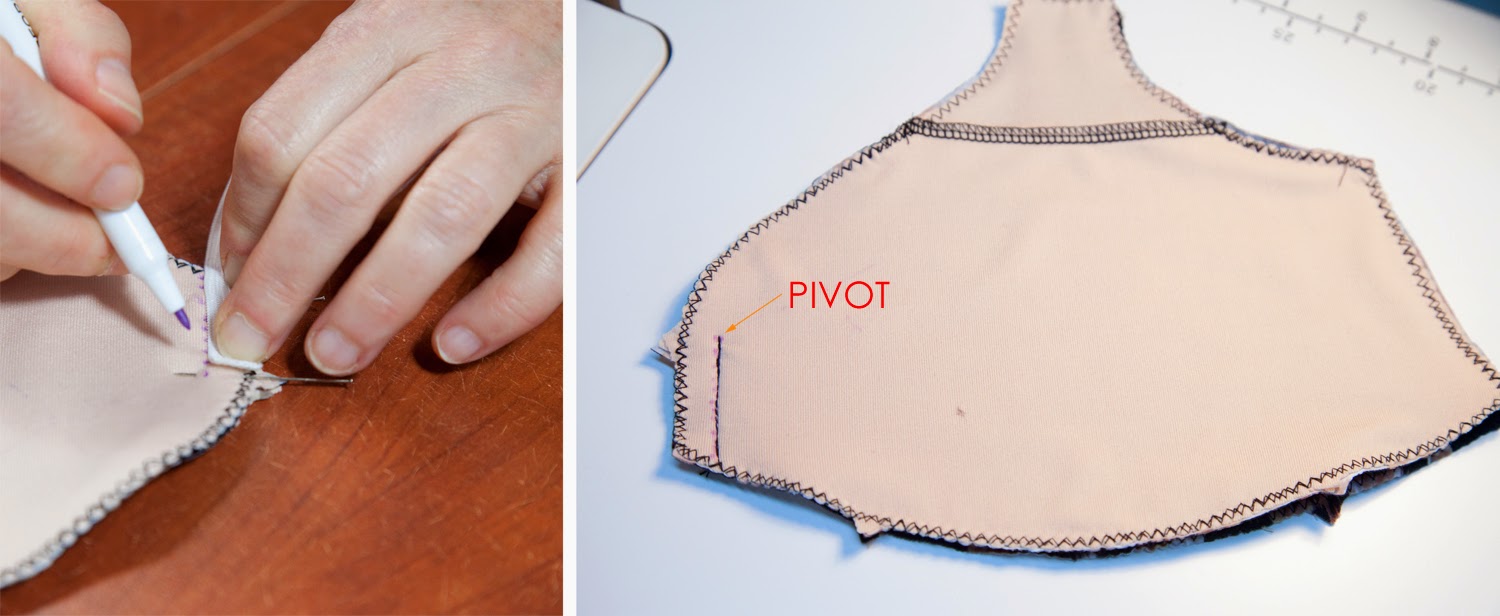
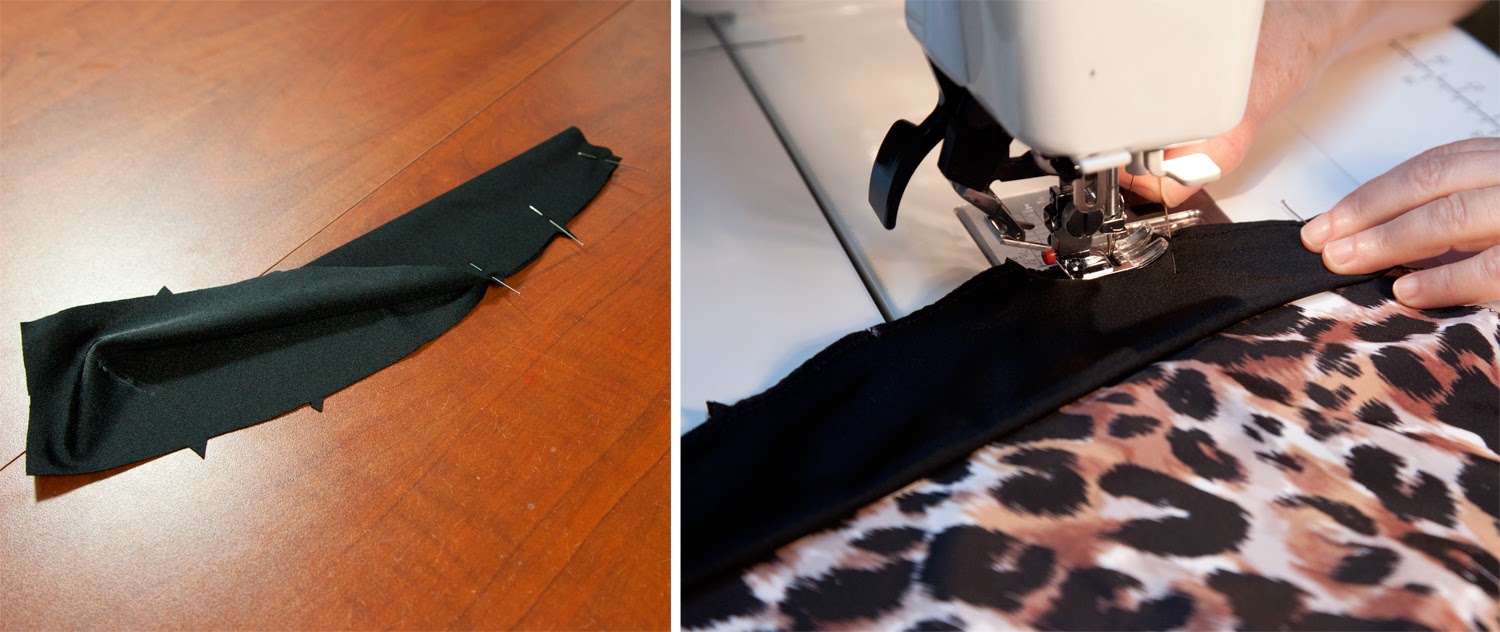
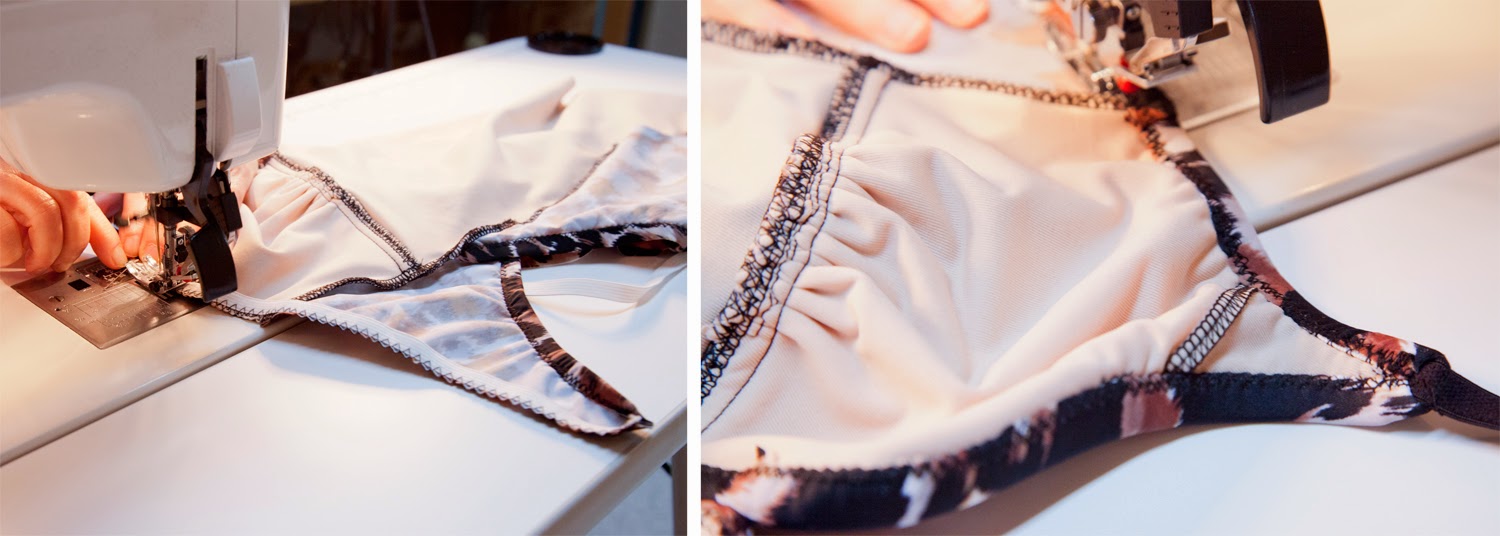
Using your elastic as a guide, trace a along center front, from the notch to the bottom edge. Stitch on the line, starting at the bottom. When you reach the end of the line (notch), keep your needle down, pivot, stitch downwards. This will make the end of your stitch much stronger (you want the bust pieces to stay together!).
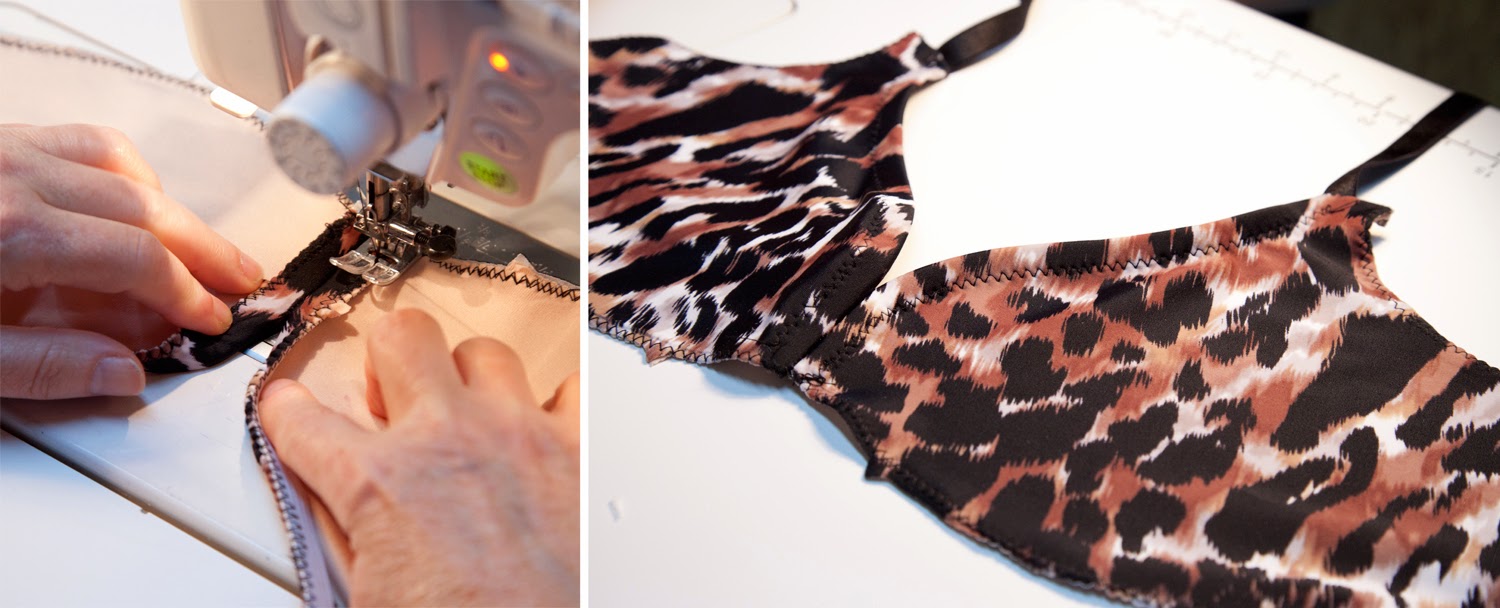
Pin the shiny (finished) side of your strap to the right side of the bust piece. Stitch across (a few times, you don't want them to fly off!) and flip them up like this so the seam allowance is folded against the lining:

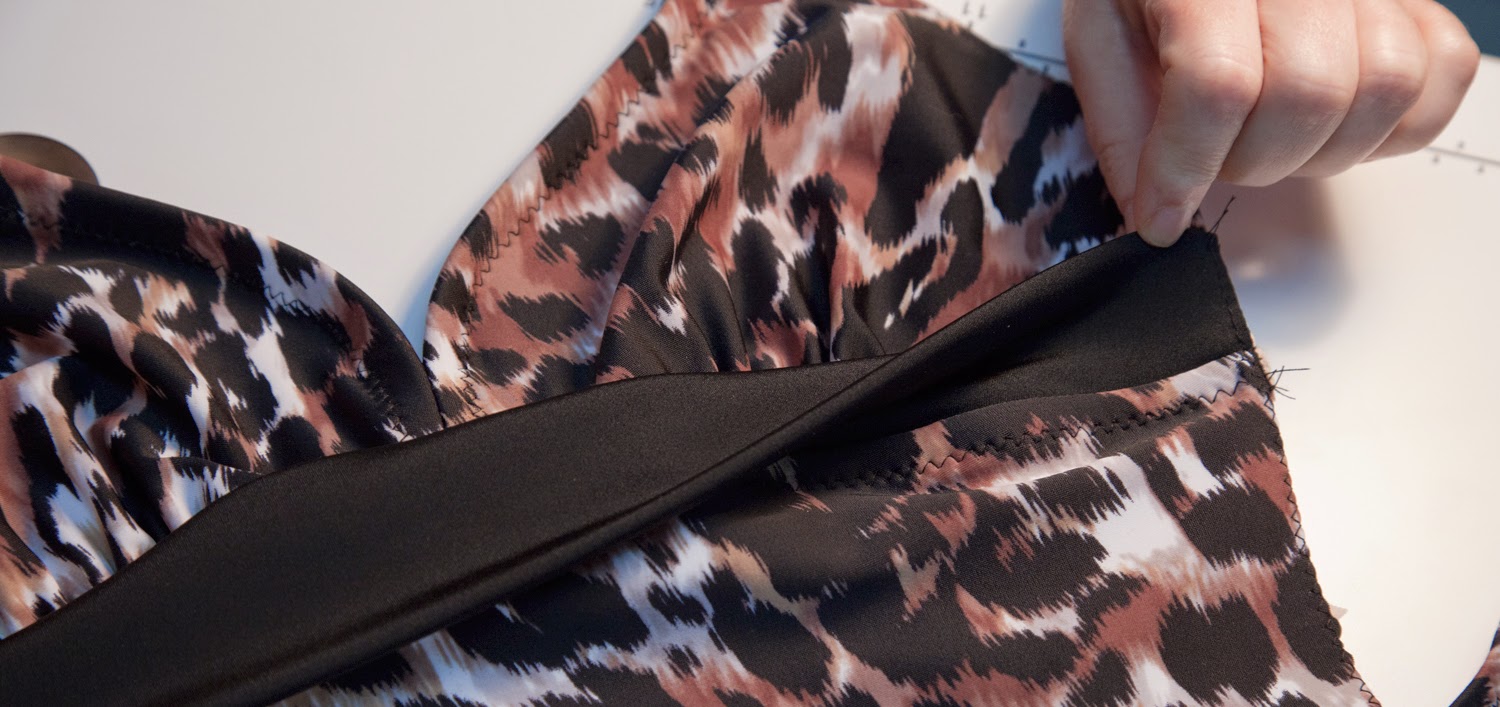
Pin the neckline elastic under the strap seam allowance and to the wrong side of center front seam allowance (be careful to pin only one bust piece, not both). Baste along the edge of the elastic ("zig" on the elastic, "zag" in the air).

Baste the elastic to the other bust piece.

Fold the elastic to the wrong side and topstitch. Make sure you fold the elastic over the strap so the strap edge is as close as possible to the crease (not far away from the folded edge).
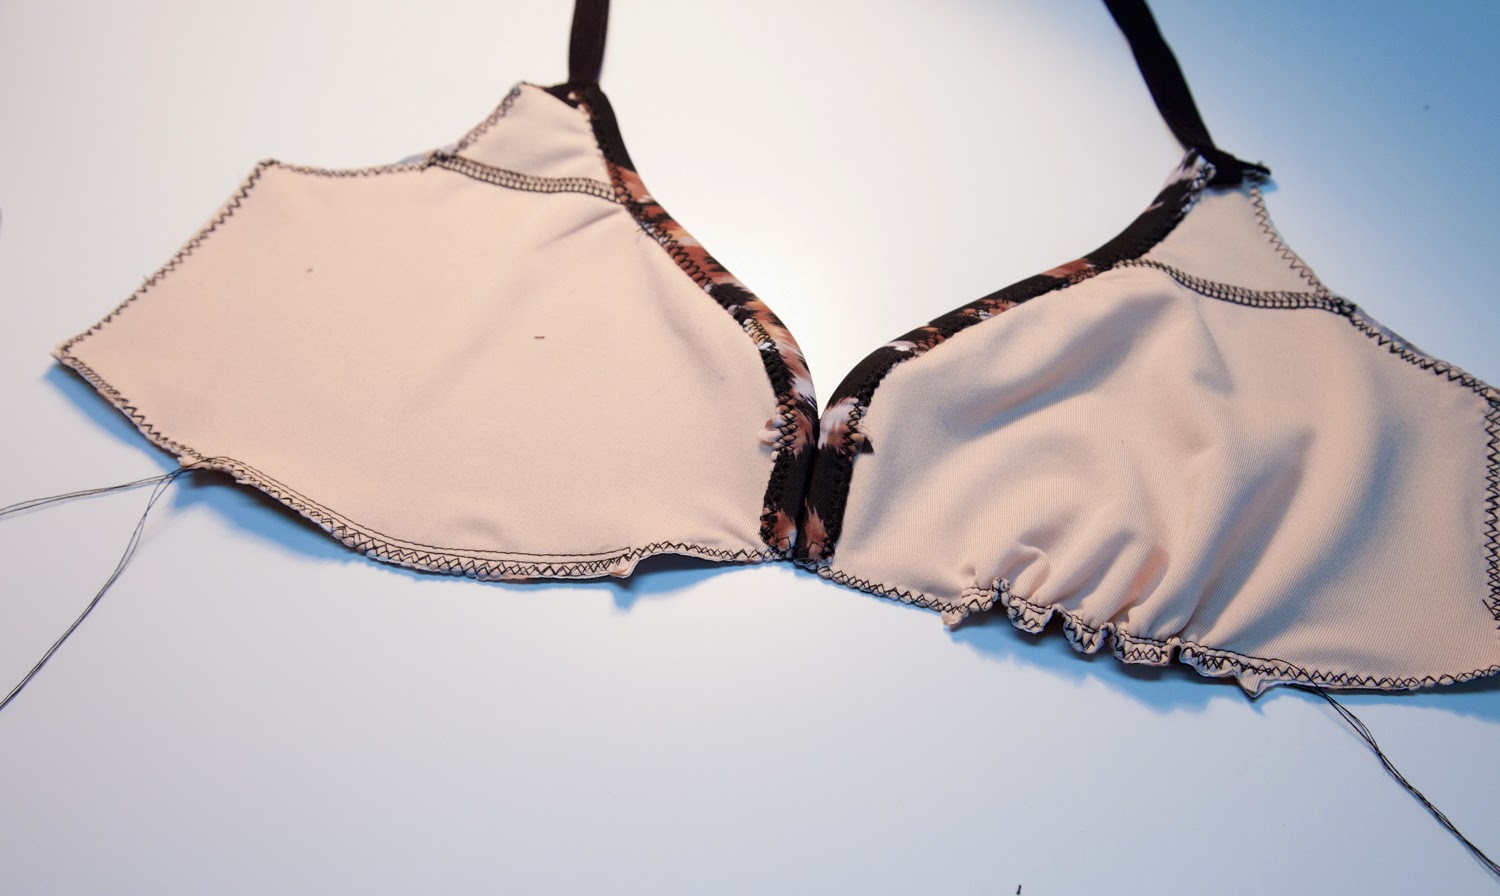
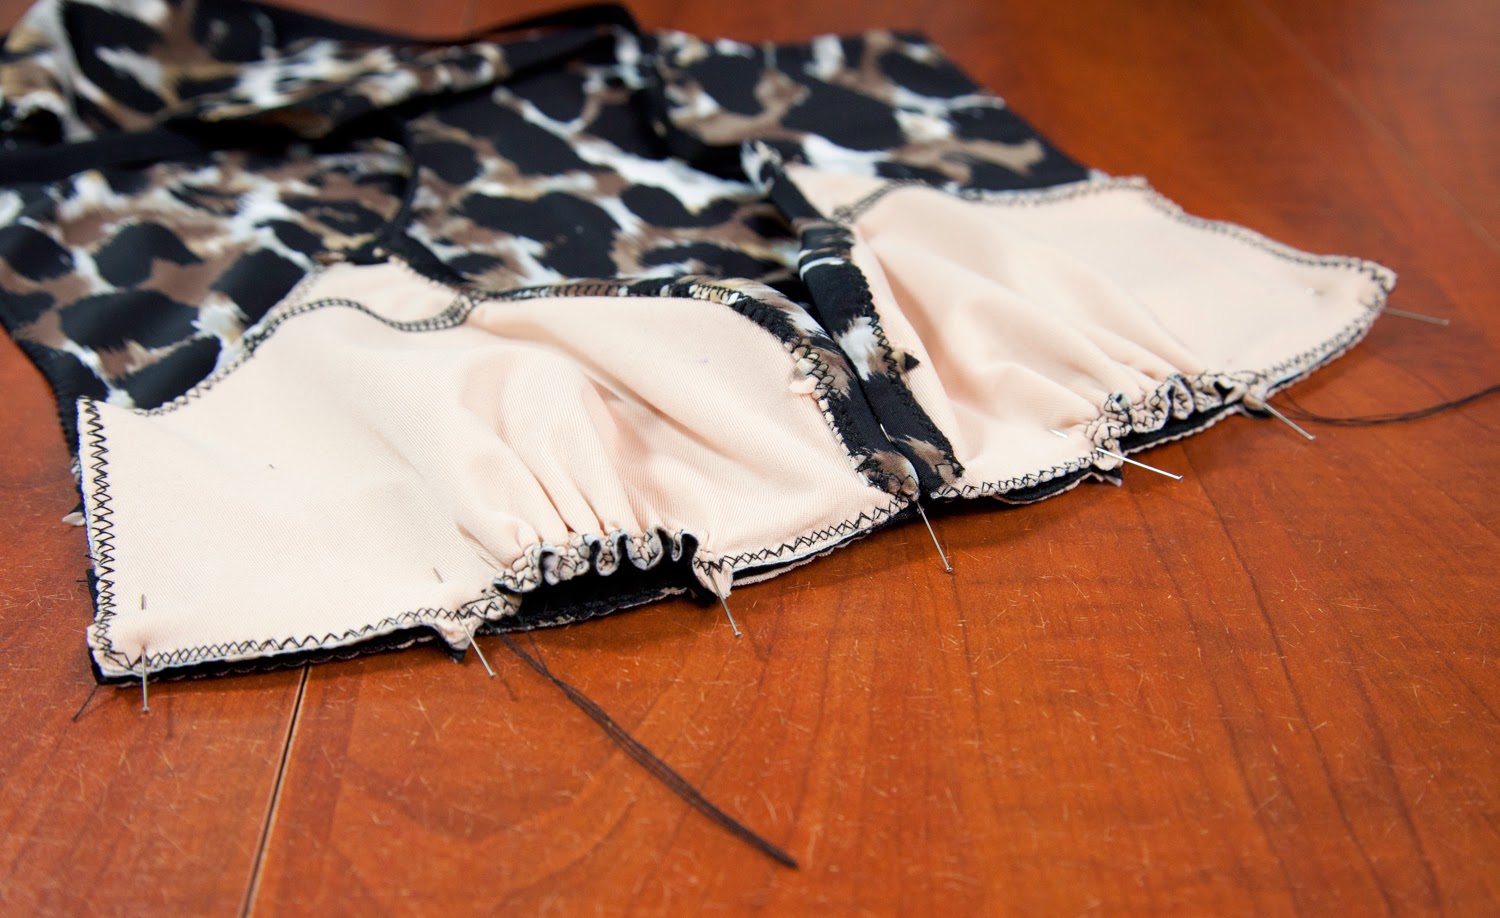
Sew a "square-U-shaped" gathering stitch at the bottom of the bust pieces, between the notches.
The "square U technique:
- Pull some thread out (so it is easier to pull later)
- Start at one notch, sew long straight stitches up to the second notch very close to the edge.
- Needle down
- Pivot and sew two stitches upwards
- Pivot again and go back towards the first notch, sewing about 1/8" away from the stitch
With this technique way the gathers will remain very tight at the end of the stitch and you will have more control than if the two rows were open at both ends. Pull the bobbin thread to gather (we will adjust it later).
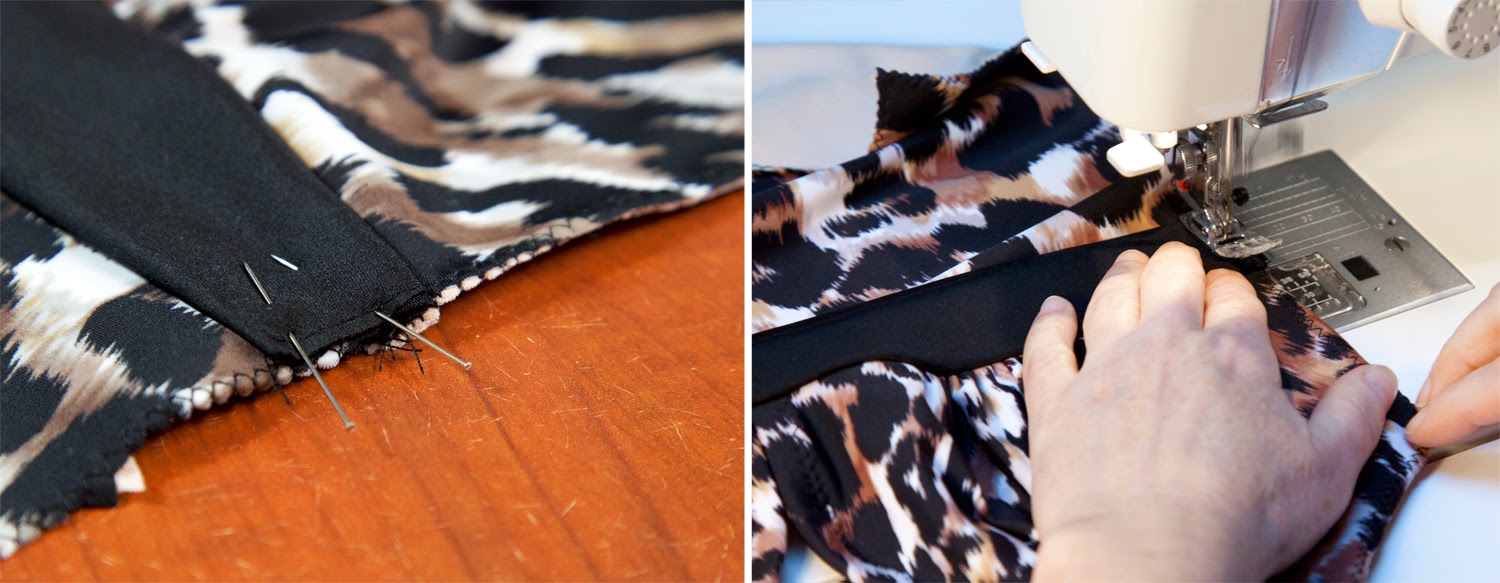
Contrast band
Fold the band wrong sides together and baste the raw edges together. Pin the basted band to the top of the front, matching centers and notches.
Now you are ready to sew the bust pieces to the front.

Pin the notches together and adjust your gathers evenly between the notches. Pull the bobbin threads until the gathers fit the band like this:
Sew the underbust seam 1 cm (3/8") from edge, from one side seam to the other. We like to finish this seam on the serger afterwards.

Bring the seam allowance towards the front and topstitch.
Put the contrast band back into place, pin and baste at side seam.
Pin front to back at side seams, matching all the notches, and stitch.
FINISHING UP THE OPEN BACK
Pin the armhole/back elastic to the wrong side of the fabric, under the strap seam allowance and at center back.

Sew you first zigzag, fold the elastic to the wrong side and sew another zigzag. Notice how the strap is covered by the elastic at the tip of the bust piece.
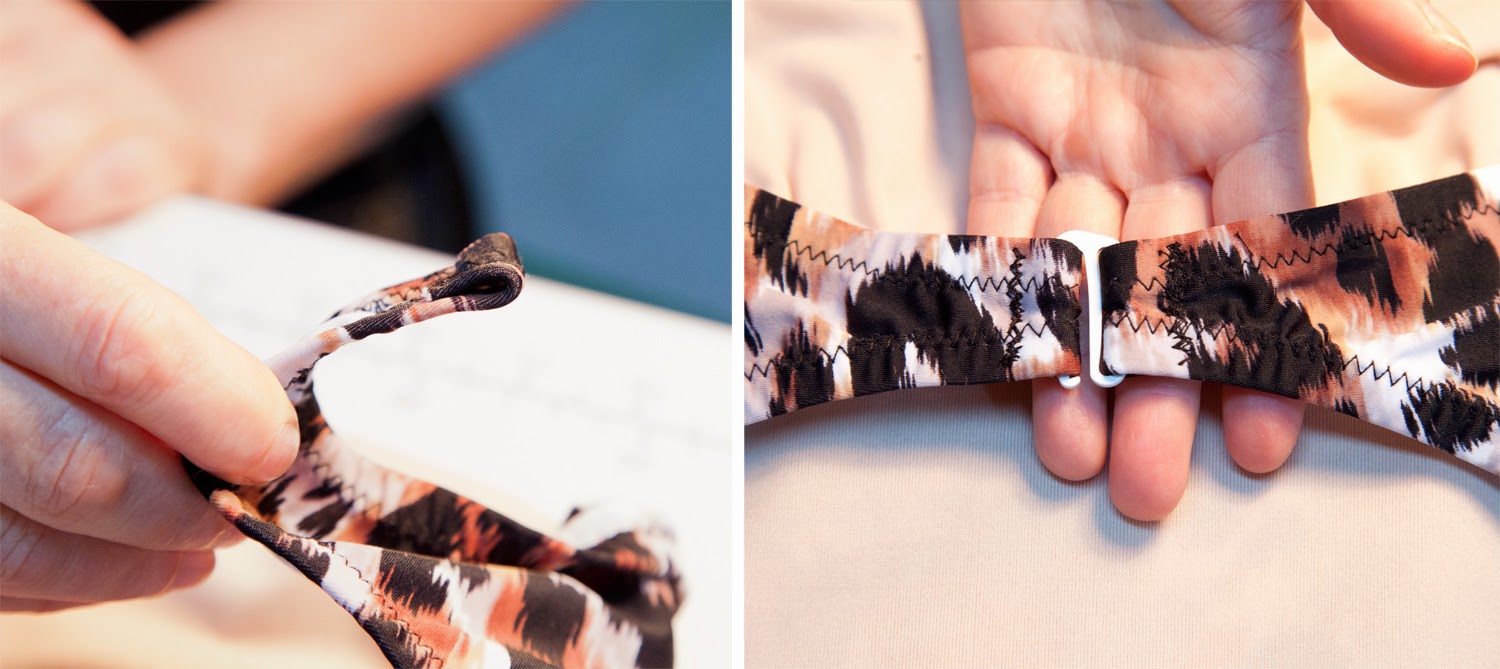
Fold center back (RIGHT) to the wrong side by 1 cm and sew back and forth to create a loop. Insert the LEFT end in the hook and stitch.
Locate the strap placement mark / clip on the upper back seam allowance, pin the end of the strap (adjust) and sew on the elastic. Go back and forth a few times to make sure the strap won't go anywhere :)

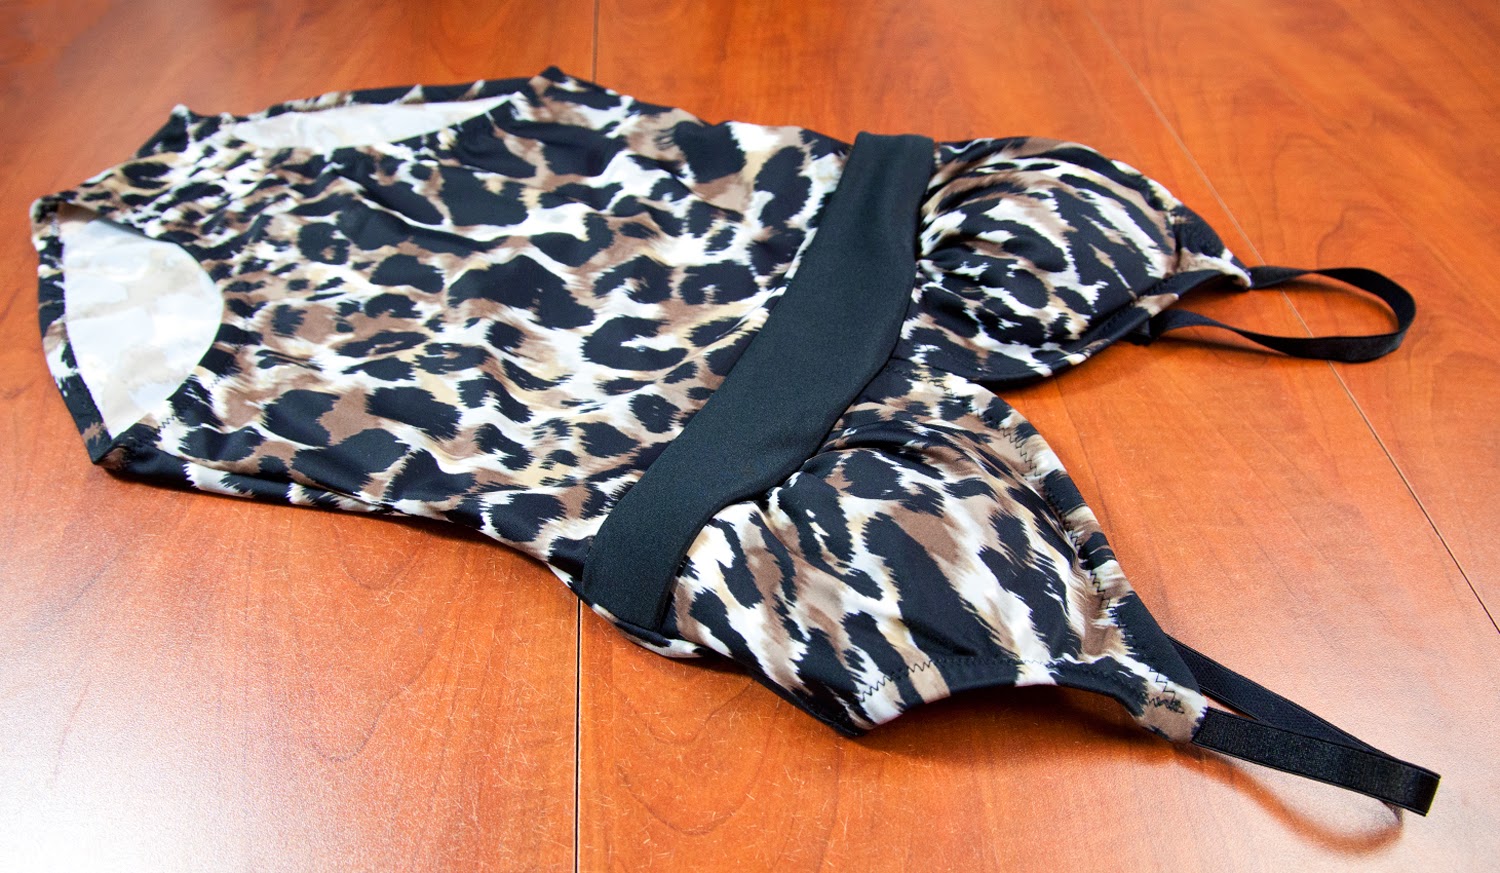
Insert swim shapers/cups through the bust lining openings

Apply the elastics to leg openings (see link below) and head to the beach to show off your new swimsuit!
← 3350 Sewalong // Part 4 // The Open Back 3350 Sewalong // Part 6 // Leg Opening →